pfSense Setup
Configure WireGuard
This section shows you how to set up your WireGuard tunnel, peer, and interface for WiZone.
Important : Get your configuration from the WiZone Portal first.
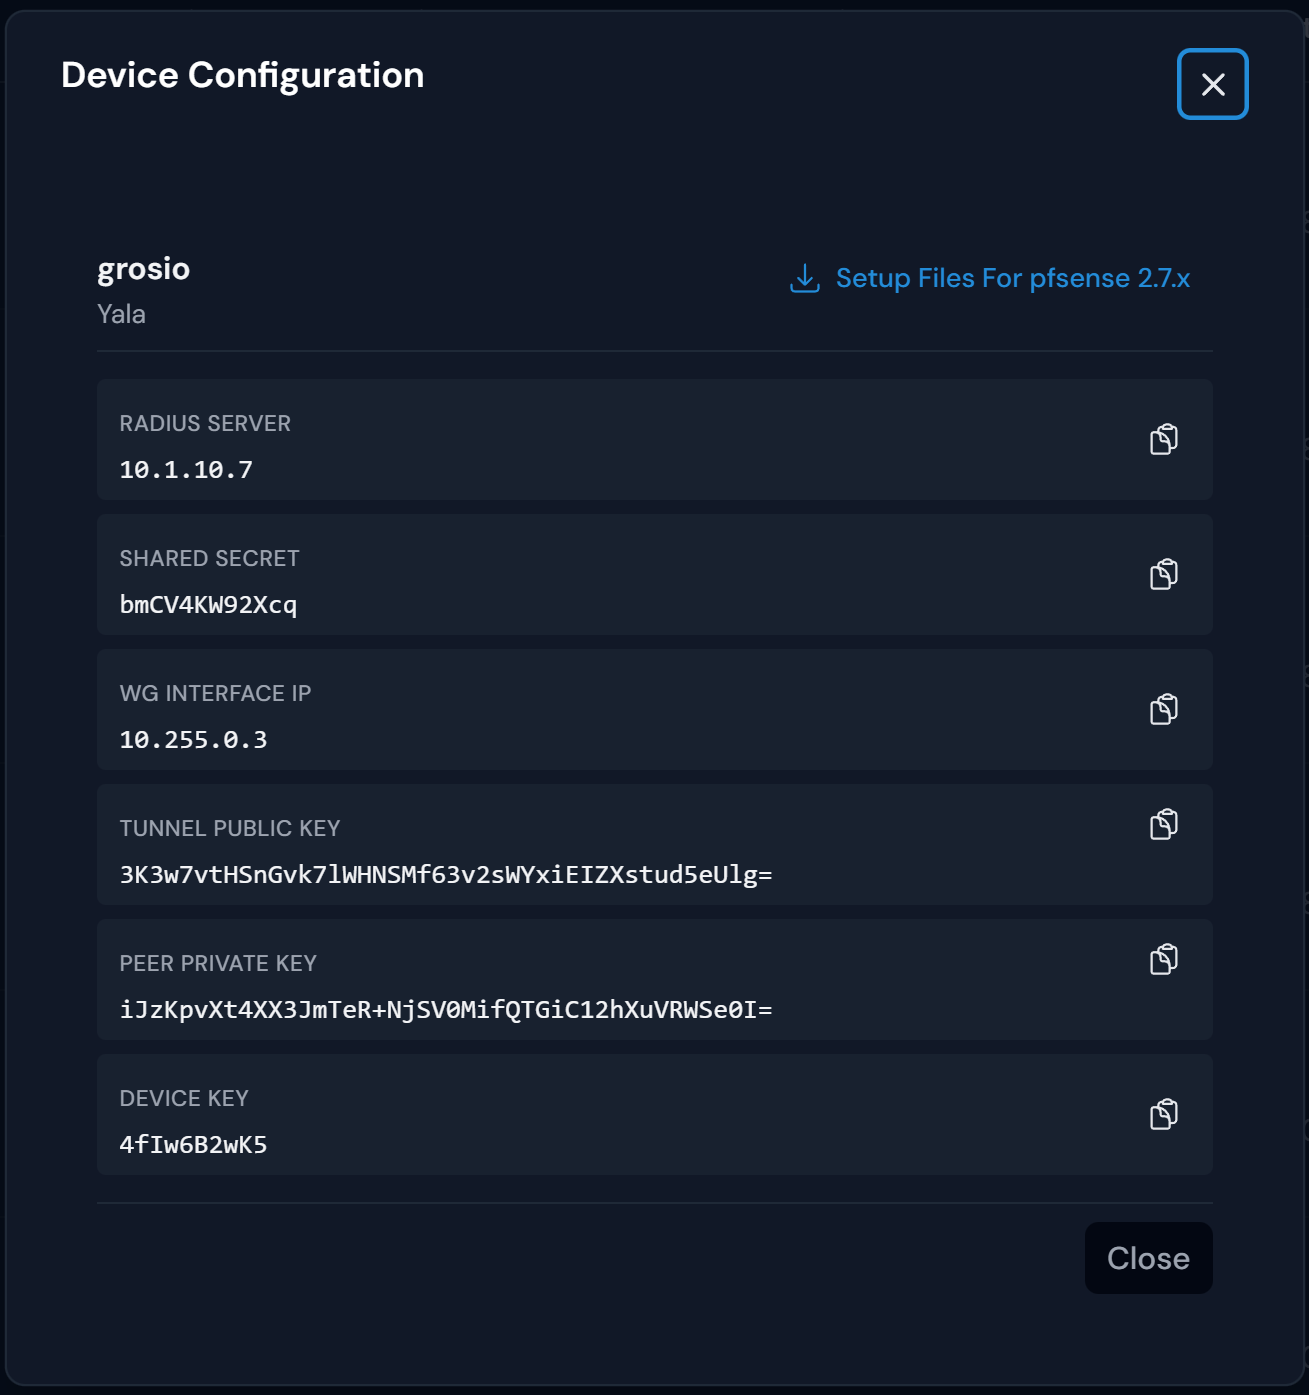
Before you continue, make sure you have downloaded or copied the device-specific configuration values from the WiZone Portal.
Before you continue, make sure you have downloaded or copied the device-specific configuration values from the WiZone Portal.
Get Your Device Settings
- Log in to the WiZone Portal
- Go to the Devices page
- Select your device (e.g., "grosio")
- Click on the device to open the Device Configuration dialog
- Copy the configuration values as needed for each setup step
Step 1 - WireGuard Tunnel Configuration
- Go to VPN → WireGuard → Tunnels → Add Tunnel.
- Tick the Enable Tunnel checkbox.
- Enter the following details using values from your WiZone Portal device configuration:
| Field | Where to Find Value | Description |
|---|---|---|
| Description | (choose any name) | Name to identify your WireGuard tunnel (e.g., WG_WiZone) |
| Listen Port | (default: 51820) | Port used for WireGuard communication |
| Interface Keys | PEER PRIVATE KEY | (Copy from WiZone Portal Device Configuration Do not click Generate ) |
- Scroll down to Interface Configuration (tun_wg1).
- Enter the following:
| Field | Where to Find Value | Description |
|---|---|---|
| Interface Address | WG INTERFACE IP / 24 | (Copy IP from Portal and select subnet 24) |
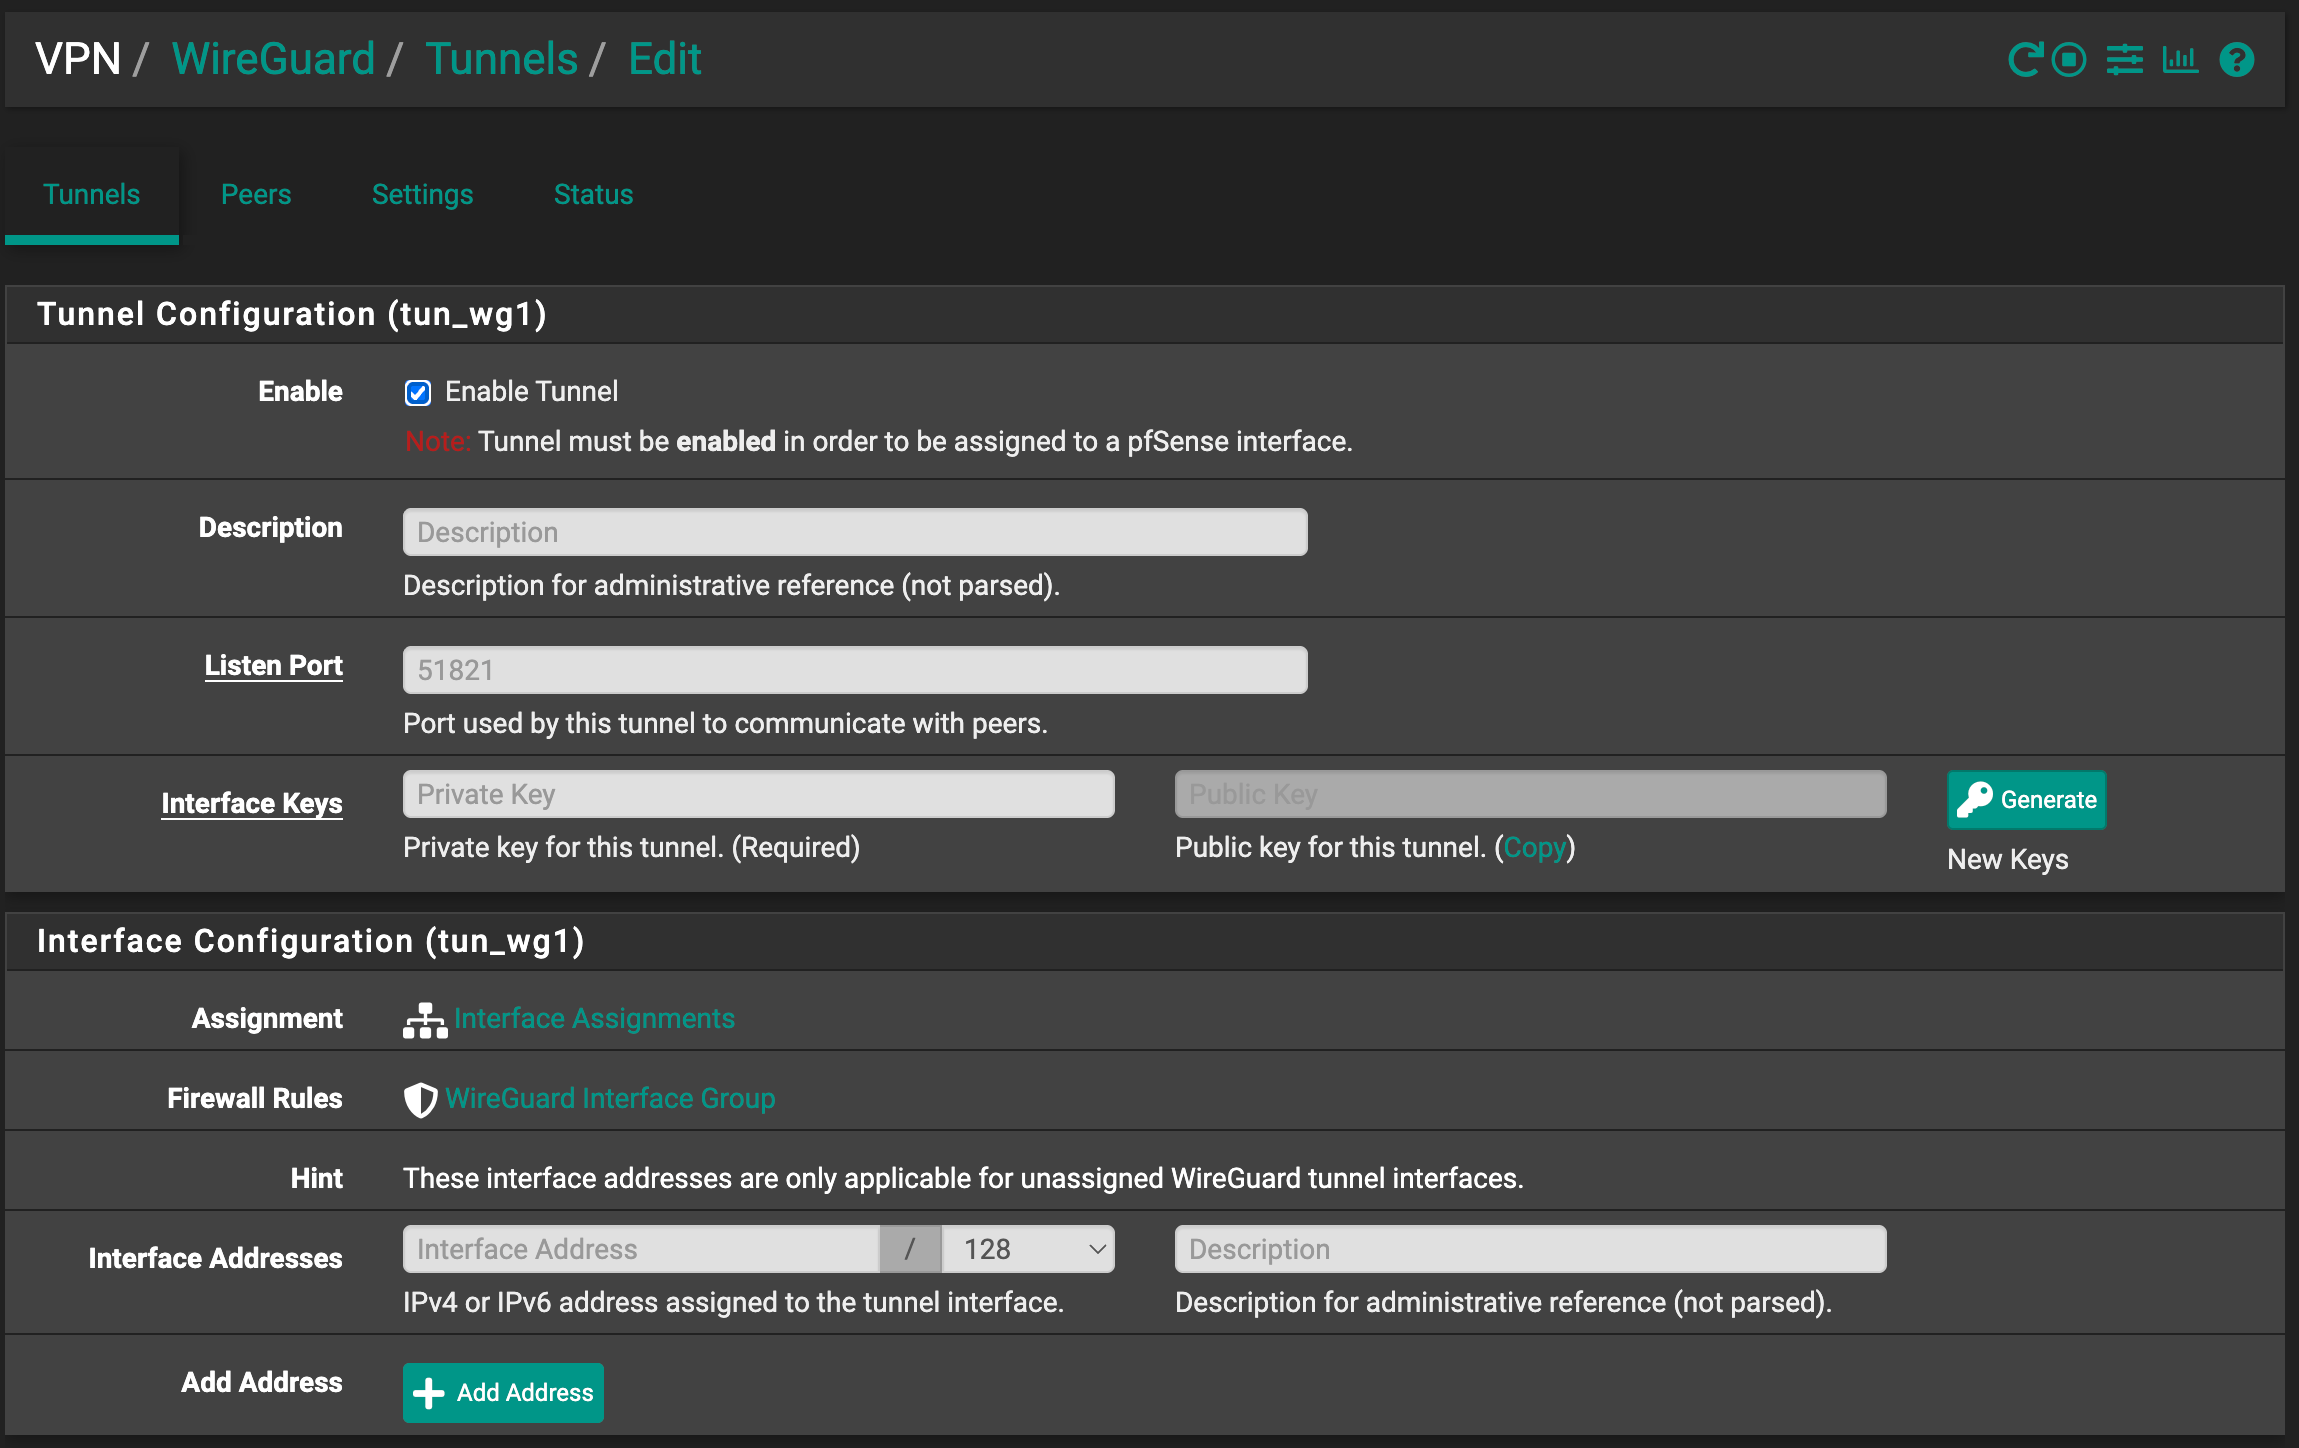
- click Save Tunnel.
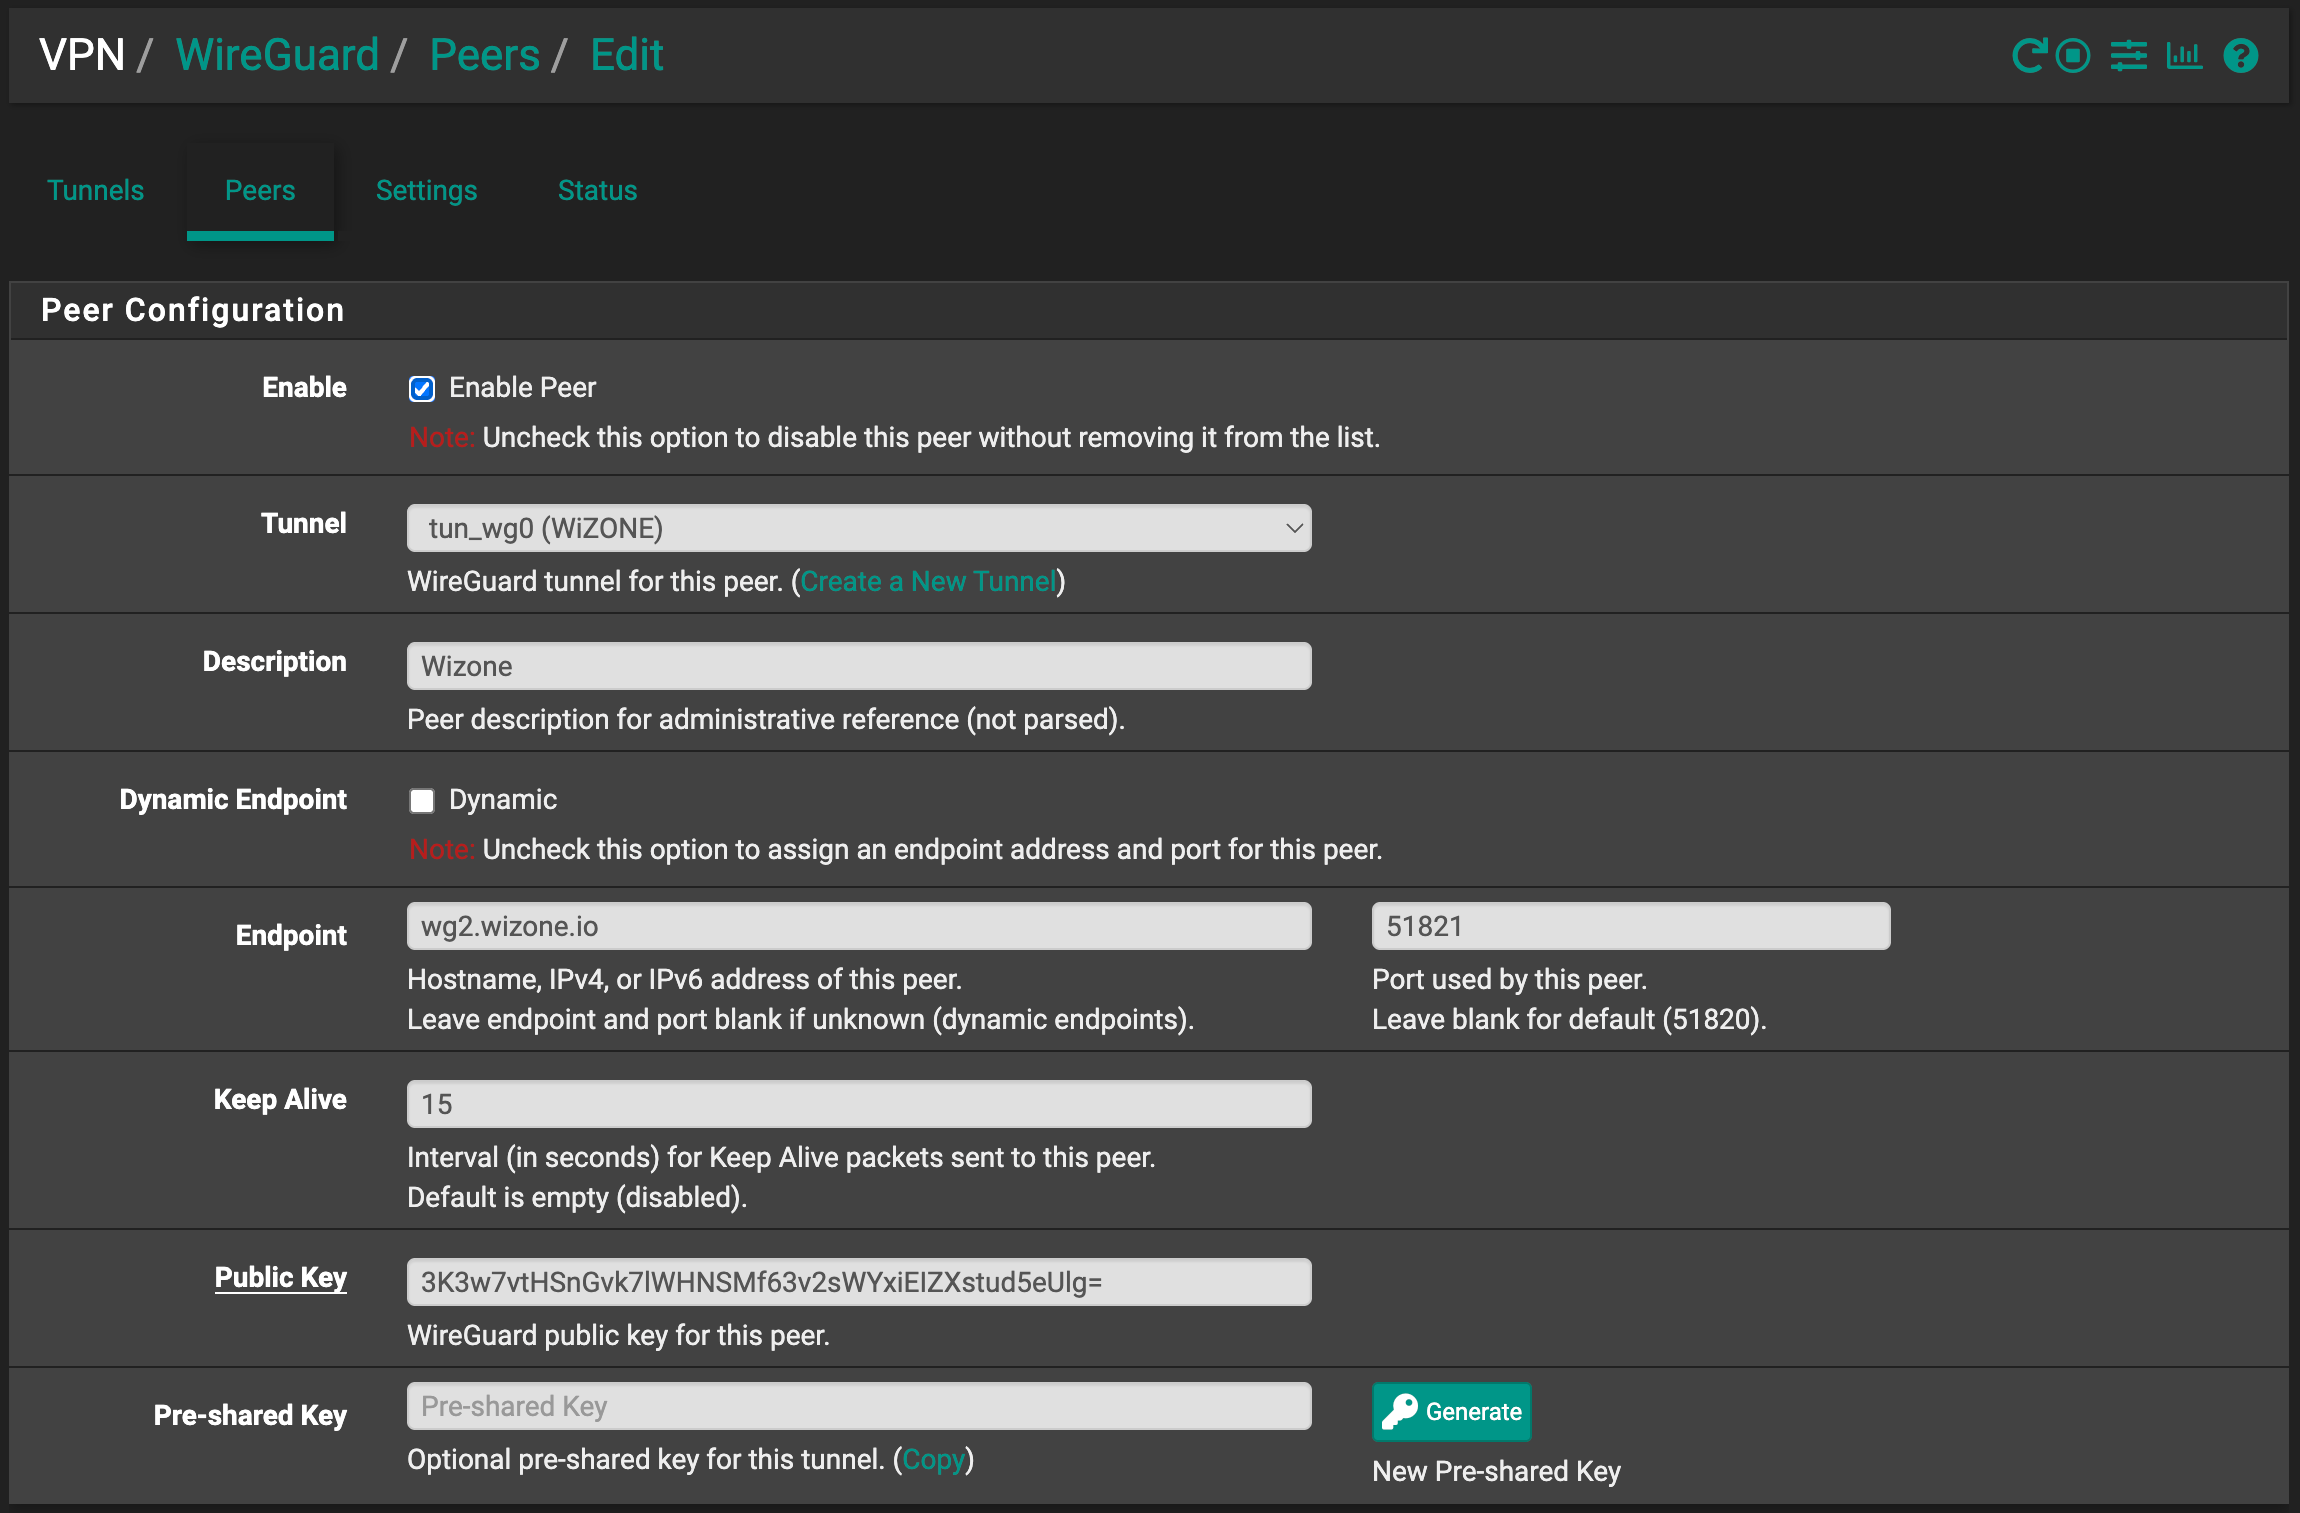
Step 2 - Add a Peer
- Go to VPN → WireGuard → Peers → Add Peer.
- Configure using values from your WiZone Portal device configuration:
| Field | Where to Find Value | Description |
|---|---|---|
| Enable Peer | (check the box) | Ensure the peer is active |
| Tunnel | (select your tunnel) | Select the tunnel created earlier (e.g., tun_wg0 (WG_WiZone)) |
| Dynamic Endpoint | (untick this option) | Disable this so you can manually enter the Endpoint and Port values. |
| Endpoint | wg2.wizone.io | WiZone remote hostname |
| Port | (see secure captive portal) | Port for this peer (must match the port in the secure captive portal) |
| Keep Alive | 15 | Optional – maintain persistent connection |
| Public Key | TUNNEL PUBLIC KEY | (Copy from WiZone Portal Device onfiguration) |
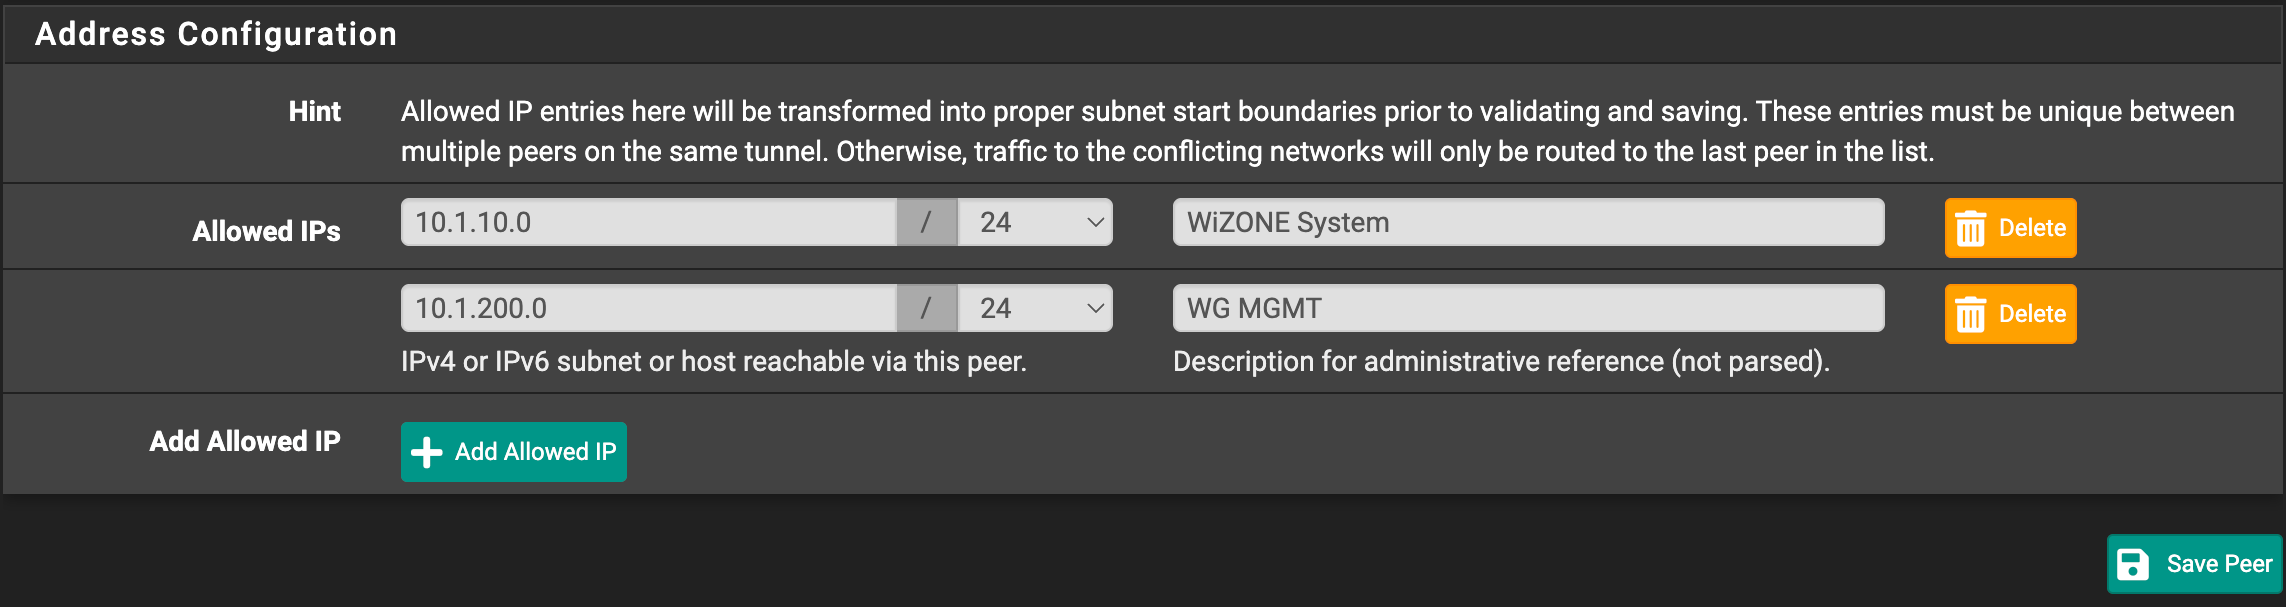
Step 3 - Add IP Allow List
- Under the same Peer Configuration, scroll to Address Configuration.
- Add the following network under Allowed IPs:
| Row | Allowed IPs | Description | comment |
|---|---|---|---|
| 1 | 10.1.10.0/24 | WiZone System | Used for core WiZone services such as API, authentication, device sync, and other essential system functions. |
| 2 | 10.1.200.0/24 | WiGuard Management | Used for management traffic, device status updates, control-plane communication, and internal monitoring (Additional support access for WiZone support team.) |
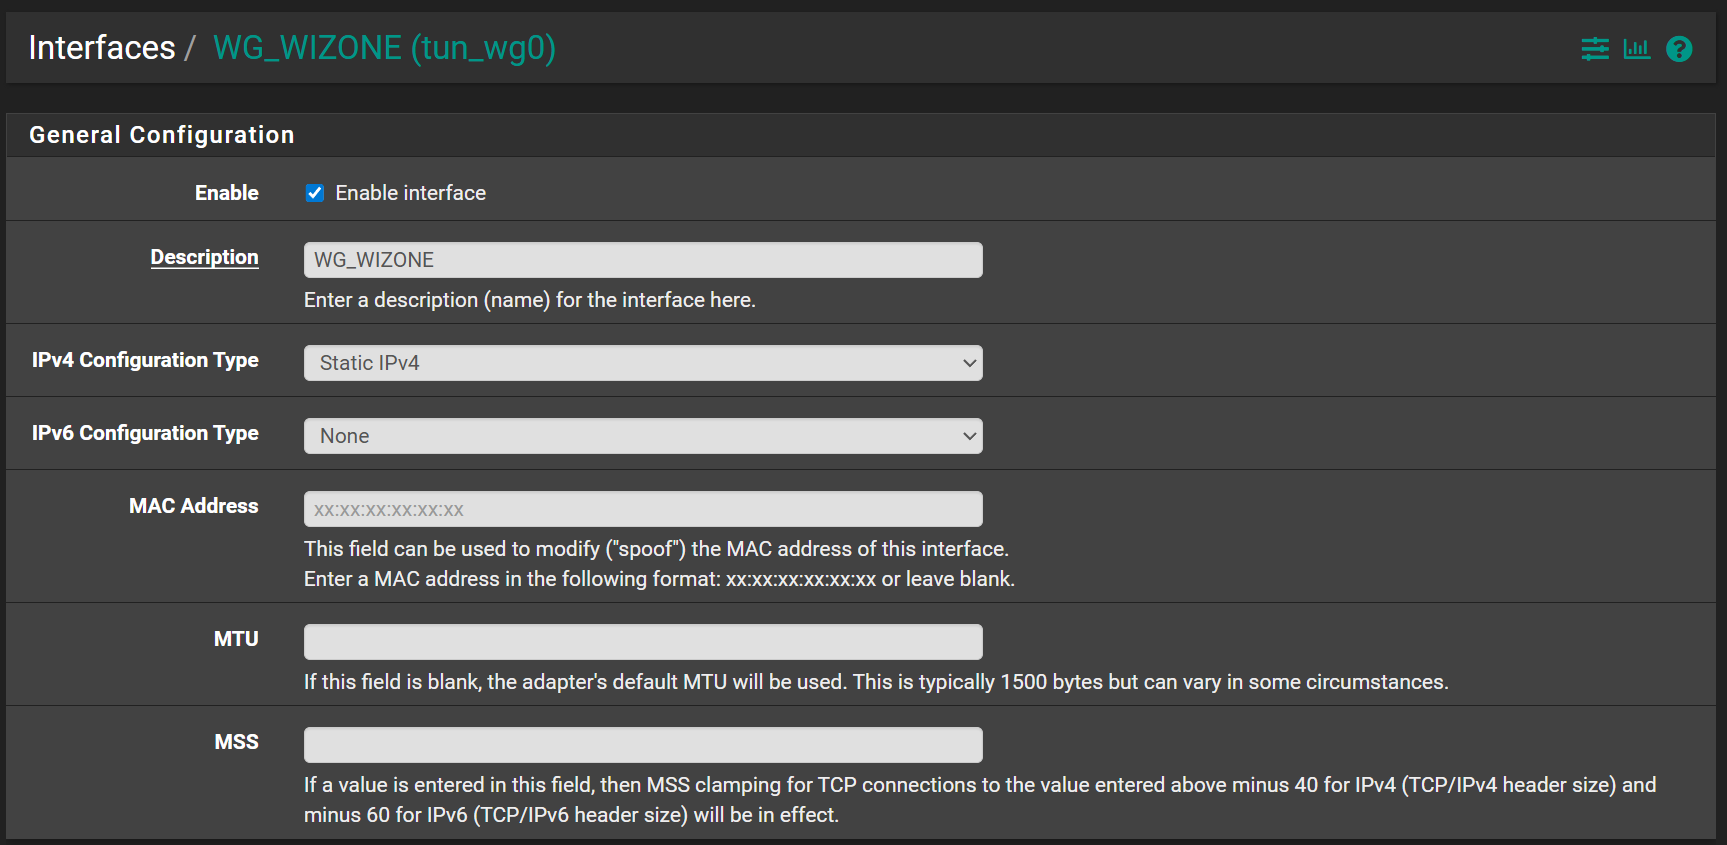
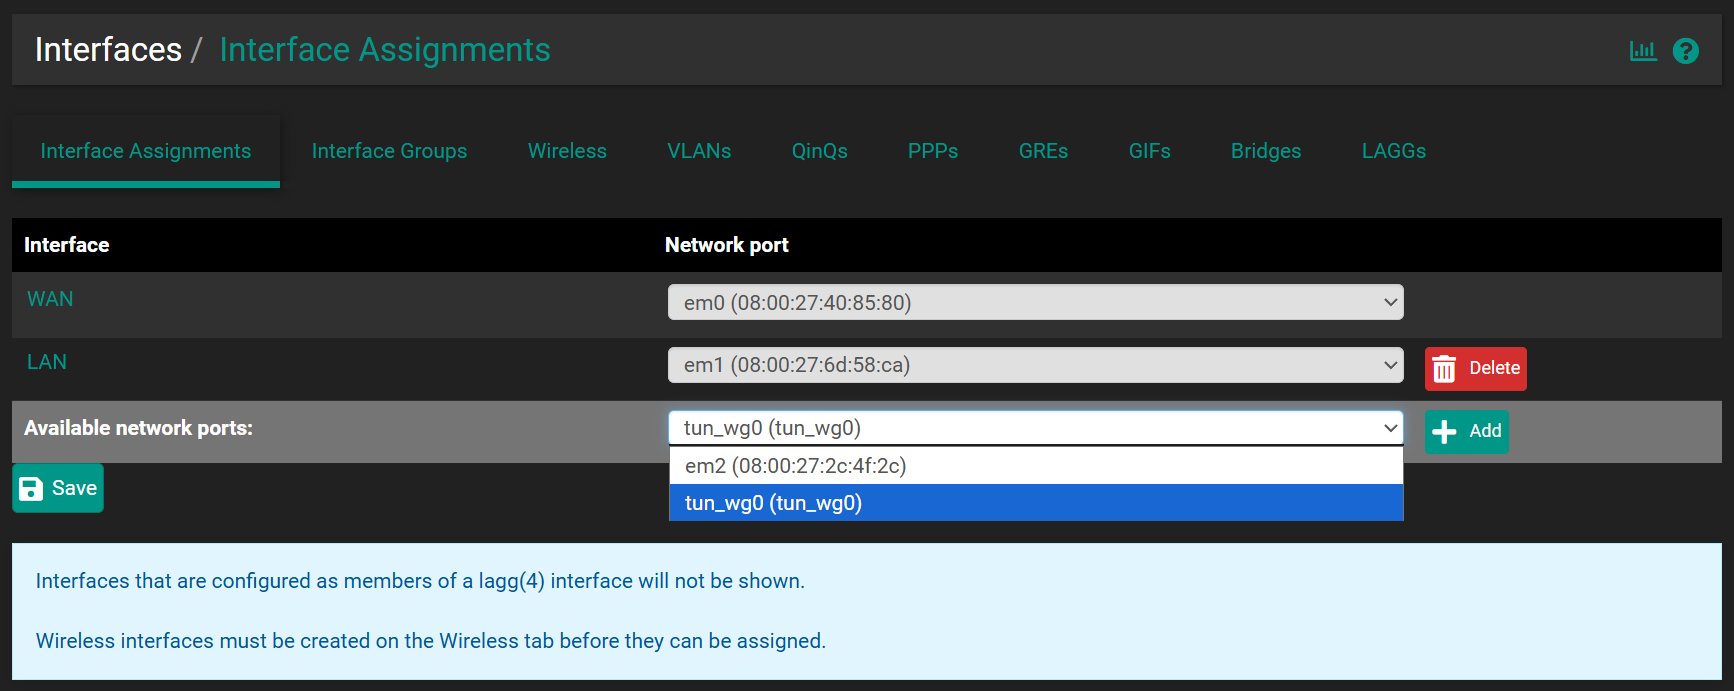
Step 4 - Add Interface for WireGuard
- Go to Interfaces → Assignments → Interface Assignments.
- Under Available Network Ports, select your WireGuard tunnel (
tun_wg0) and click + Add. - Click the newly added interface (e.g., OPT1, OPT2, etc.) to open its configuration page.
- Configure the interface using the following settings:
| Field | Where to Find Value | Description |
|---|---|---|
| Description | (choose any name) | Interface name (e.g., WG_WiZone) |
| IPv4 Configuration Type | Static IPv4 | Set the interface to use a static IP |
| IPv4 Address | WG INTERFACE IP | (Copy from WiZone Portal Device configuration) |