Mikrotik Setup
MikroTik Setup
Step-by-step guide to configure MikroTik for WiZone — from WireGuard tunnel to HTTPS captive portal and remote logging.
Overview
| Stage | Topic | Description |
|---|---|---|
| 1 | Basic Network | Set LAN IP and DHCP server for Wi-Fi clients |
| 2 | WireGuard Tunnel | Create encrypted VPN tunnel back to WiZone Cloud |
| 3 | Routing & Firewall | Add static routes and allow WireGuard + CoA traffic |
| 4 | HTTPS Certificate | Auto-issue Let's Encrypt cert for secure captive portal |
| 5 | Hotspot + RADIUS | Enable captive portal login backed by WiZone RADIUS |
| 6 | Remote Logging | Send logs to WiZone Cloud for compliance |
Values from WiZone Portal
Before starting, go to NAS Configuration in the Portal and note these values:
Log in to WiZone Portal → Devices → select your NAS → open NAS Configuration
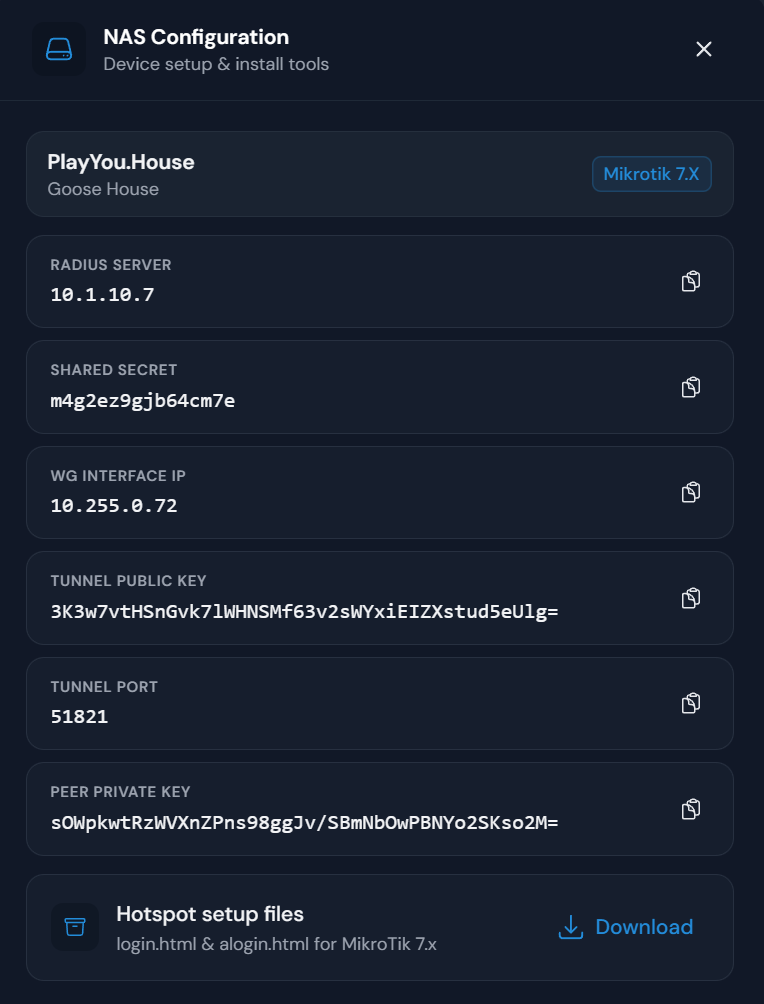
| Value | Source in Portal | Used in Stage |
|---|---|---|
RADIUS SERVER | RADIUS SERVER field | 4 |
SHARED SECRET | SHARED SECRET field | 4 |
WG INTERFACE IP | WG INTERFACE IP field | 2 |
TUNNEL PUBLIC KEY | TUNNEL PUBLIC KEY field | 2 |
TUNNEL PORT | TUNNEL PORT field | 2 |
PEER PRIVATE KEY | PEER PRIVATE KEY field | 2 |
wg2.wizone.io | (fixed value) | 2 |
10.1.10.8 | (fixed value) | 6 |
Stage 4 (HTTPS) — no values to copy manually. The Portal generates a complete script with token included.