Captive Portal Setup
Step 1 – Check Captive Portal Status
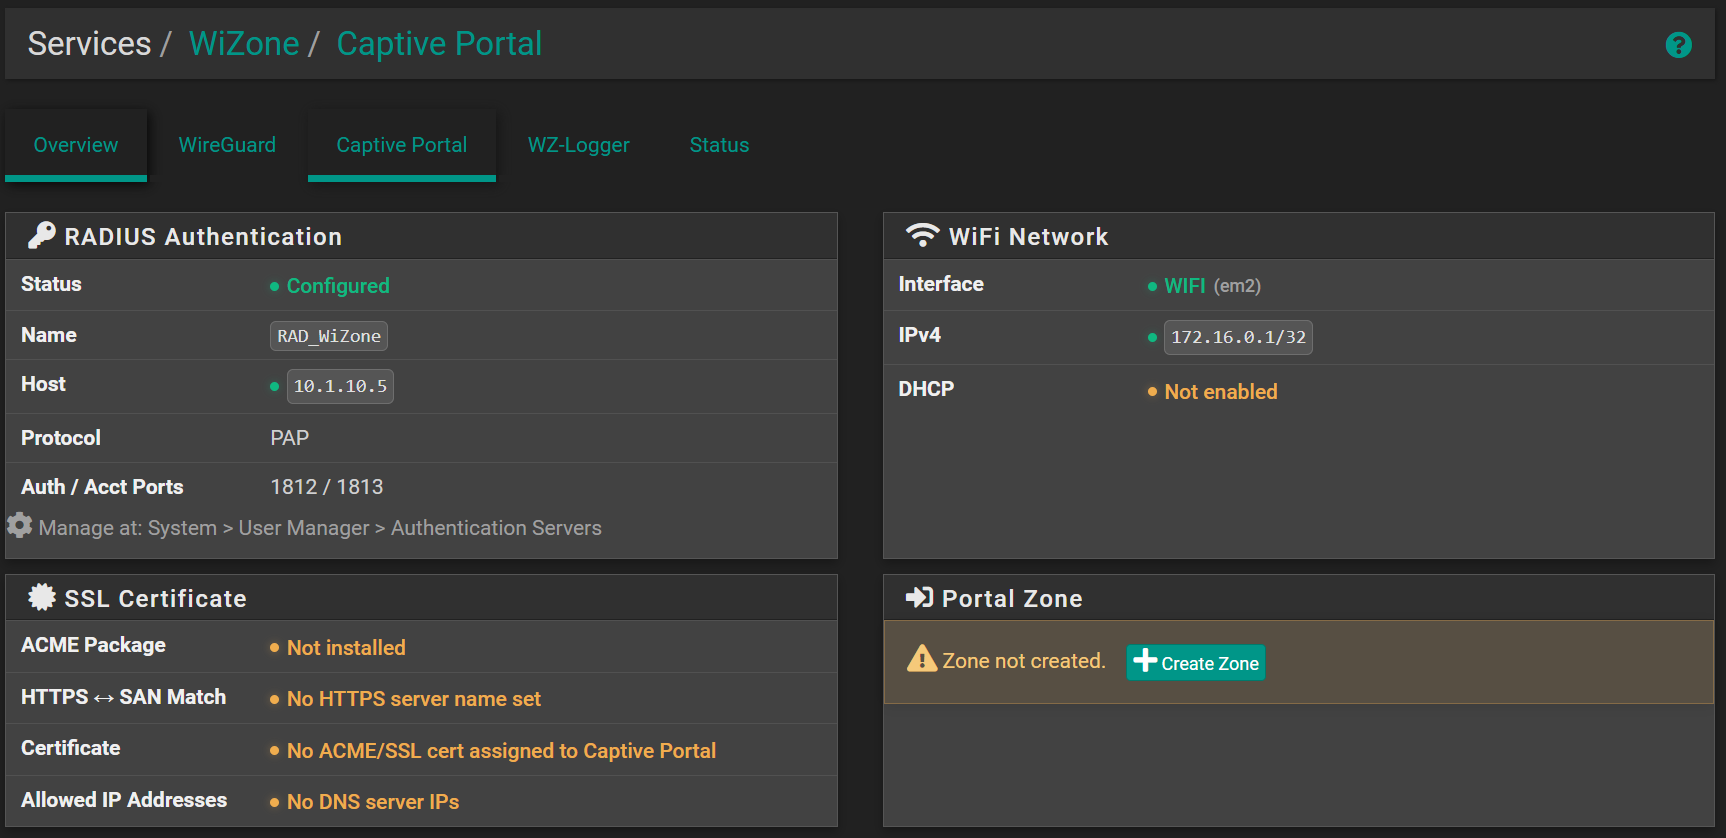
Go to Services → WiZone → Captive Portal and review each section before proceeding.
| Section | Initial State | Action Required |
|---|---|---|
| RADIUS Authentication | Configured ✅ | None |
| WiFi Network | WIFI (em2) ✅ | Verify DHCP is enabled |
| SSL Certificate → ACME Package | Not installed ⚠️ | Install ACME (Stage 2) |
| SSL Certificate → HTTPS↔SAN | No HTTPS server name ⚠️ | Set HTTPS server name in Captive Portal |
| SSL Certificate → Certificate | No ACME/SSL cert ⚠️ | Issue certificate first (Stage 2) |
| Portal Zone | Zone not created ⚠️ | Click Create Zone |
Step 2 – Create Captive Portal Zone
Go to Services → WiZone → Captive Portal and click + Create Zone. Enter a zone name of your choice (e.g. WiZone).
Step 3 – Configure Zone Settings
Go to Services → Captive Portal → Zone Name → Edit and set the following:
| Field | Value |
|---|---|
| Enable Captive Portal | ✅ |
| Idle Timeout (Minutes) | (optional) |
| Concurrent Logins | Multiple |
| MAC Filtering | Disable (RADIUS MAC auth handles this) |
| Custom Portal Page | ✅ Enable |
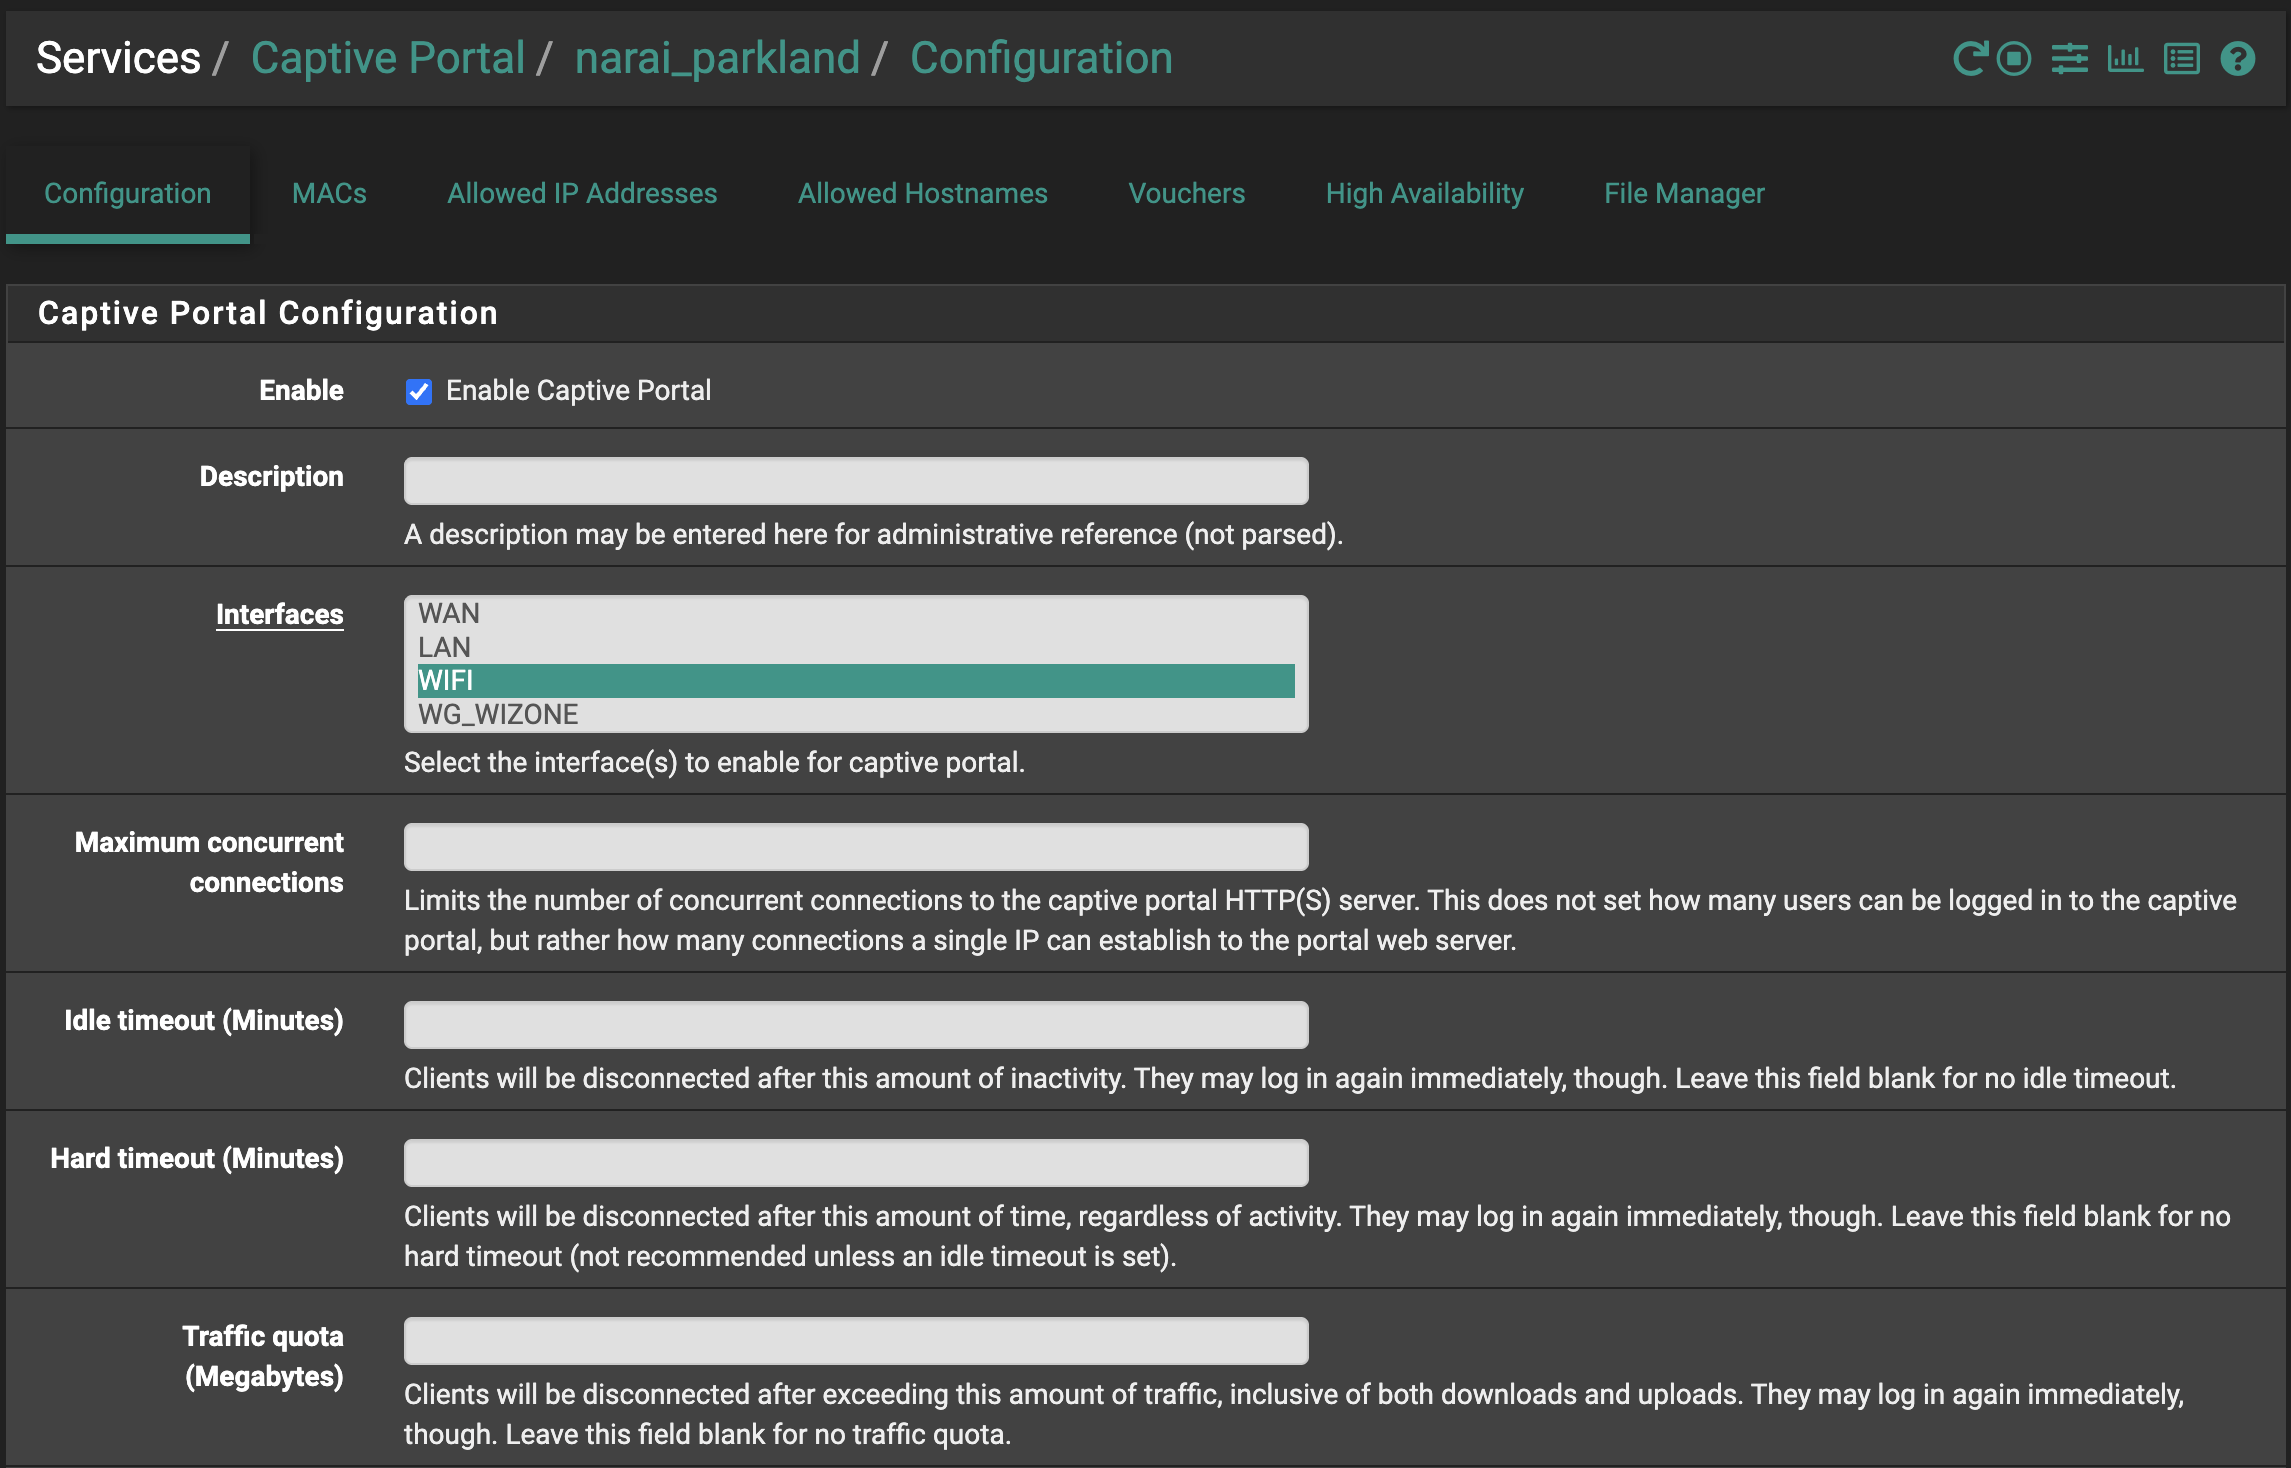
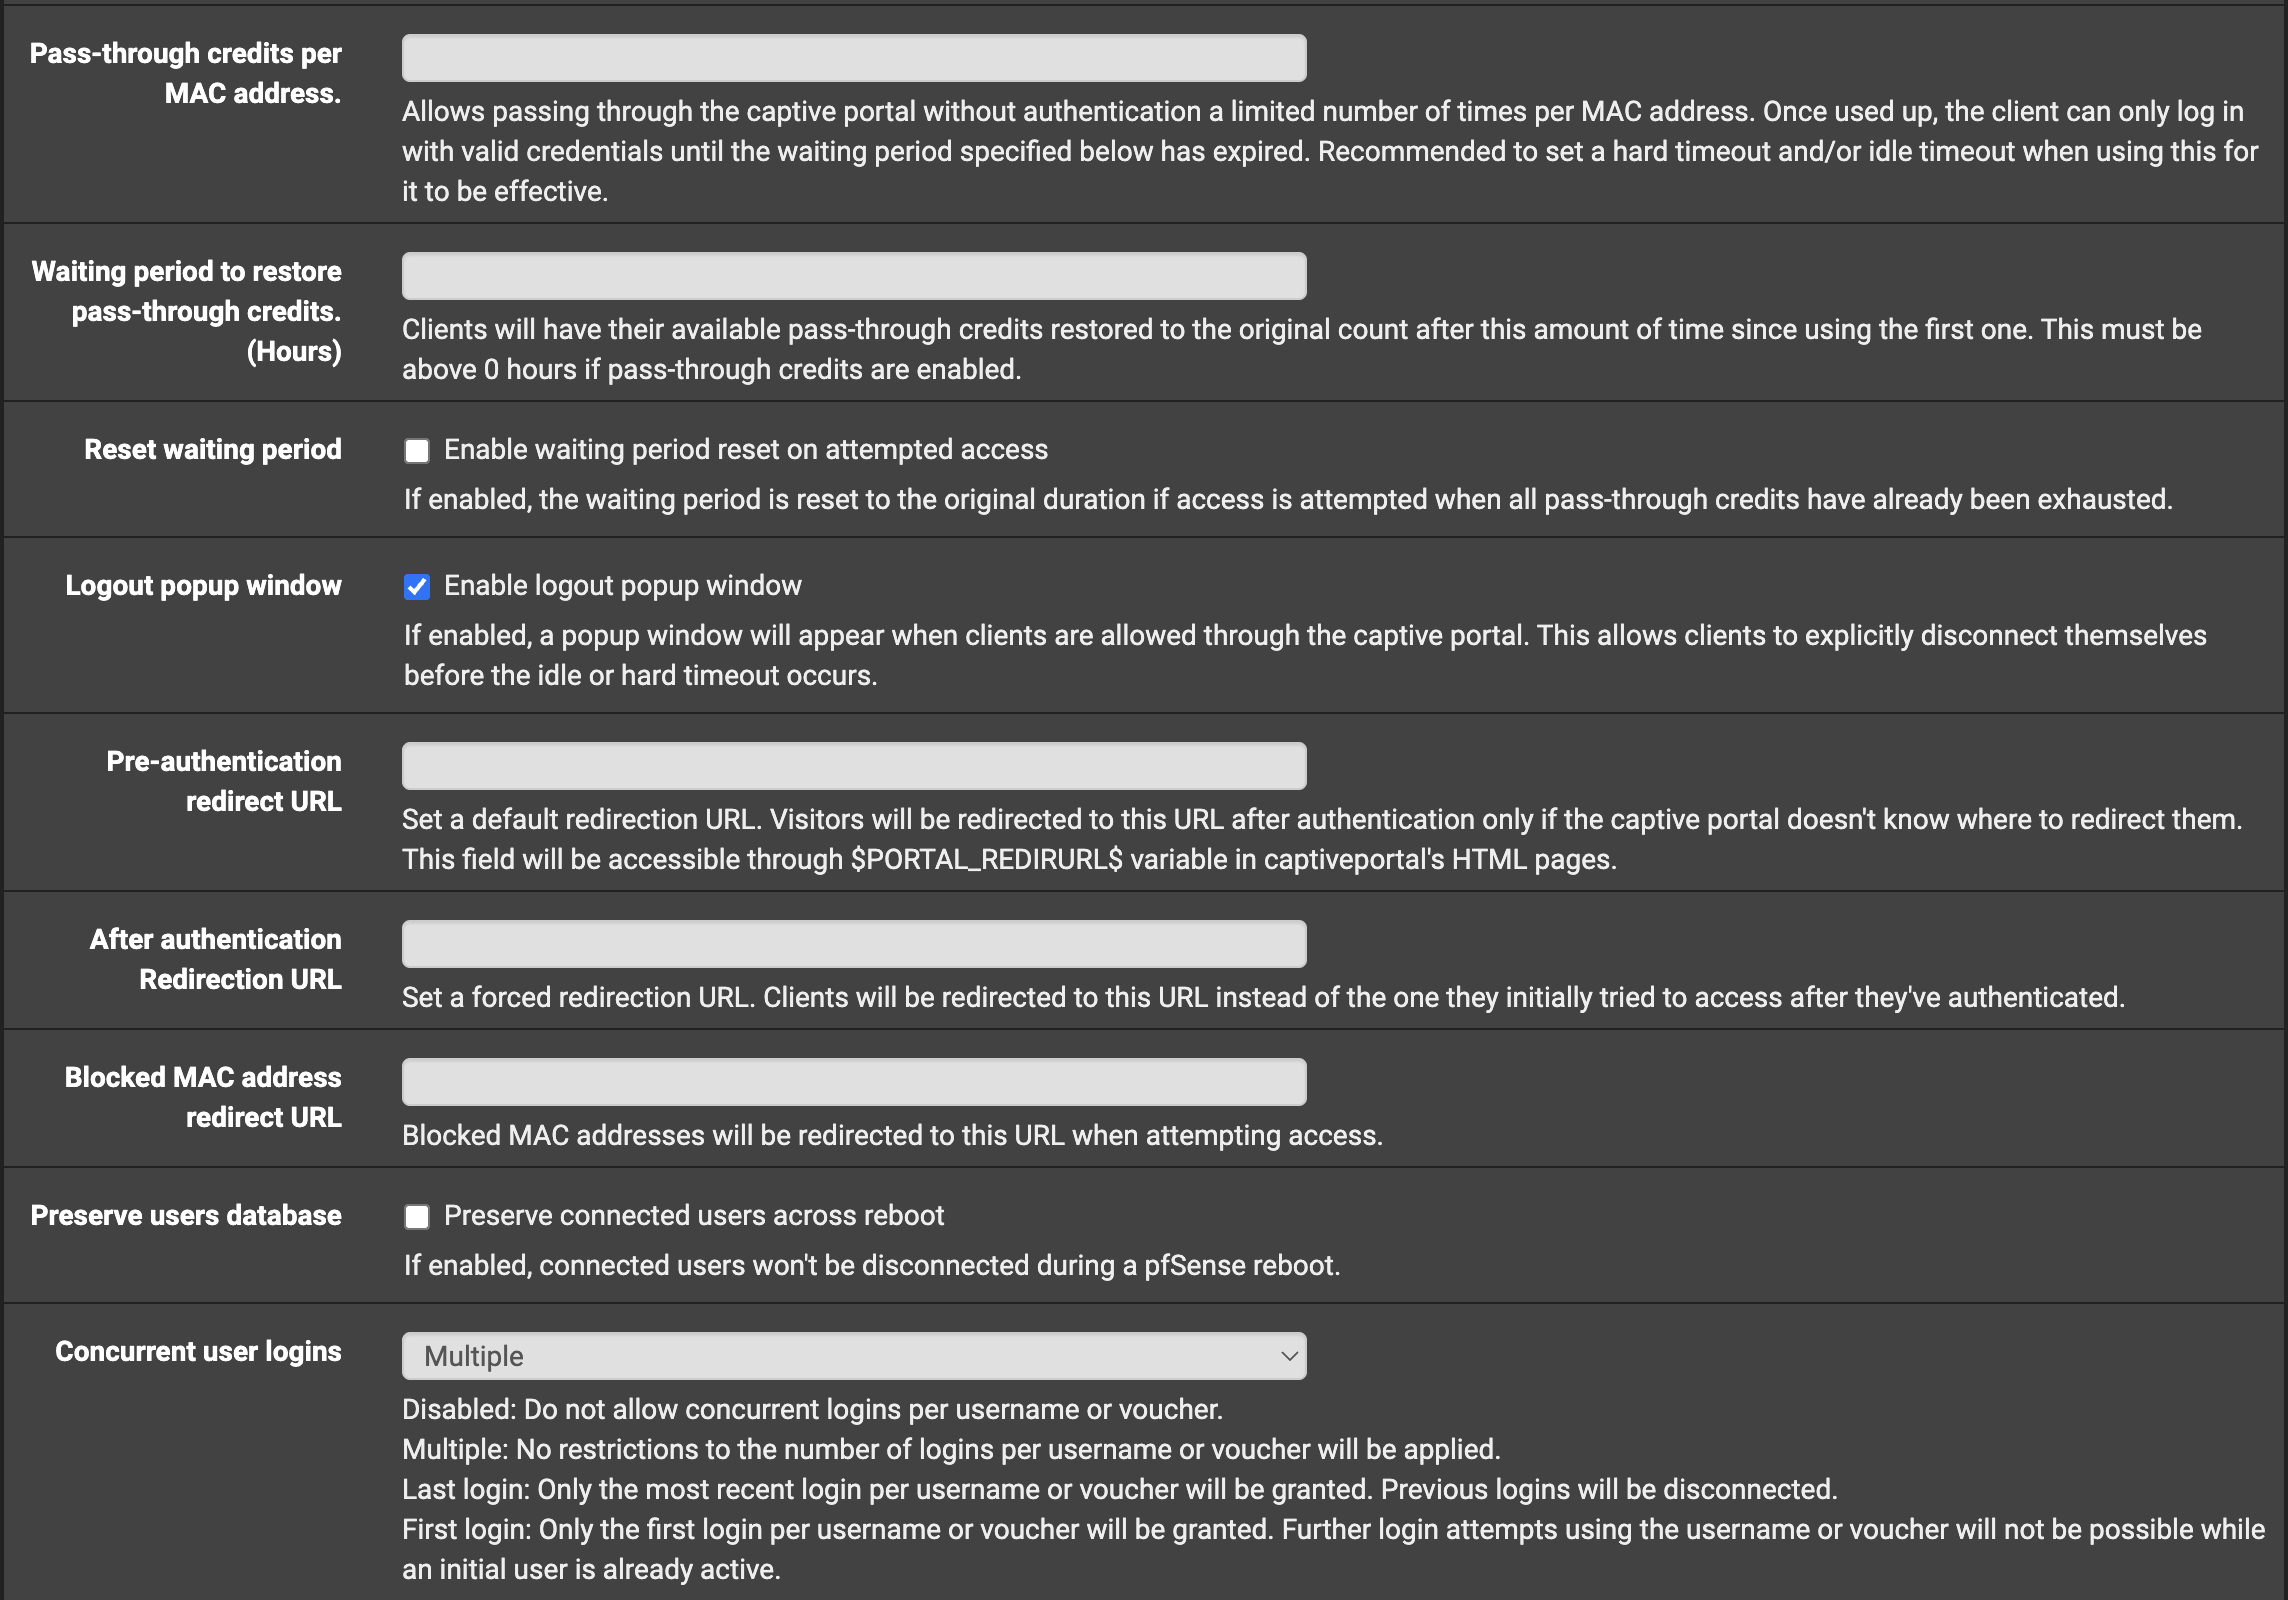
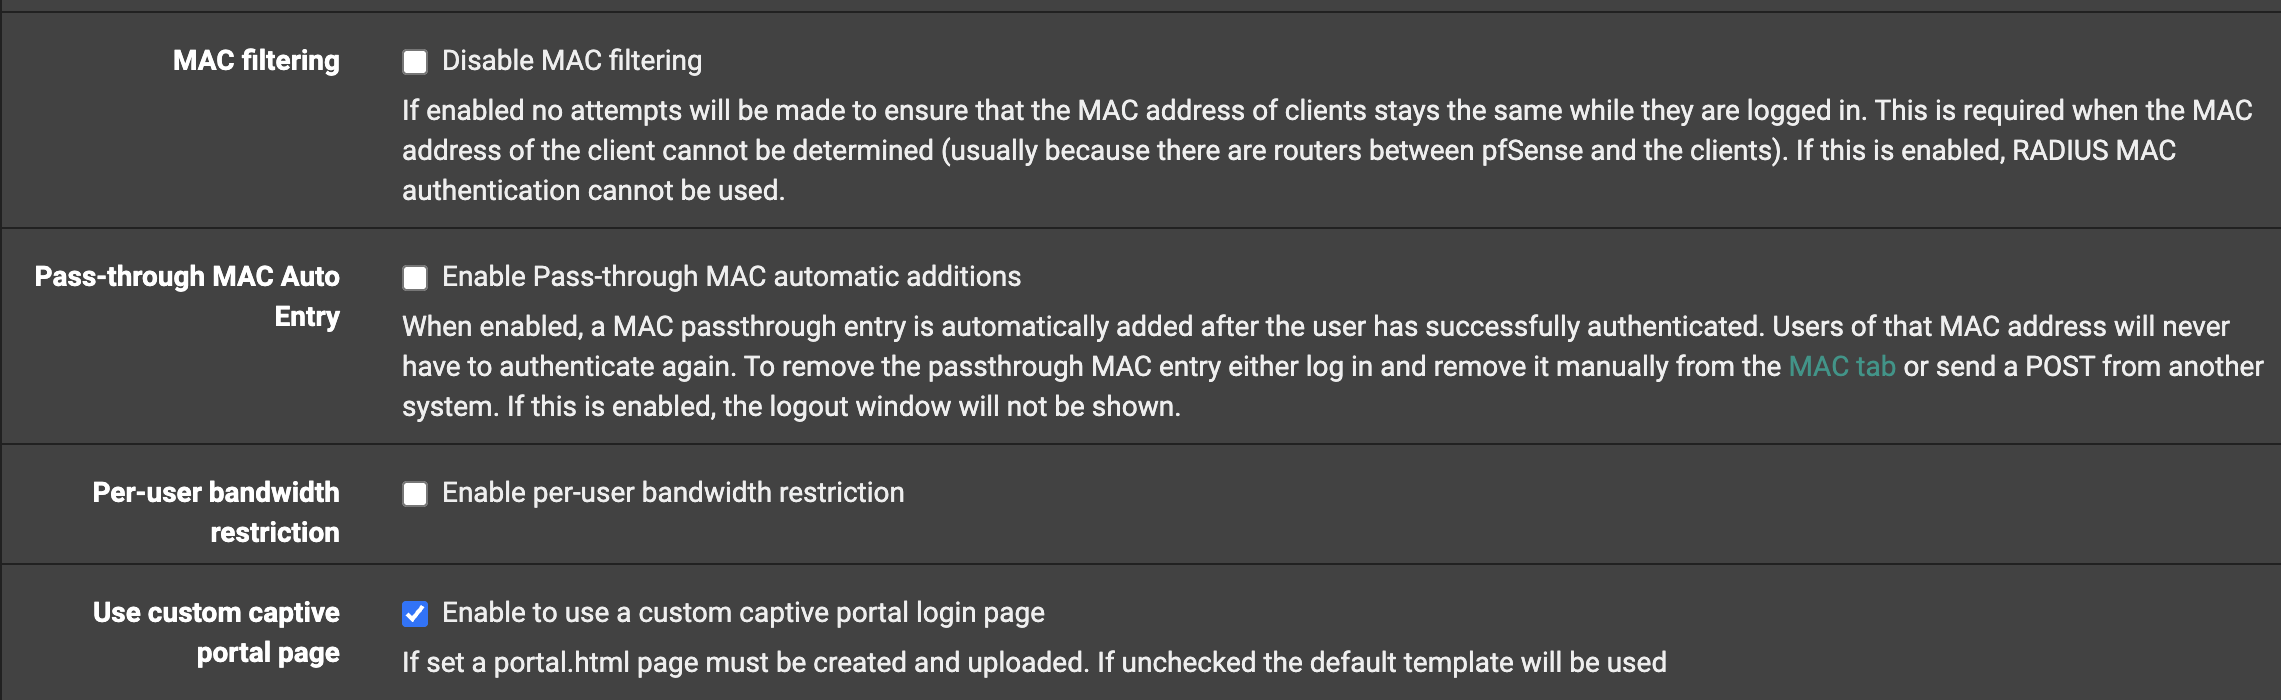
Click Save.
Step 4 – Upload Custom Login Page
After unzipping, use captiveportal-login.html. Upload it to both fields in the zone editor:
| Field | File |
|---|---|
| Portal page contents | captiveportal-login.html |
| Auth error page contents | captiveportal-login.html |
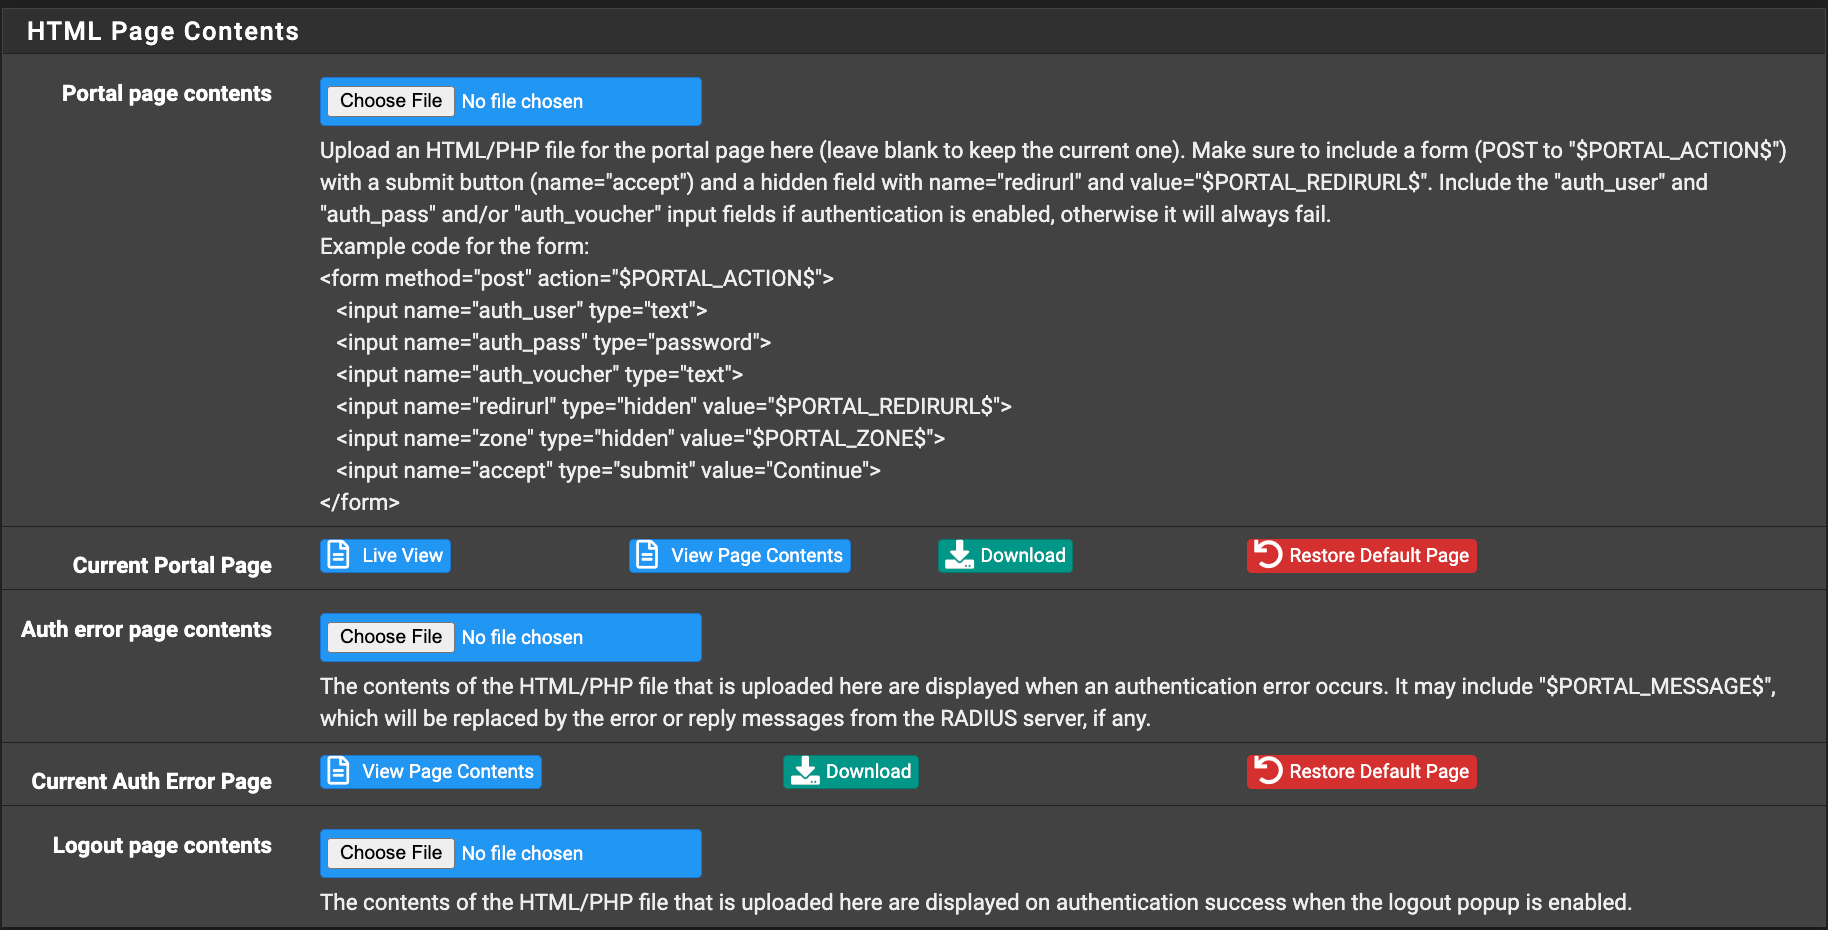
Click Save.
Step 5 – Authentication Tab (RADIUS MAC)
In the zone editor, open the Authentication tab and configure:
| Field | Value |
|---|---|
| Authentication Method | Use RADIUS MAC Authentication |
| Authentication Server | RAD_WiZone |
| RADIUS MAC Secret | password (any value works — MAC auth validates by MAC address only) |
| Login Page Fallback | ✅ (redirect to login page on MAC auth failure) |
| Session Timeout | ✅ (enforce RADIUS Session-Timeout attribute) |
| Traffic Quota | ✅ (enforce RADIUS pfSense-Max-Total-Octets) |
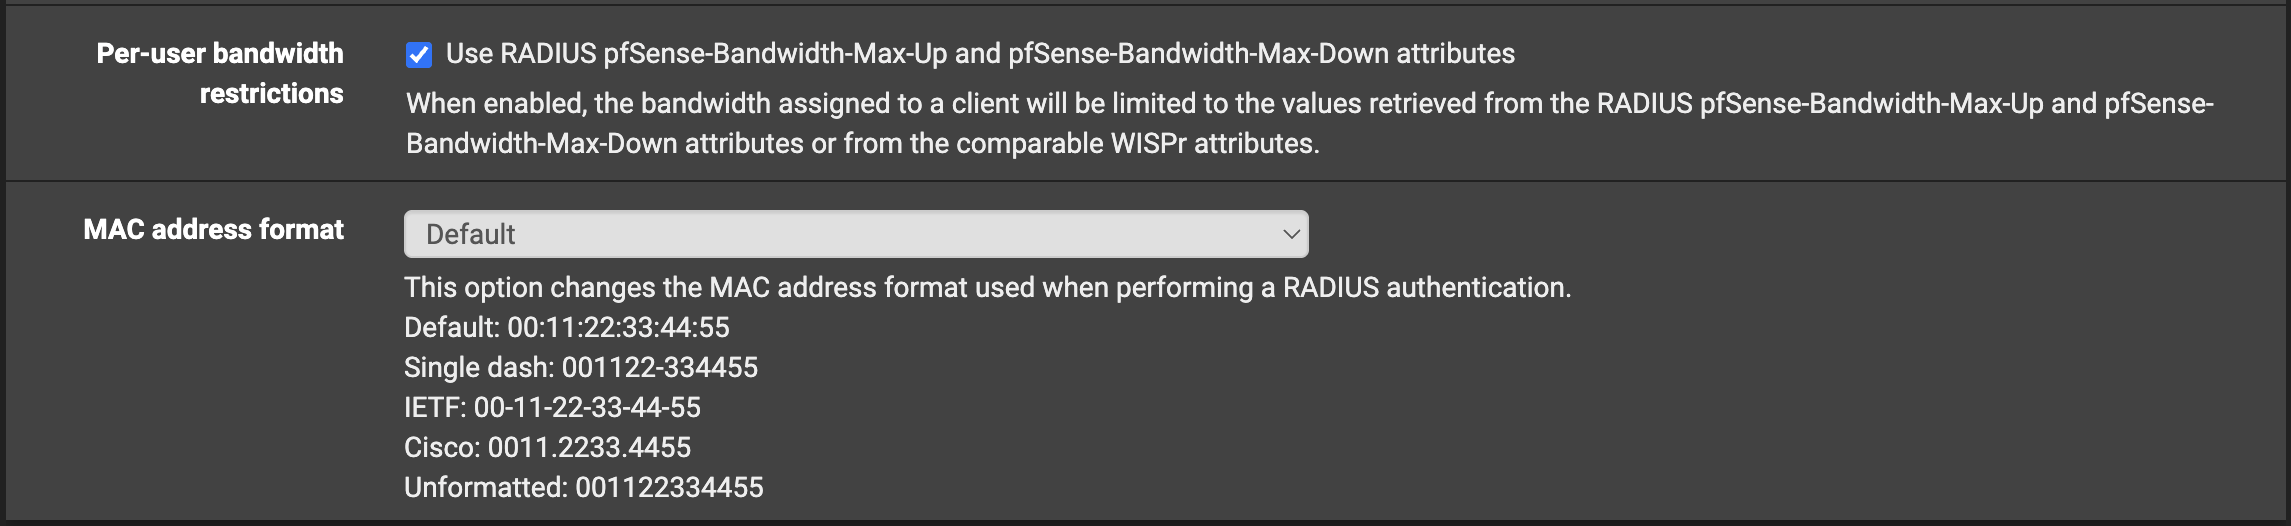
| Per-User Bandwidth Restrictions | ✅ (enforce RADIUS upload/download limits) |
| MAC Address Format | Default |
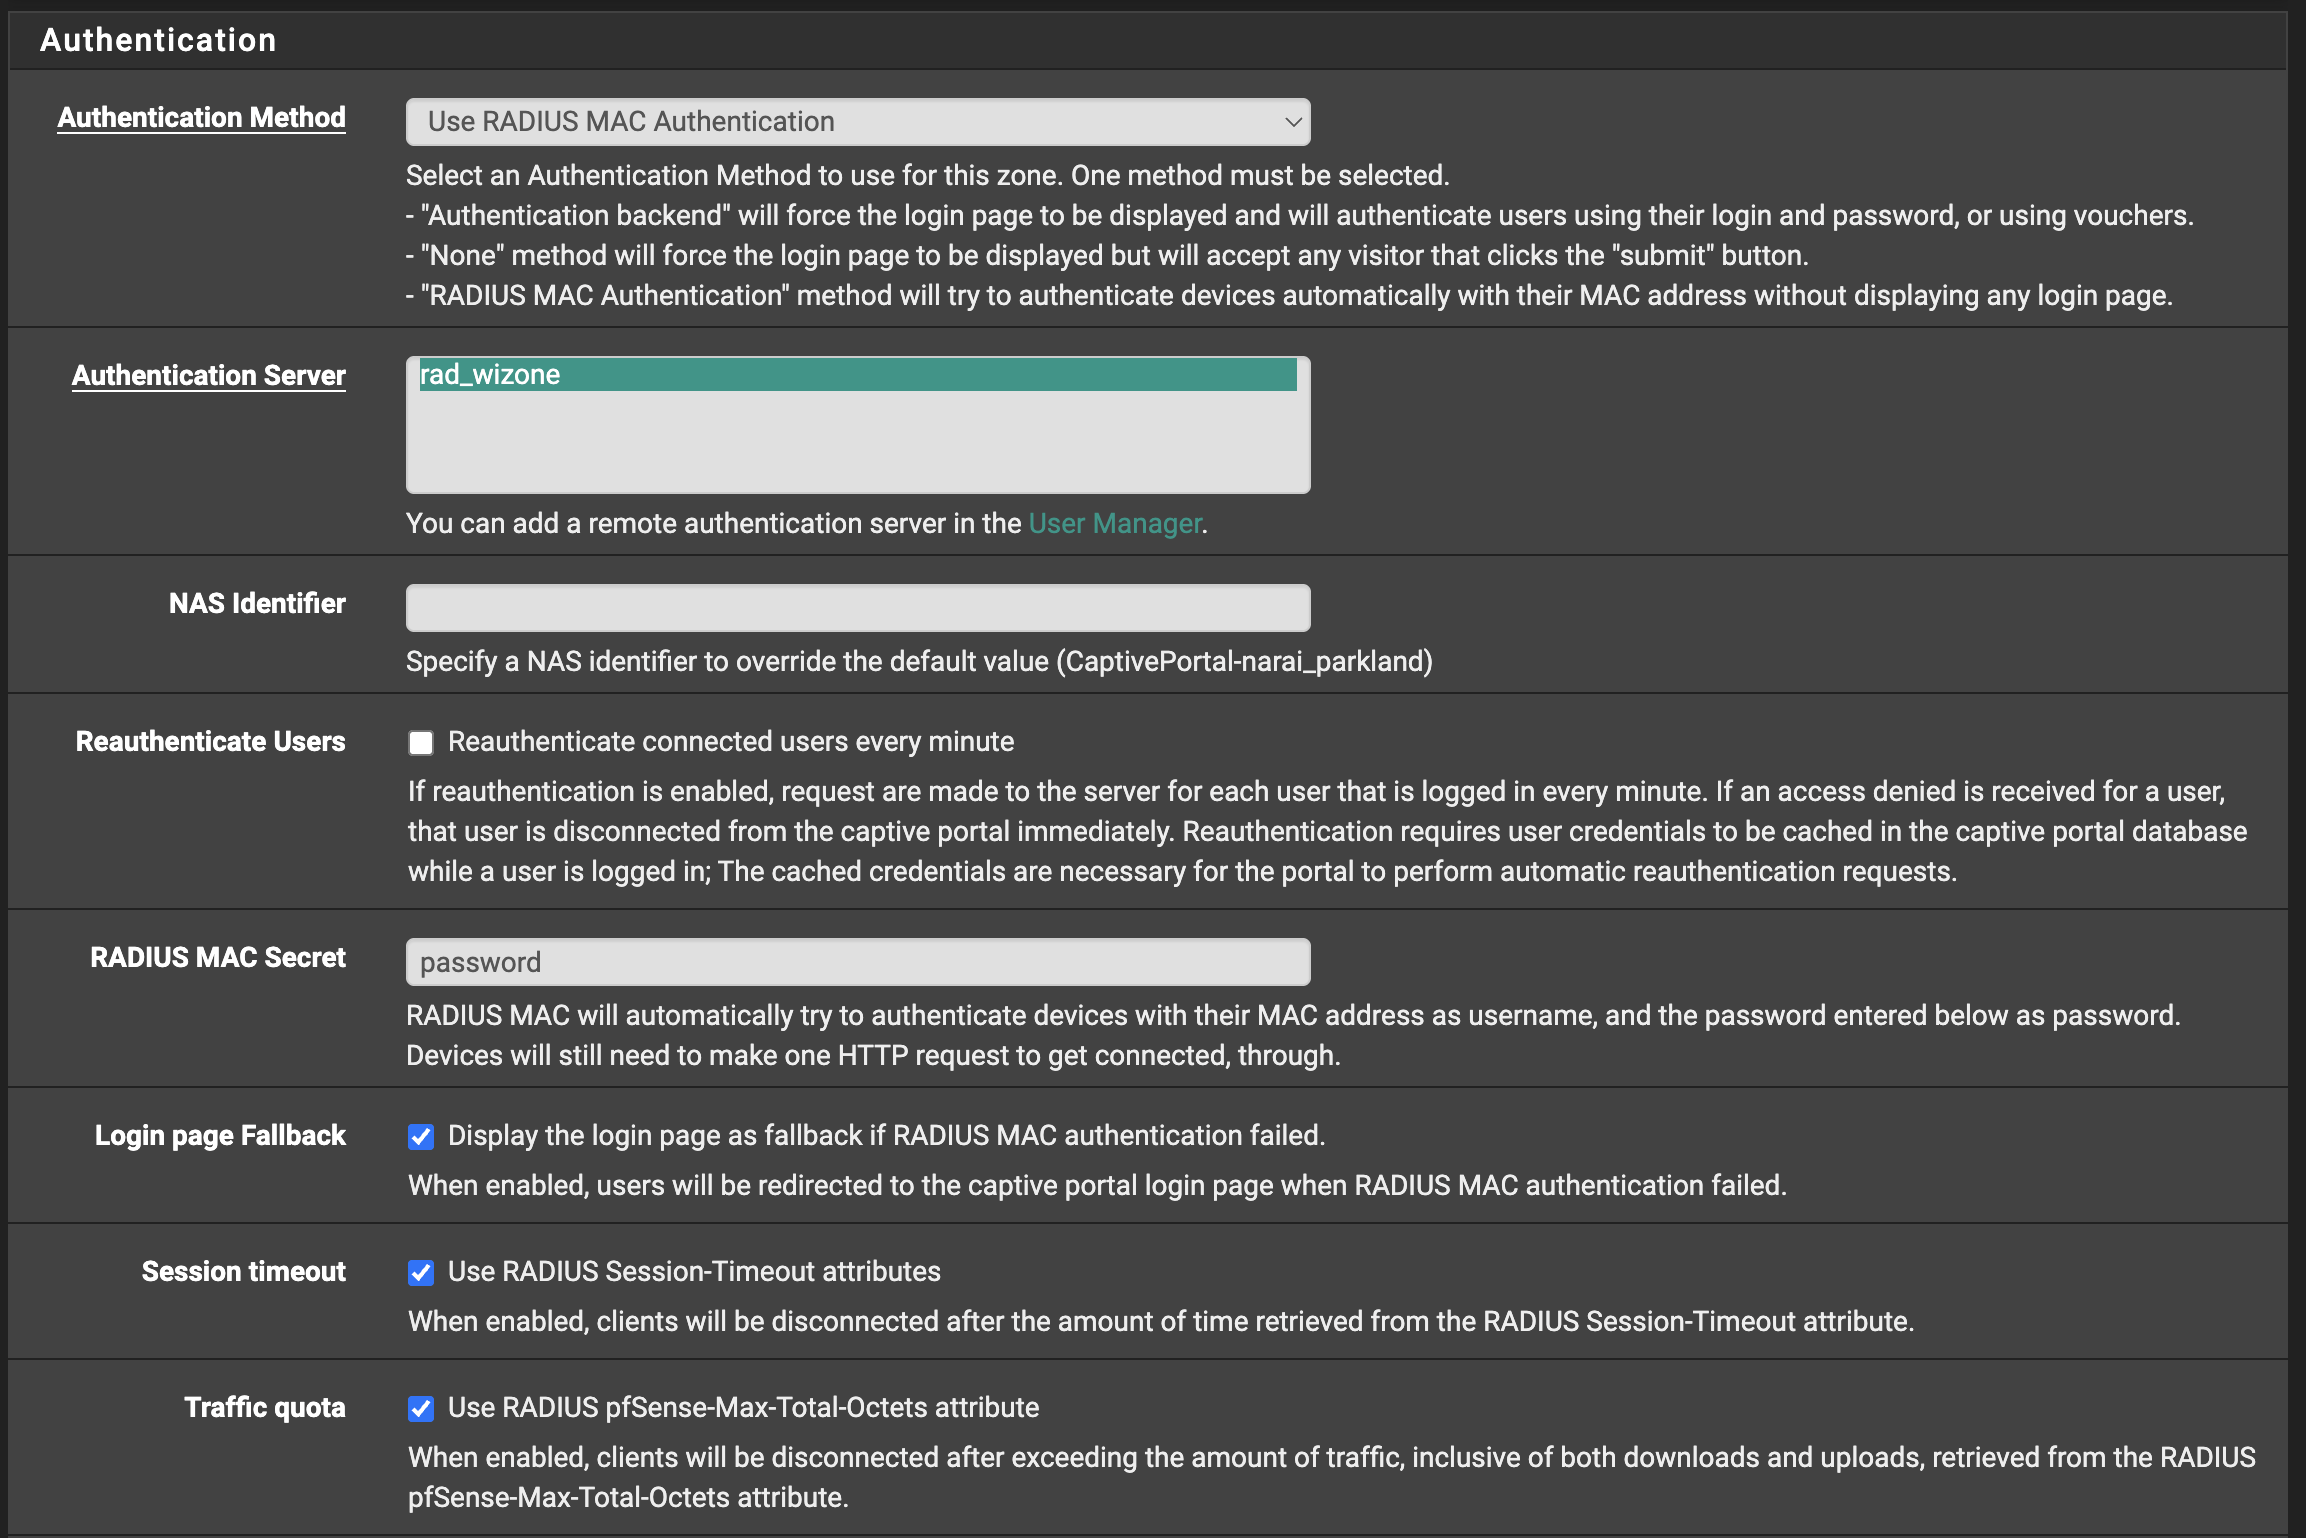
Click Save.
Step 6 – Accounting Tab
In the zone editor, open the Accounting tab and configure:
| Field | Value |
|---|---|
| Send RADIUS Accounting Packets | ✅ |
| Accounting Server | RAD_WiZone |
| Send Accounting Updates | Interim |
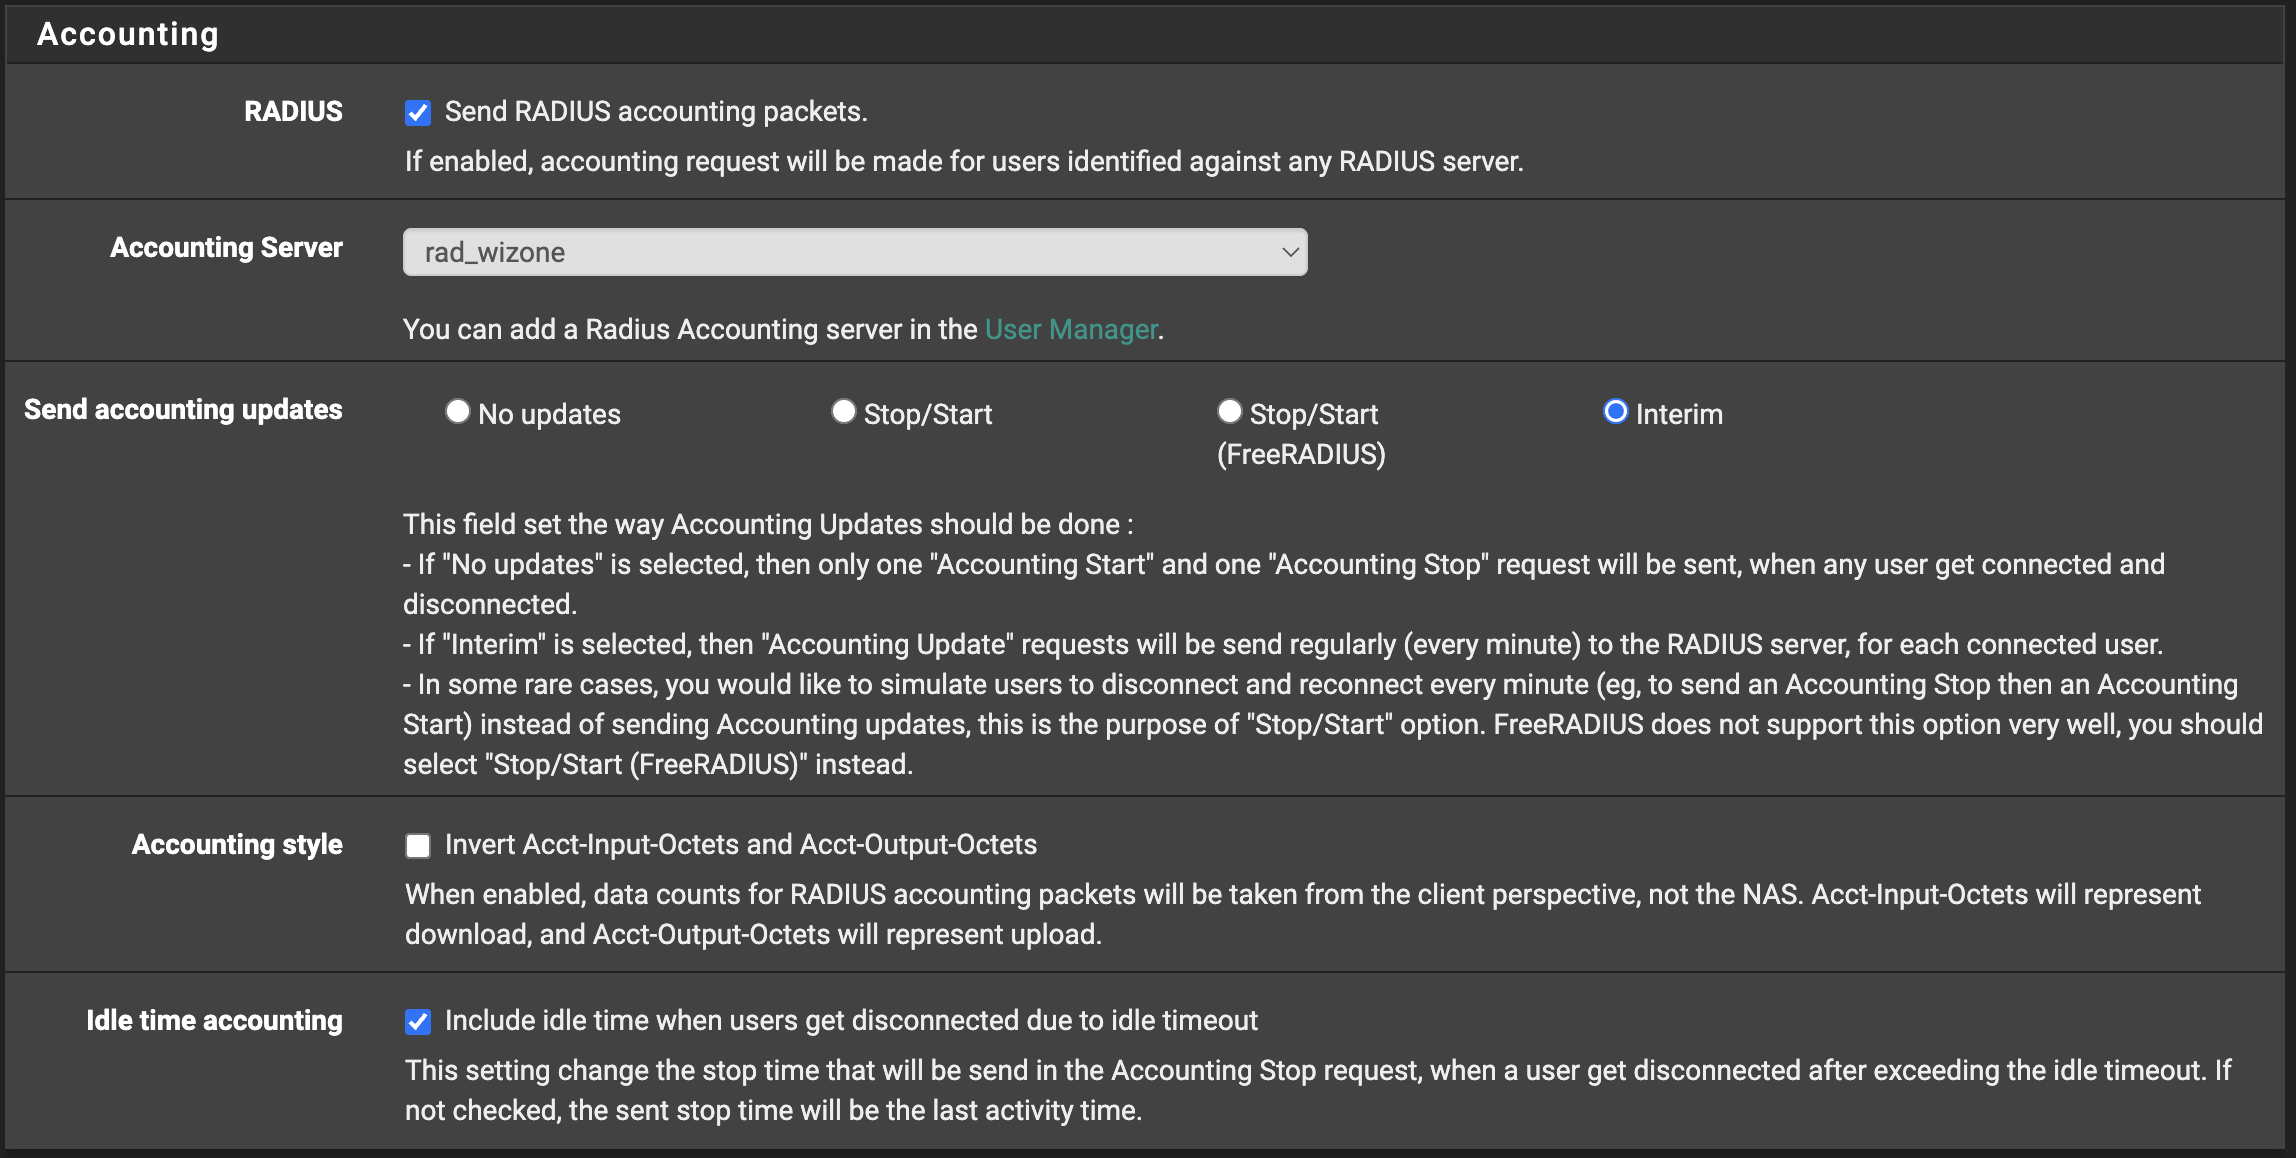
Click Save.
Step 7 – HTTPS Options
In the zone editor, open the HTTPS Options tab and configure:
| Field | Value | Notes |
|---|---|---|
| Enable HTTPS Login | ✅ | Encrypts credentials in transit |
| HTTPS Server Name | johndoe.wizone.io | Replace with your subdomain from Stage 2 Step 1 |
| SSL/TLS Certificate | captive_key | Select the ACME cert issued in Stage 2 |
| Disable HTTPS Forwards | ❌ | Leave unchecked to allow HTTP → HTTPS redirect |
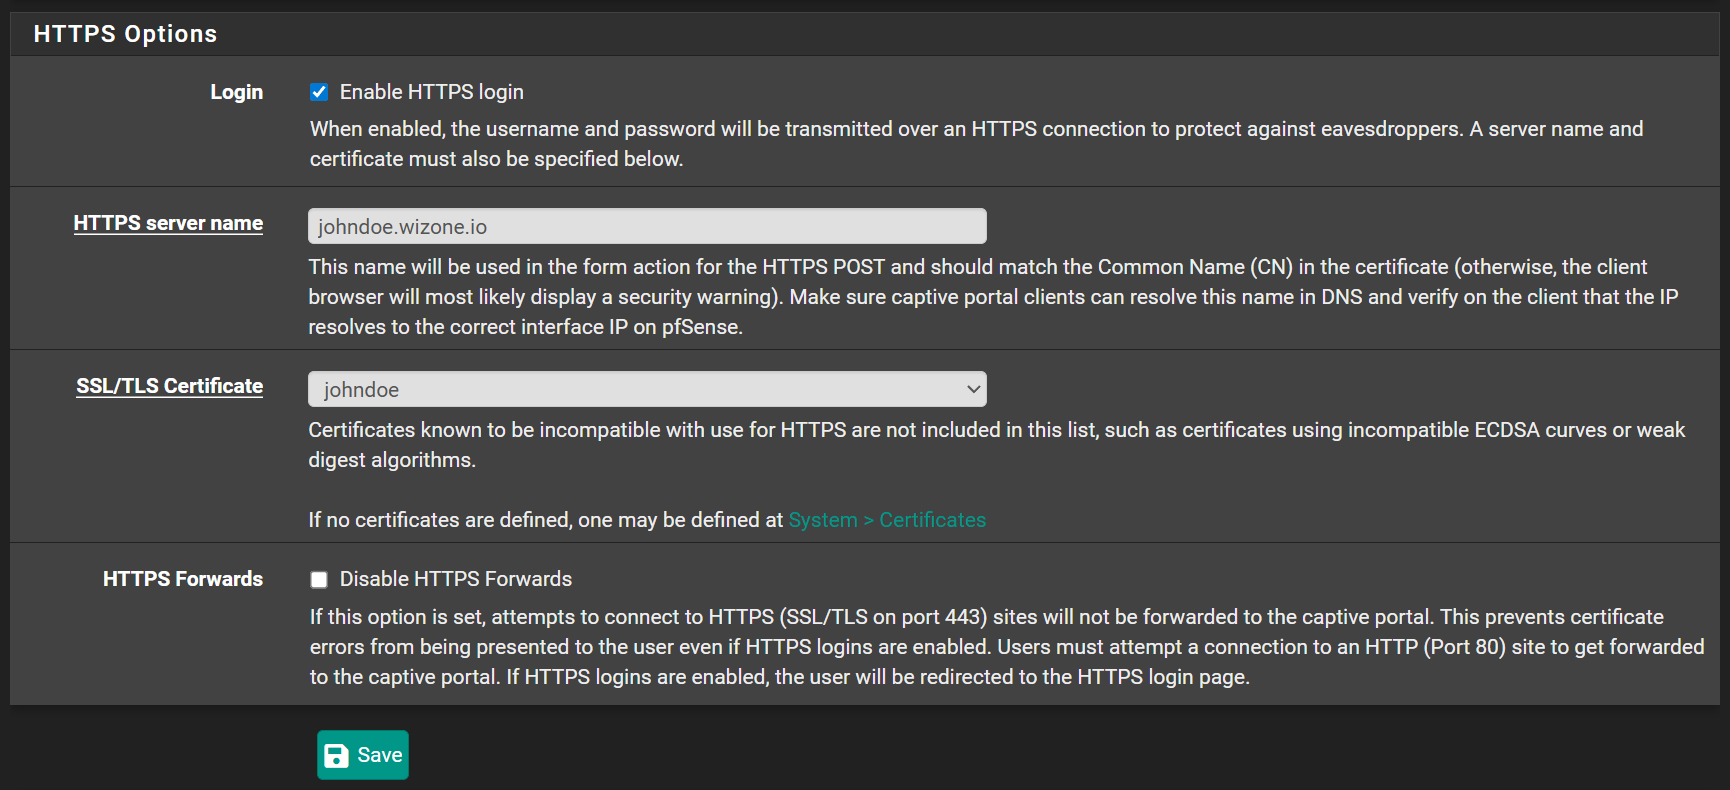
Click Save.
Step 8 – Allowed IP Addresses
Go to Services → Captive Portal → Zone → Allowed IP Addresses and add the following to allow unauthenticated clients to resolve DNS:
Cloudflare DNS
1.1.1.1Google DNS
8.8.8.8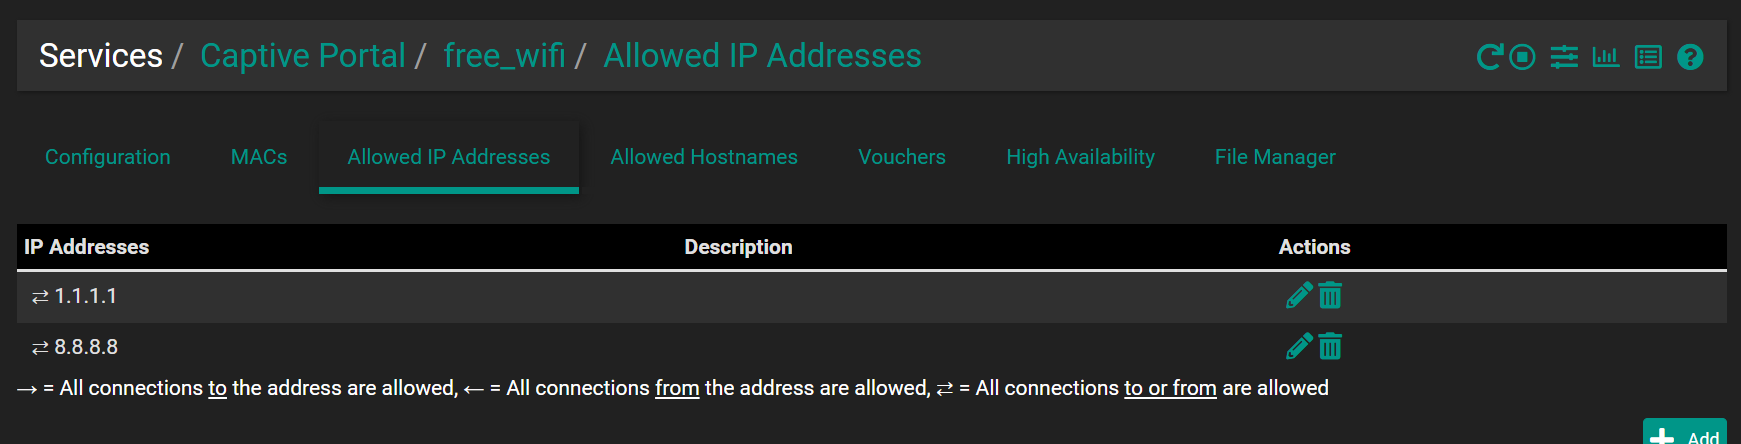
Step 9 – Allowed Hostnames (Whitelist)
Go to Services → Captive Portal → Zone → Allowed Hostnames and add the following with Direction = Both:
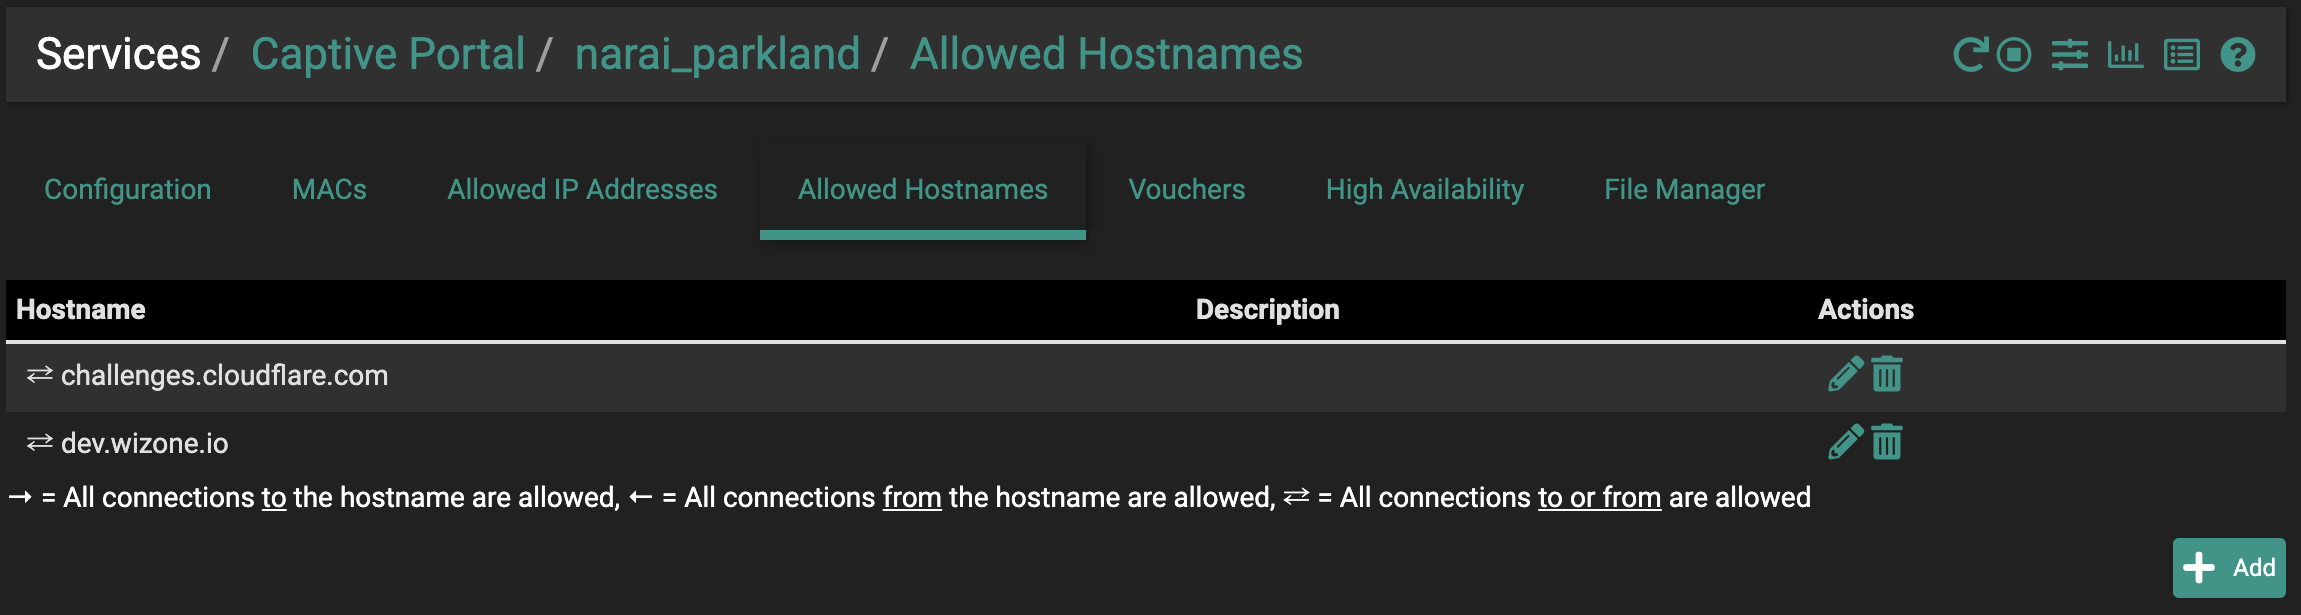
WiZone Captive Portal
portal.wizone.ioCloudflare SSL validation
challenges.cloudflare.comCloudflare Insights
static.cloudflareinsights.com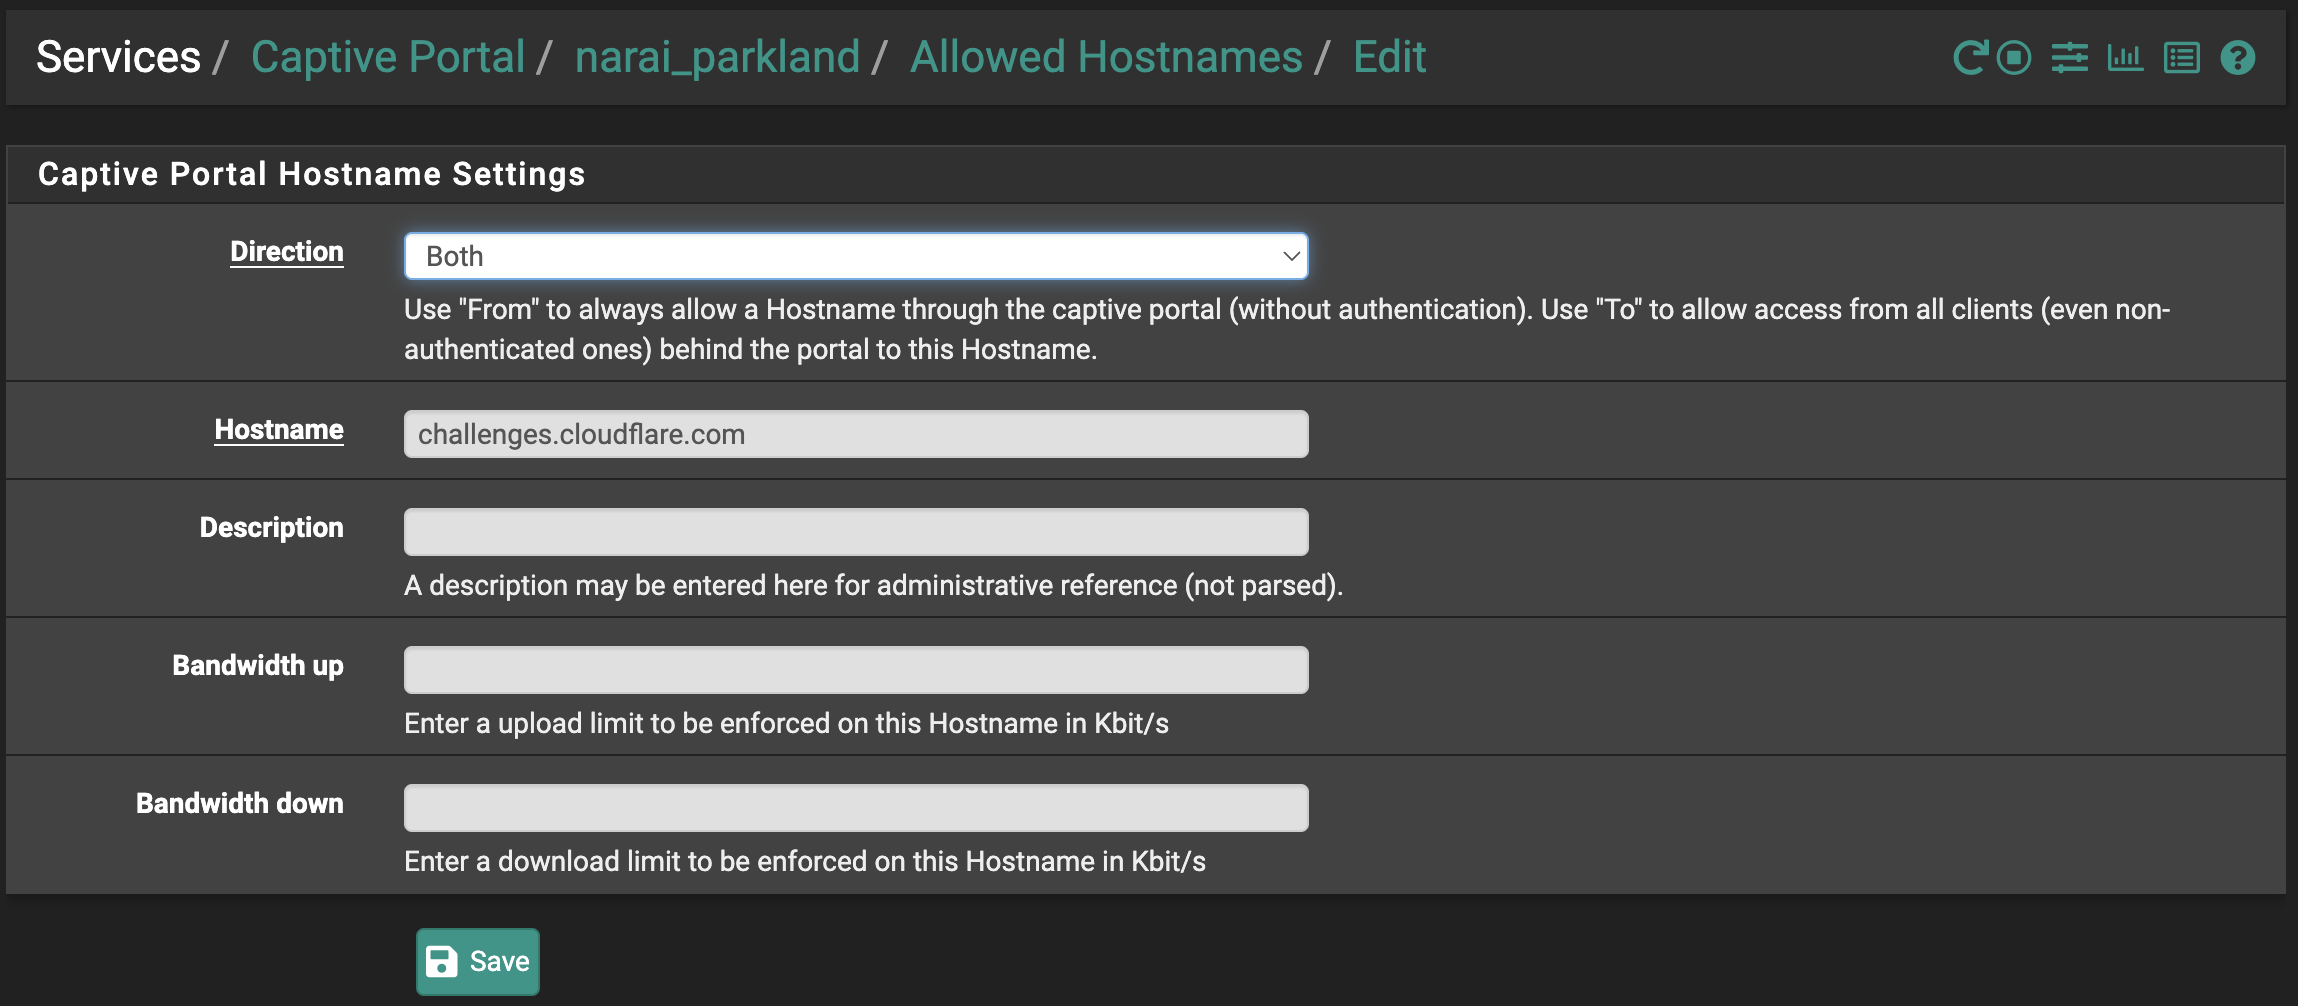
Step 10 – Verify Final Status
Go to Services → WiZone → Overview and confirm all sections show Ready.
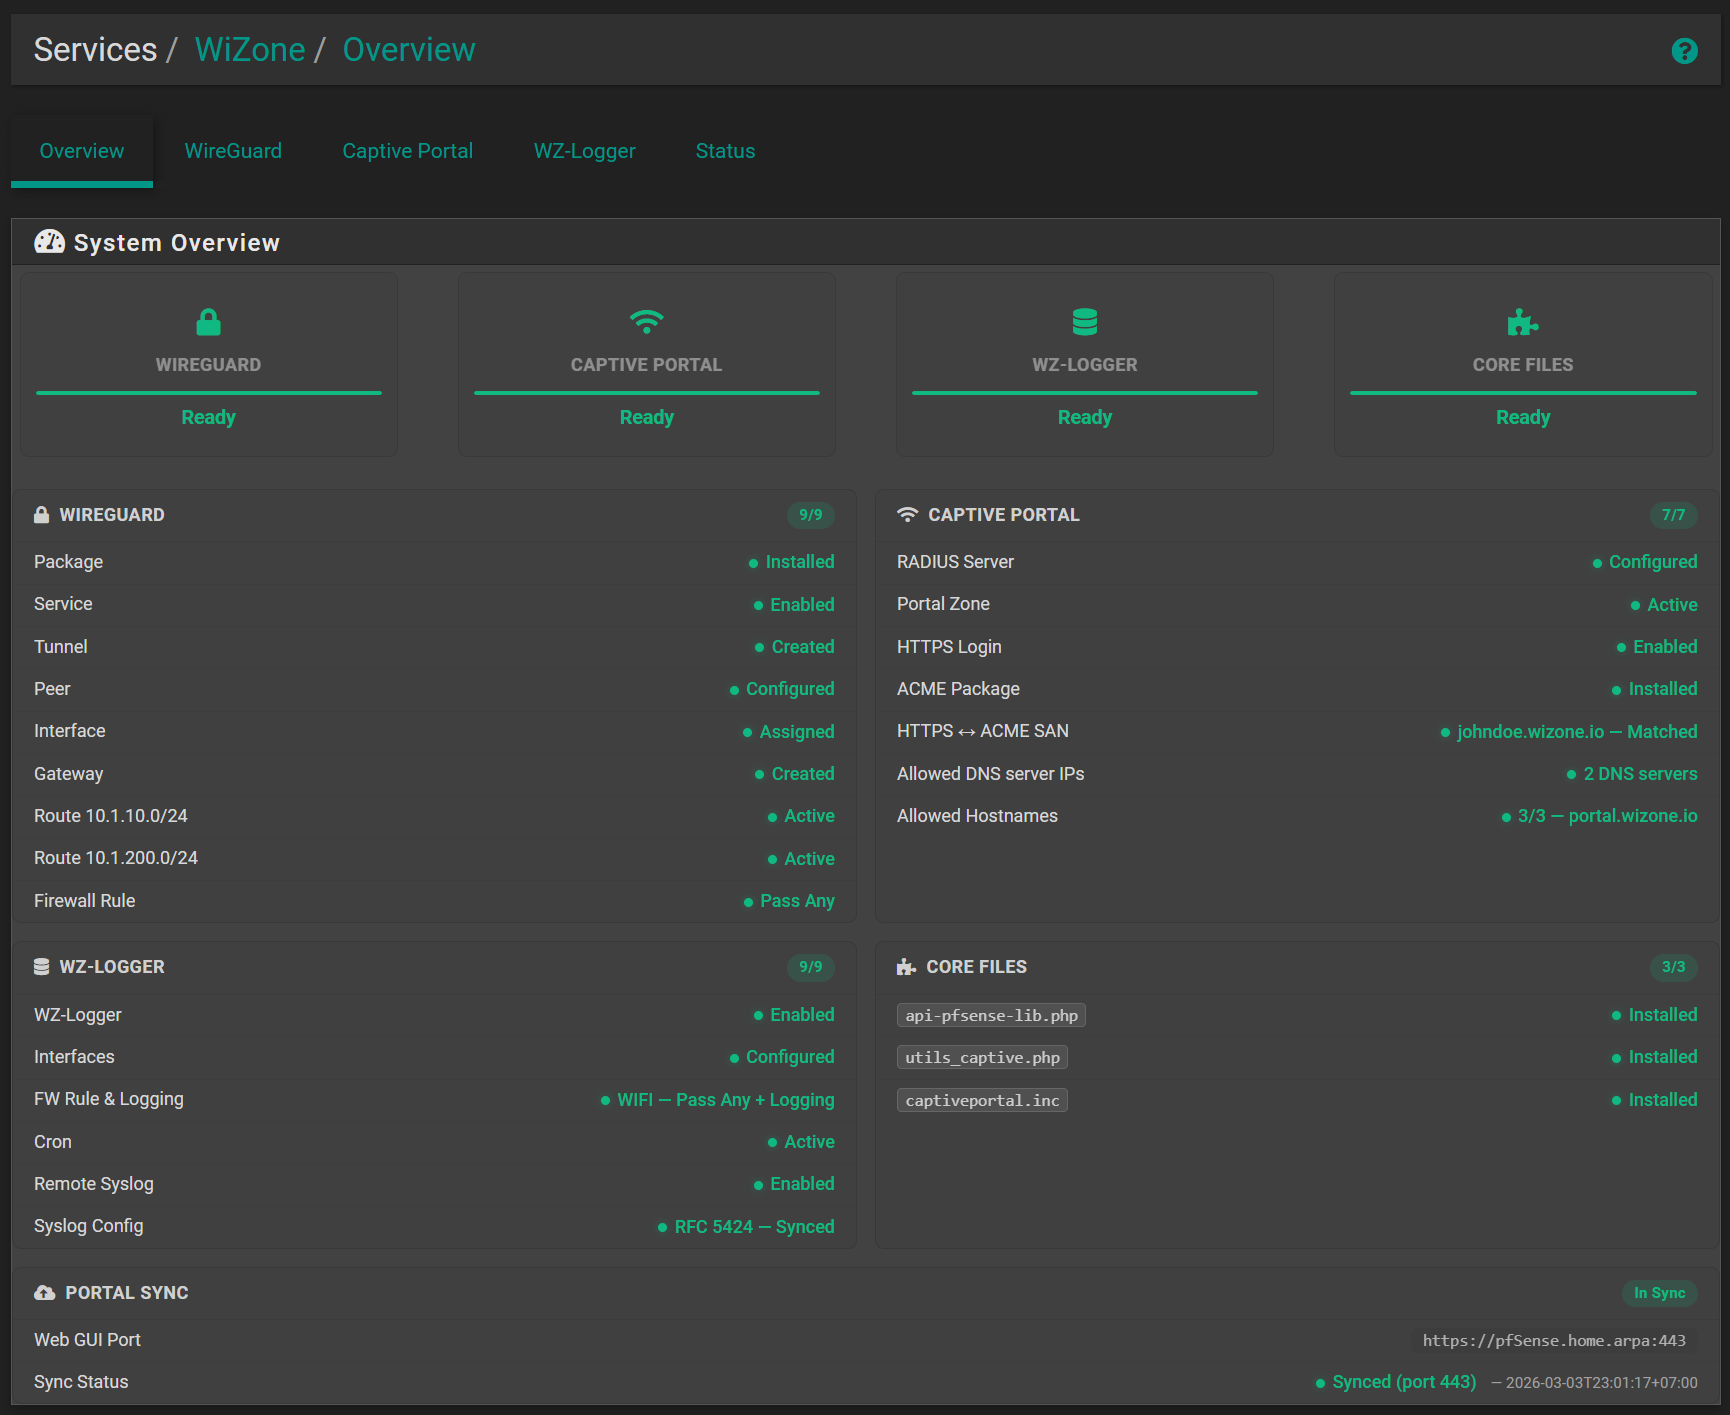
| Section | Status |
|---|---|
| WIREGUARD | ✅ Ready |
| CAPTIVE PORTAL | ✅ Ready |
| WZ-LOGGER | ✅ Ready |
| CORE FILES | ✅ Ready |