pfSense Setup
ACME SSL Certificate Setup
Issue a Let's Encrypt SSL certificate for the Captive Portal using ACME DNS-01 challenge via WiZone's DNS API.
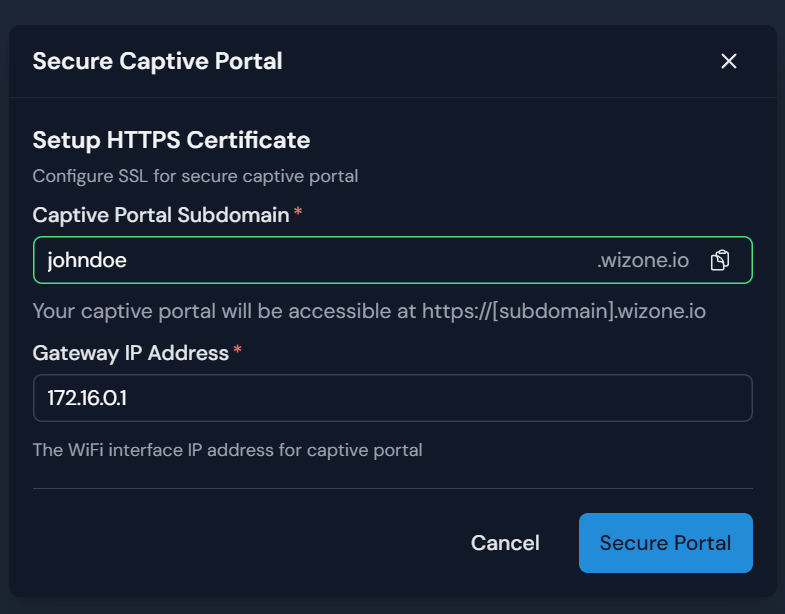
Step 1 – Assign a Subdomain in WiZone Portal
- Go to WiZone Portal → NAS and select the target NAS.
- Click the Secure Captive Portal icon (globe icon).
- Fill in the following:
| Field | Example | Notes |
|---|---|---|
| Captive Portal Subdomain | johndoe | Results in johndoe.wizone.io |
| Gateway IP Address | 10.10.252.1 | IP of your WiFi interface (configured in Stage 1, Step 5.1) |
- Click Secure Portal.
Step 2 – Copy ACME Credentials from WiZone Portal
After clicking Secure Portal, the system displays the ACME credentials needed for pfSense configuration.
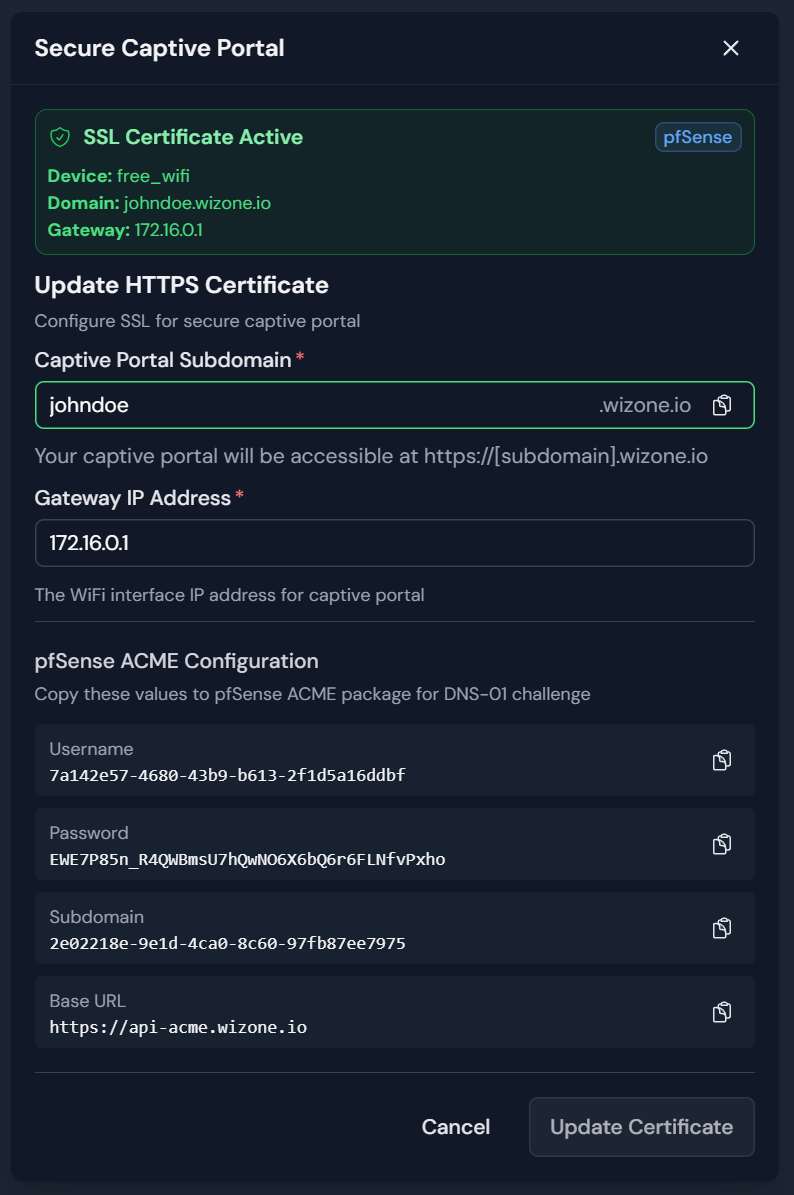
Copy these values — you'll need them in Step 5:
| Field | Notes |
|---|---|
| Username | ACME DNS API username |
| Password | ACME DNS API password |
| Subdomain | DNS challenge subdomain identifier |
| Base URL | Fixed value — see below |
Base URL (ACME DNS)
https://api-acme.wizone.ioWiZone handles the DNS-01 challenge automatically via its own DNS API. No manual DNS record management required.
Step 3 – Install ACME Package on pfSense
- Go to System → Package Manager → Available Packages.
- Search for
acme. - Click + Install.
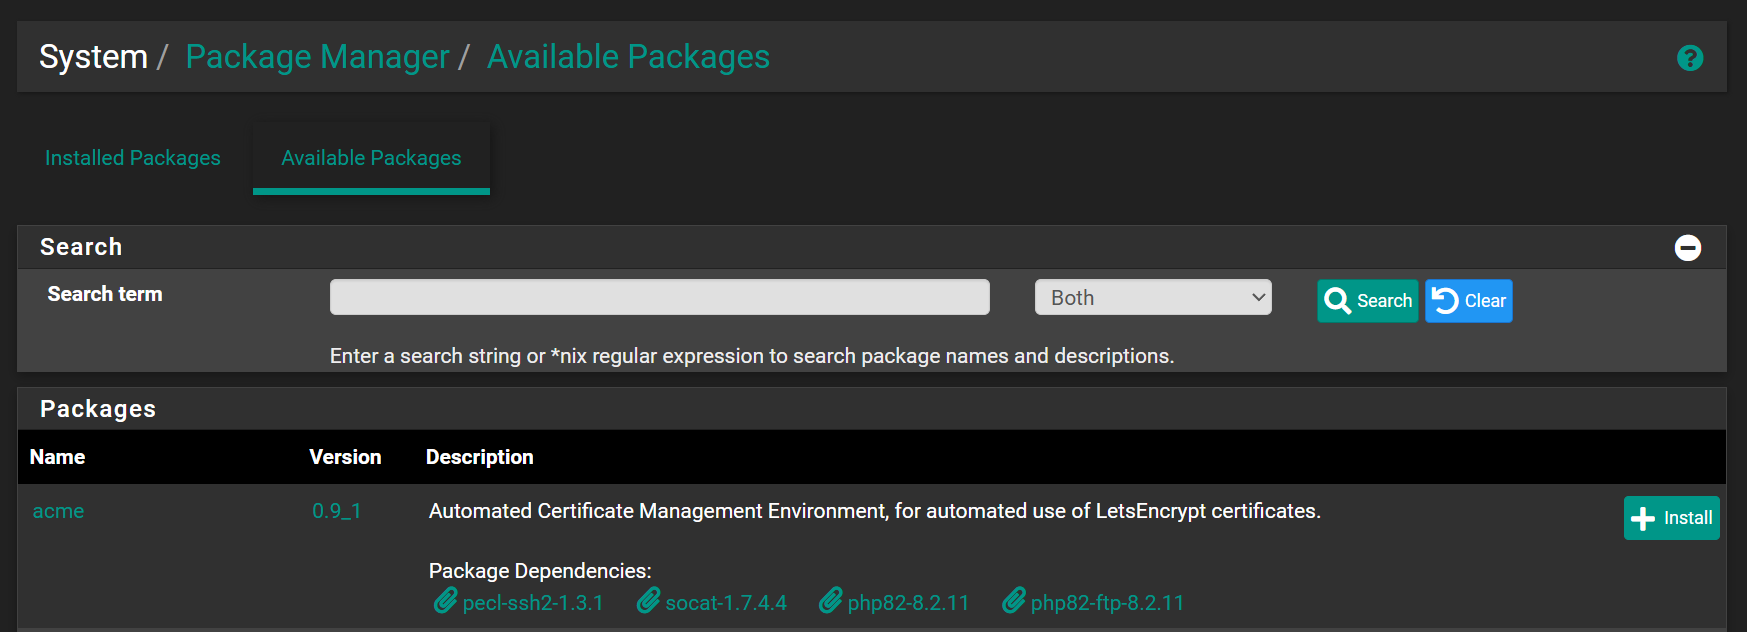
Wait for the installation to complete before continuing.
Step 4 – Create ACME Account Key
- Go to Services → Acme → Account Keys.
- Click + Create new account key and configure:
| Field | Value | Notes |
|---|---|---|
| Name | captive_key | Identifier for this account key |
| ACME Server | Let's Encrypt Production ACME v2 | Use Production for real certificates |
| E-Mail Address | [email protected] | Receives expiry notifications |
- Click Create new account key to generate the private key.
- Click Register ACME account key to register with Let's Encrypt.
- Click Save.
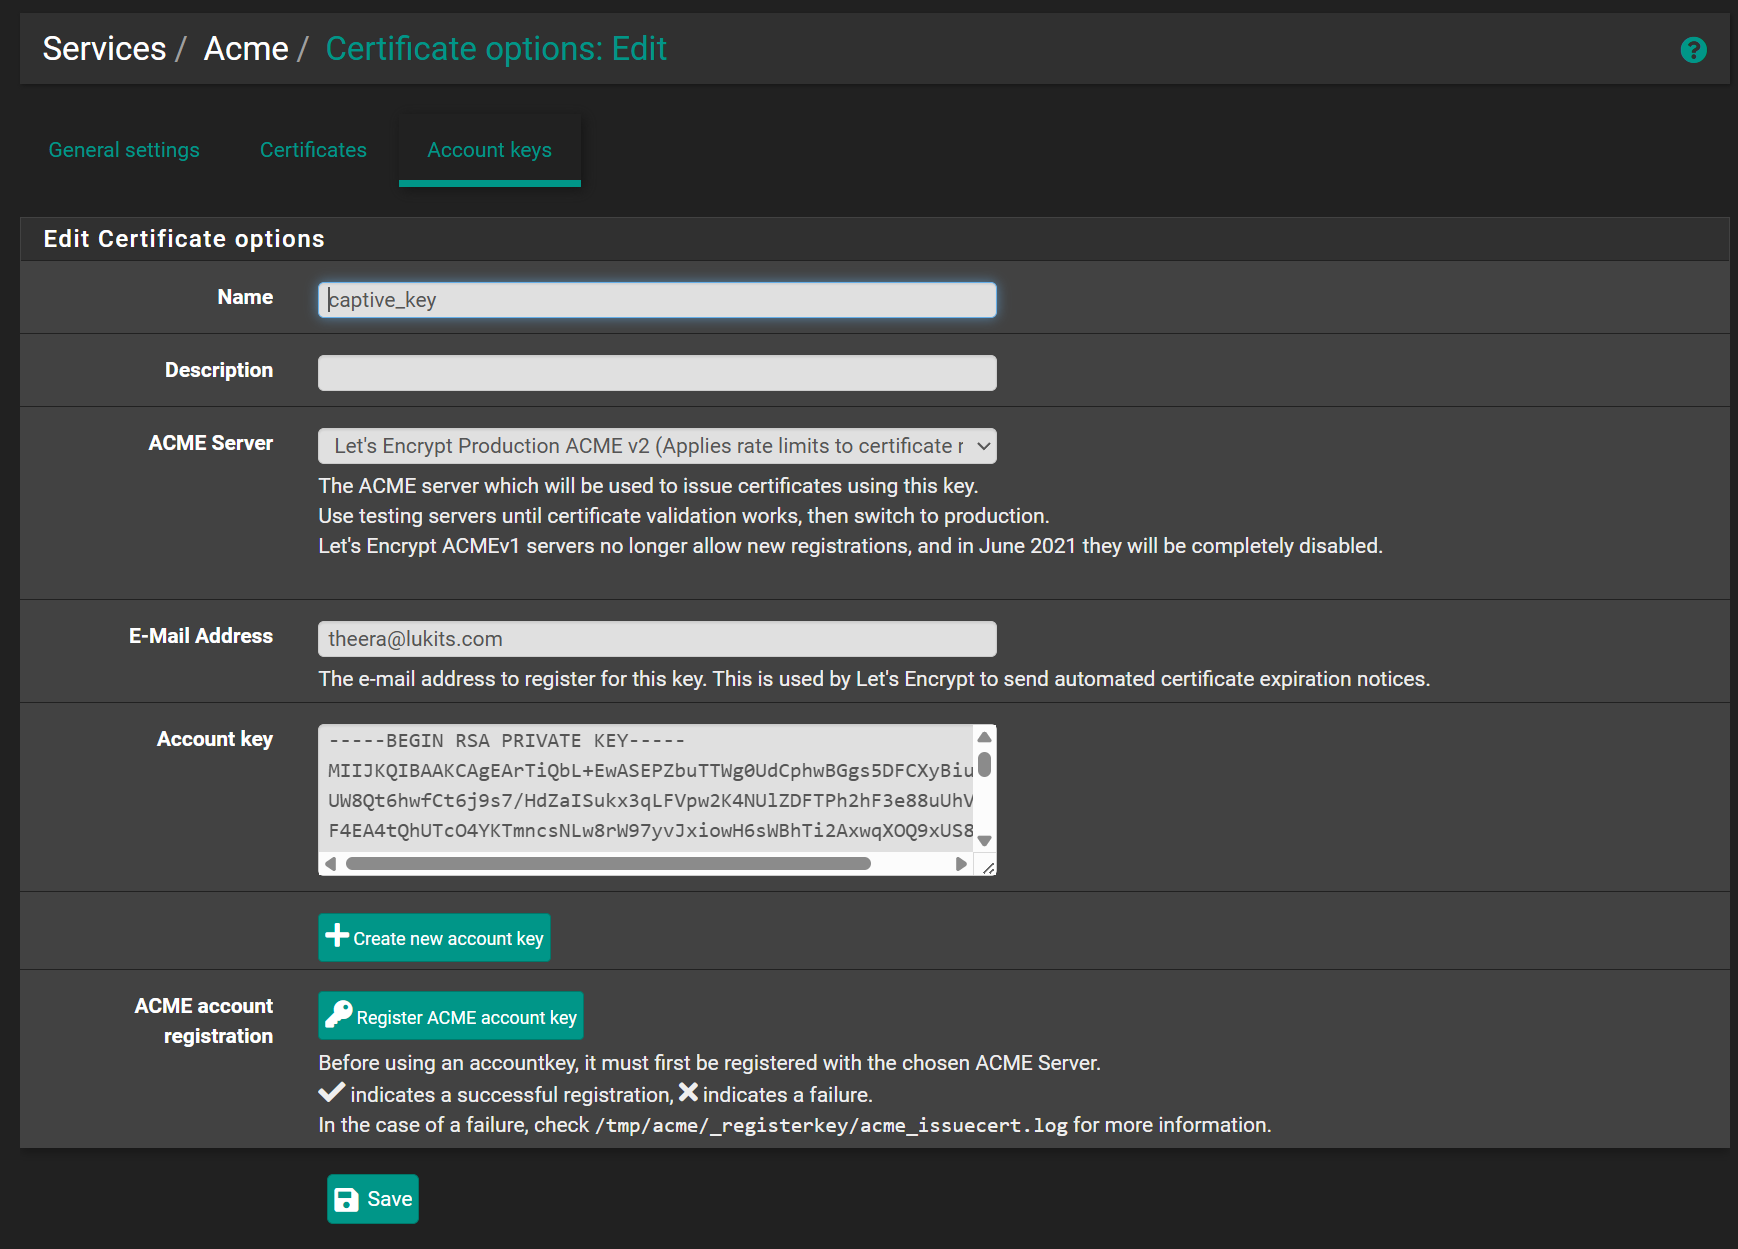
A green ✓ next to the Register button confirms successful registration.
Step 5 – Create Certificate with DNS Challenge
- Go to Services → Acme → Certificates.
- Click + Add and set the general fields:
| Field | Value |
|---|---|
| Name | captive_key |
| Account | captive_key (created in Step 4) |
- Under Domain SAN list, click + Add and configure:
| Field | Value | Notes |
|---|---|---|
| Mode | Enabled | |
| Domainname | johndoe.wizone.io | Full Captive Portal domain |
| Method | DNS-acme-dns.io | ACME DNS challenge |
| Username | (from WiZone Portal) | Copied in Step 2 |
| Password | (from WiZone Portal) | Copied in Step 2 |
| Subdomain | (from WiZone Portal) | ACME DNS identifier from Step 2 — not the same as the portal subdomain |
| Base URL | https://api-acme.wizone.io |
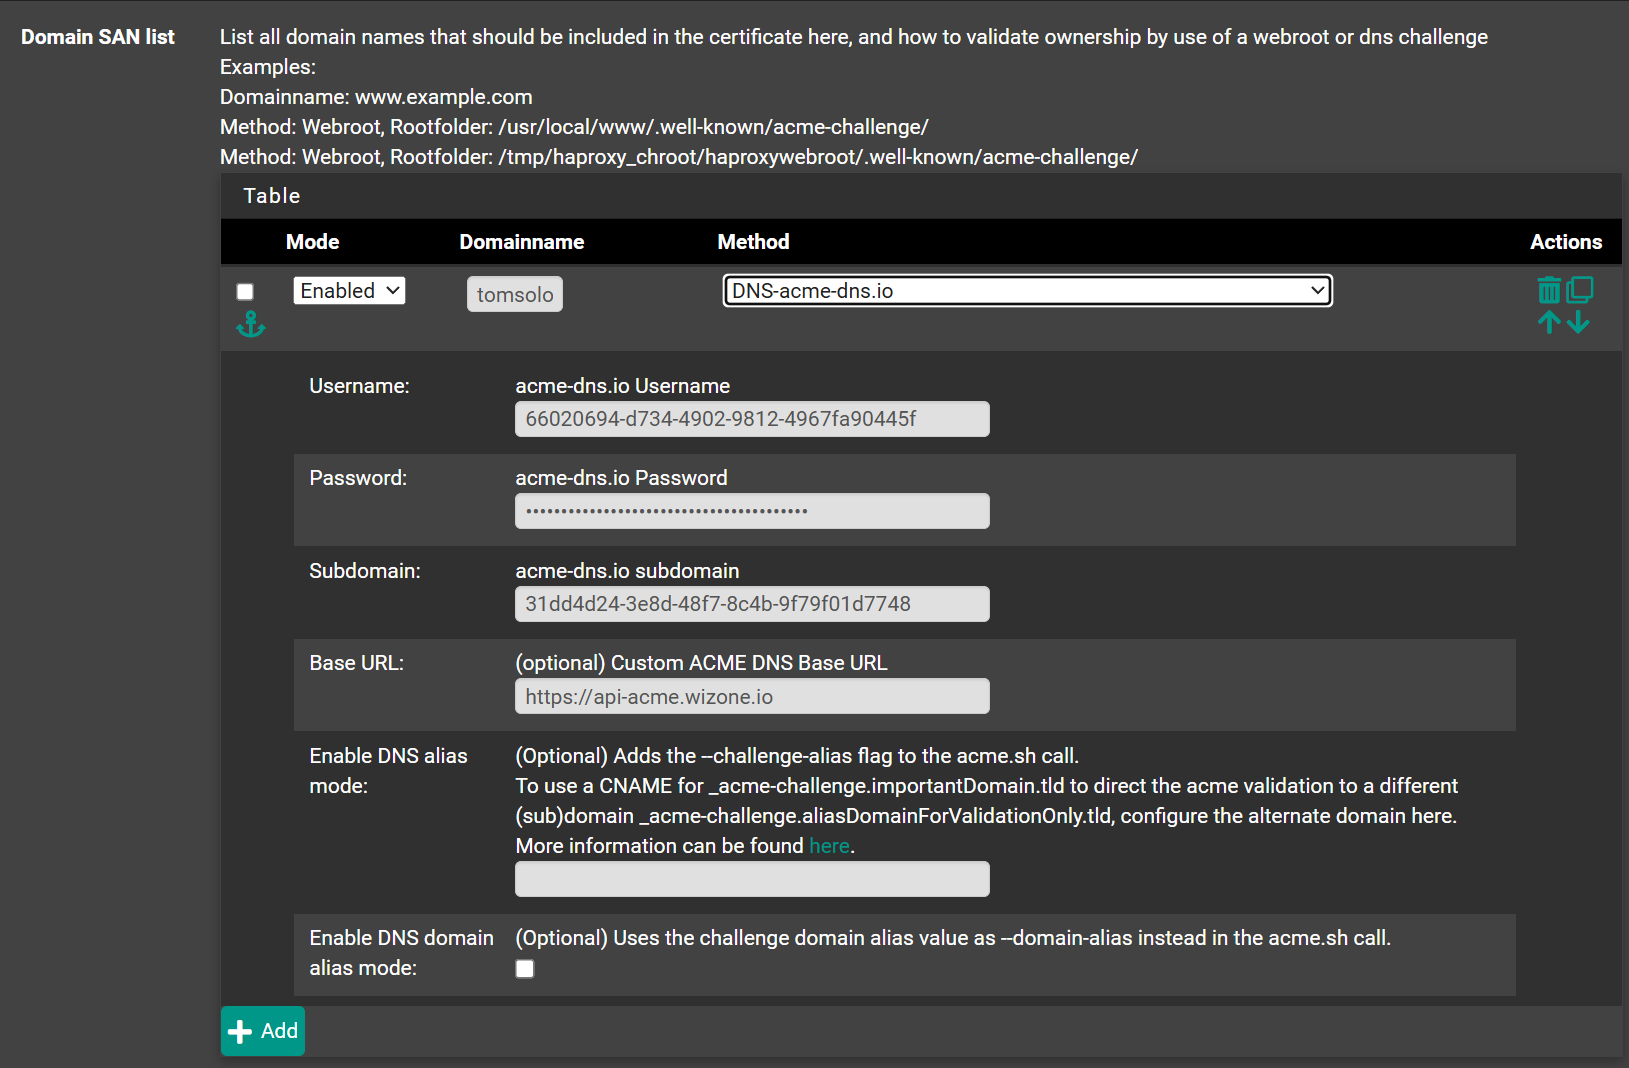
- Click Save.
Step 6 – Issue Certificate
- Go to Services → Acme → Certificates.
- Click Issue/Renew on the
captive_keycertificate. - Wait 1–3 minutes for issuance to complete.
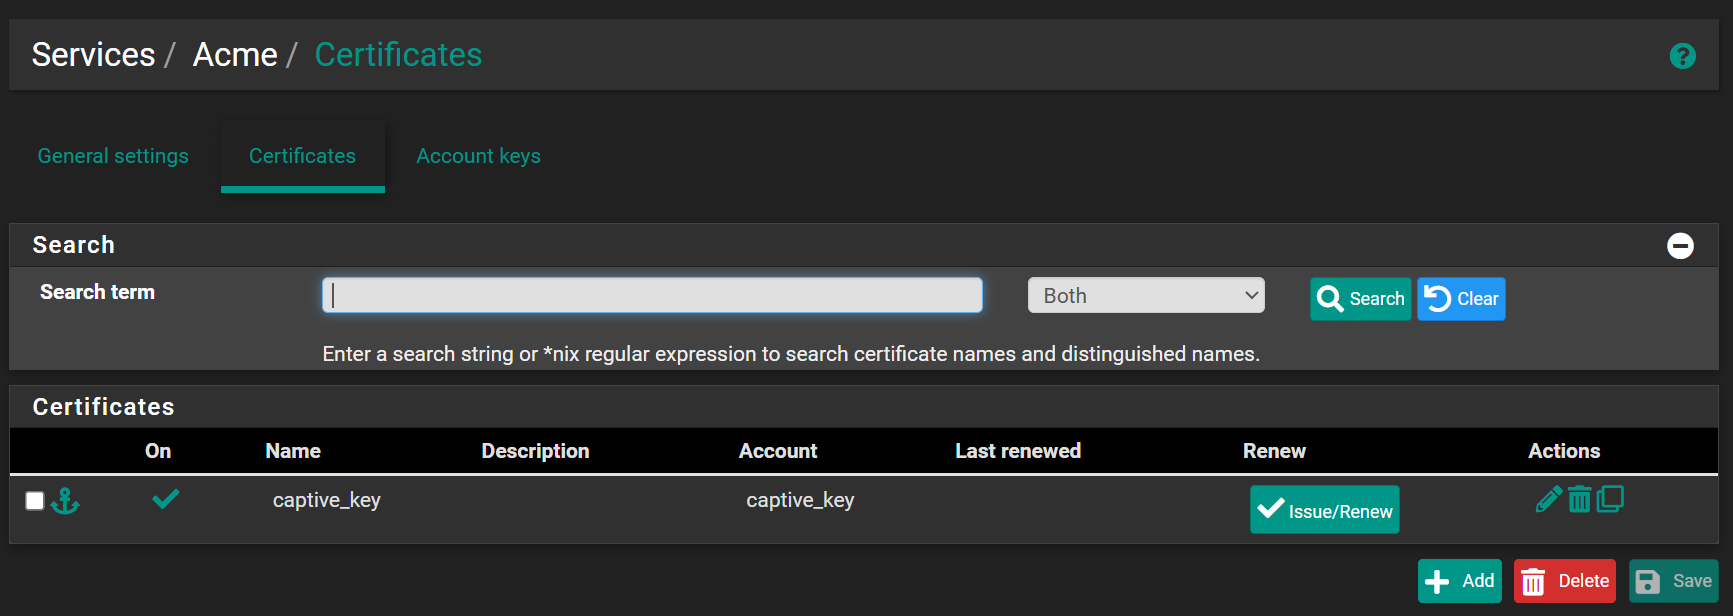
If issuance fails, verify:
- Username, Password, Subdomain, and Base URL match exactly what's shown in the Portal
- pfSense has internet access
- The ACME account key was registered successfully (Step 4)
Step 7 – Add Certificate Action (Auto-restart on Renewal)
Go back to Services → Acme → Certificates and open captive_key for editing.
In the Actions list section, click + Add and configure:
| Field | Value | Notes |
|---|---|---|
| Mode | Enabled | |
| Command | captiveportal [your zone name] | Must be prefixed with captiveportal followed by the zone name you will create in Stage 3 (e.g. captiveportal freewifi) |
| Method | Restart Local Service | Restarts the portal after each cert renewal |
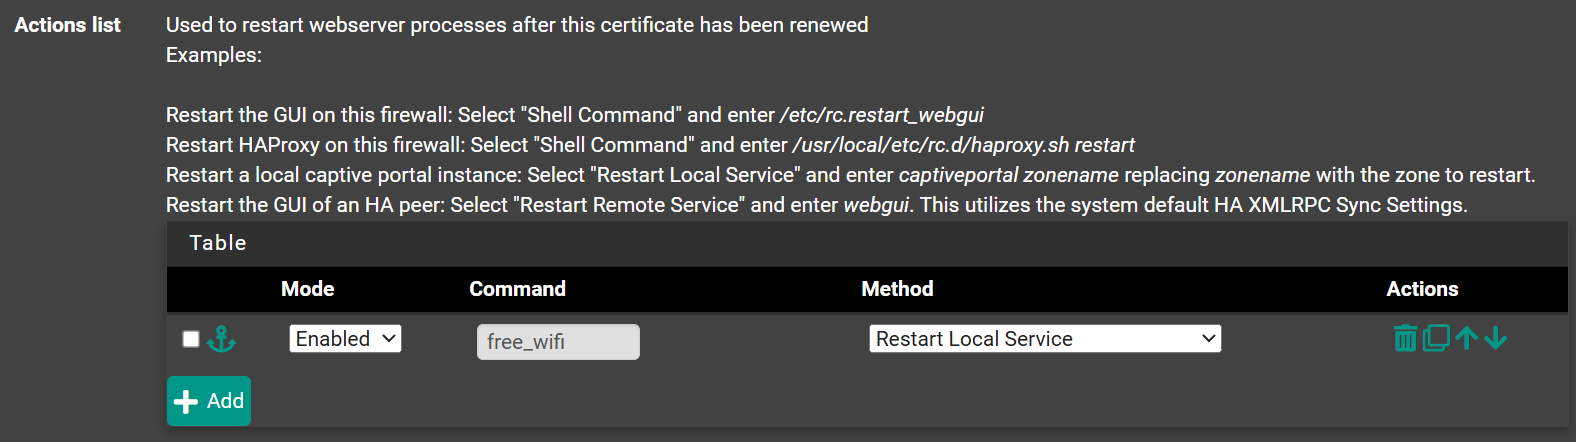
Click Save.
The
captiveportal prefix is required — entering just the zone name alone (e.g. freewifi) will not work. The zone name portion must exactly match the Captive Portal zone configured in Services → Captive Portal.This ensures the Captive Portal service restarts automatically after each SSL renewal, preventing HTTPS errors from stale cert files.
Step 8 – Enable Auto-renewal Cron
Go to Services → Acme → Settings and enable Cron Entry.
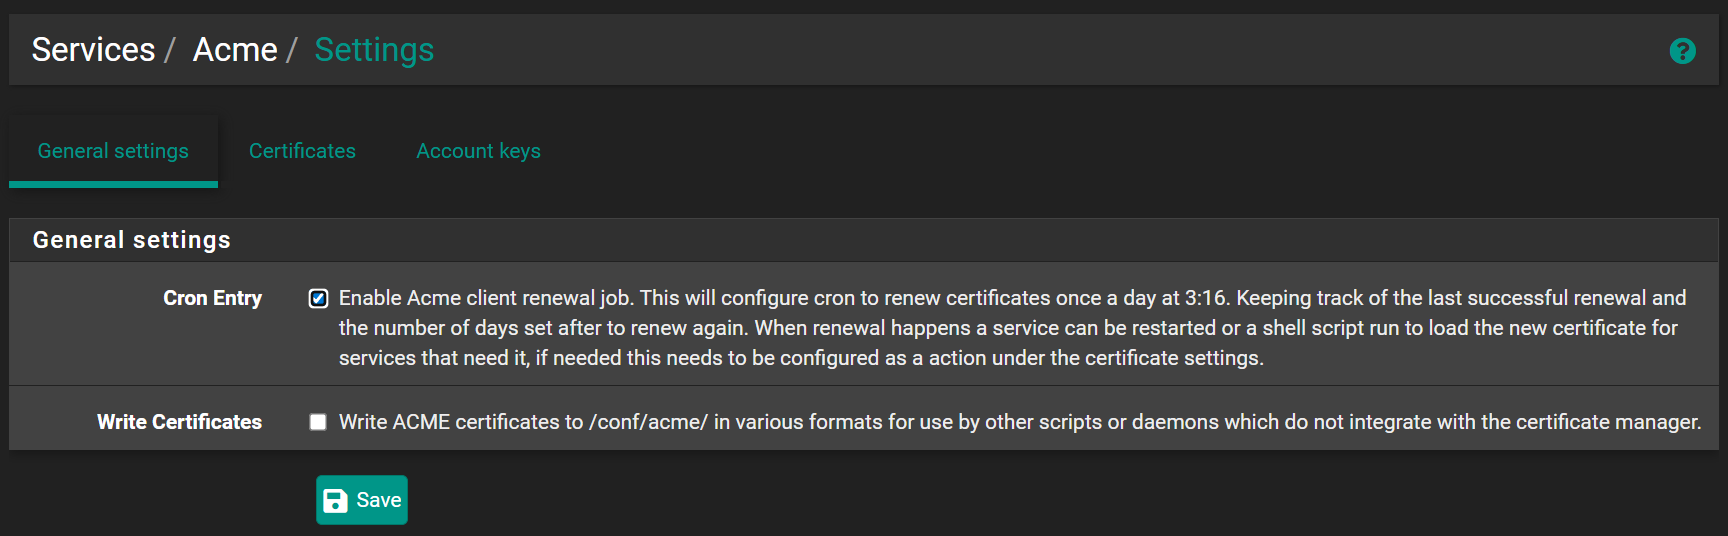
Click Save.
Let's Encrypt certificates expire every 90 days. Cron runs a daily renewal check at 3:16 AM — no manual renewal required.