Mikrotik Setup
WireGuard Tunnel
Create an encrypted WireGuard VPN tunnel from MikroTik to WiZone Cloud.
Important: Get your configuration from the WiZone Portal first.
Go to Devices → NAS Configuration and keep it open — you will copy values from there in every step below.
Go to Devices → NAS Configuration and keep it open — you will copy values from there in every step below.
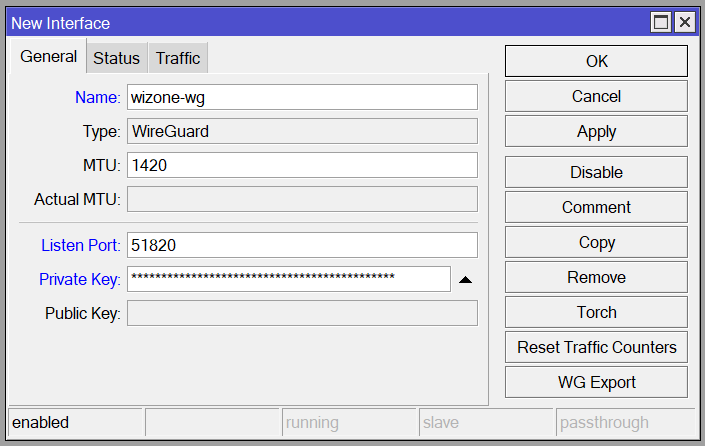
Step 1 – Create WireGuard Interface
Go to WireGuard → WireGuard tab → Add (+) and configure:
| Field | Value |
|---|---|
| Name | wizone-wg |
| Listen Port | 51820 |
| Private Key | PEER PRIVATE KEY from Portal |
Click Apply → OK.
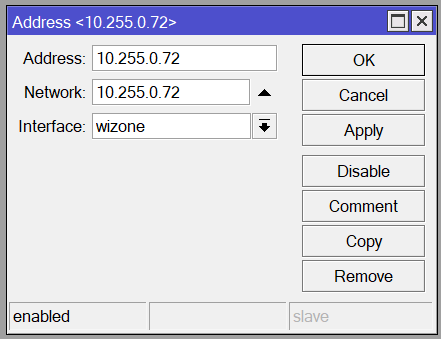
Step 2 – Assign IP to WireGuard Interface
Go to IP → Addresses → Add (+) and configure:
| Field | Value |
|---|---|
| Address | WG INTERFACE IP from Portal |
| Interface | wizone-wg |
Click Apply → OK.
Step 3 – Add Peer
Go to WireGuard → Peers tab → Add (+) and configure:
| Field | Value |
|---|---|
| Interface | wizone-wg |
| Public Key | TUNNEL PUBLIC KEY from Portal |
| Endpoint Address | ••••••••••••• |
| Endpoint Port | TUNNEL PORT from Portal (e.g. 51821) |
| Allowed Address | 10.1.10.0/24, 10.1.200.0/24, 10.255.0.1/32 |
Click Apply → OK.

Three Allowed Addresses are required:
10.1.10.0/24— WiZone system network (RADIUS, API)10.1.200.0/24— WiZone support team VPN (remote debugging)10.255.0.1/32— VPN tunnel gateway
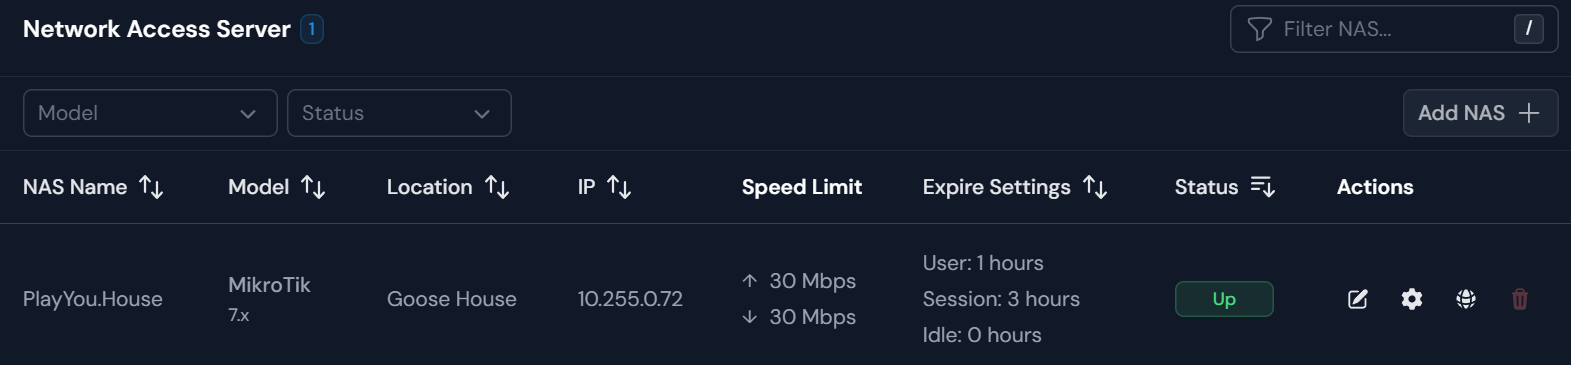
Verify
Go to WiZone Portal → Devices → NAS List and check the MikroTik Status is UP