Mikrotik Setup
Hotspot + RADIUS
Enable the MikroTik captive portal and connect it to WiZone RADIUS authentication.
Step 1 – Add RADIUS Server
Get your RADIUS values from WiZone Portal → Devices → NAS Configuration
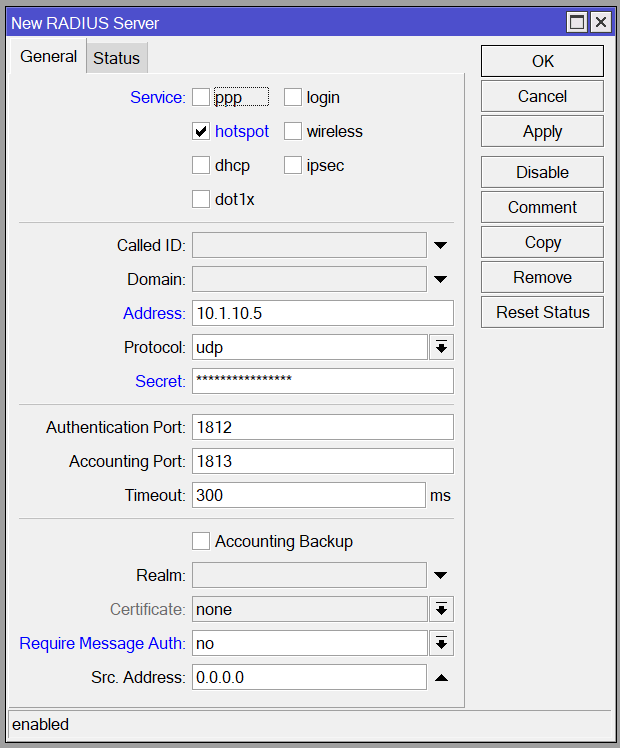
Go to RADIUS → Add (+) and configure:
| Field | Value |
|---|---|
| Service | ✅ hotspot |
| Address | RADIUS SERVER from Portal |
| Secret | SHARED SECRET from Portal |
| Authentication Port | 1812 |
| Accounting Port | 1813 |
| Require Message Auth | no |
Click Apply → OK.
Step 2 – Enable RADIUS Incoming (CoA)
Go to RADIUS → Incoming button (top of window) and configure:
| Field | Value |
|---|---|
| Accept | ✅ Checked |
| Port | 3799 |
Click Apply → OK.
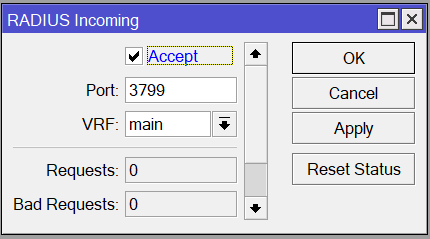
This enables CoA (Change of Authorization) — allows WiZone Portal to disconnect user sessions instantly when an admin kicks a user or a session expires.
Step 3 – Create Hotspot with Wizard
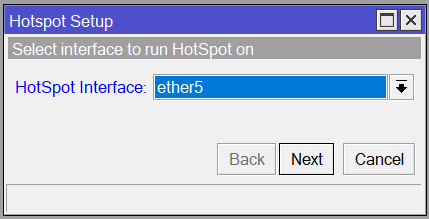
Go to IP → Hotspot → Servers tab and click Hotspot Setup.
| Step | Value |
|---|---|
| Hotspot Interface | bridge (same interface used for Wi-Fi) |
| Local Address of Network | 172.16.0.1/24 (auto-filled if set in Stage 1) |
| Address Pool of Network | 172.16.0.10 - 172.16.0.254 |
| Select Certificate | Select the cert issued in Stage 4 (or none if skipping HTTPS) |
| SMTP Server | 0.0.0.0 |
| DNS Servers | 1.1.1.1 |
| DNS Name | Your domain from Stage 4 (leave blank if skipping HTTPS) |
Click Next through each step until done.
Step 4 – Configure Hotspot Server Profile
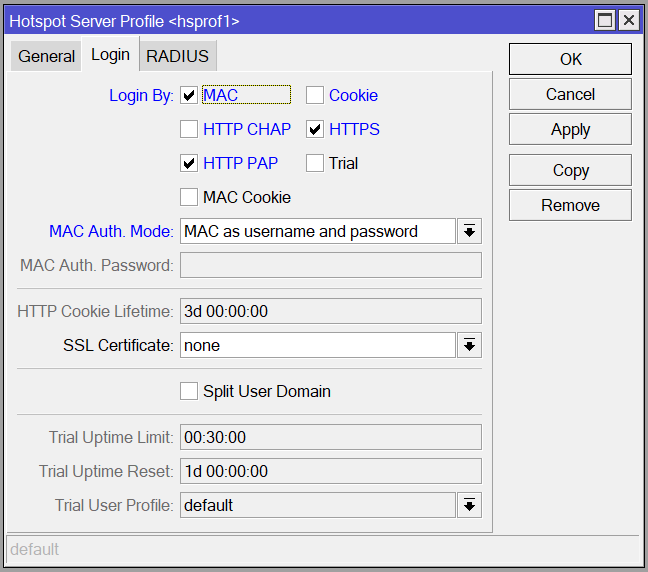
Go to IP → Hotspot → Server Profiles tab → double-click hsprof1.
Login tab:
| Field | Value |
|---|---|
| Login By | ✅ MAC, ✅ HTTP PAP, ✅ HTTPS (uncheck CHAP, Cookie, Trial) |
| MAC Auth. Mode | MAC as username and password |
| MAC Auth. Password | Any value, e.g. mktom (cannot be blank) |
| HTTP Cookie Lifetime | 3d 00:00:00 |
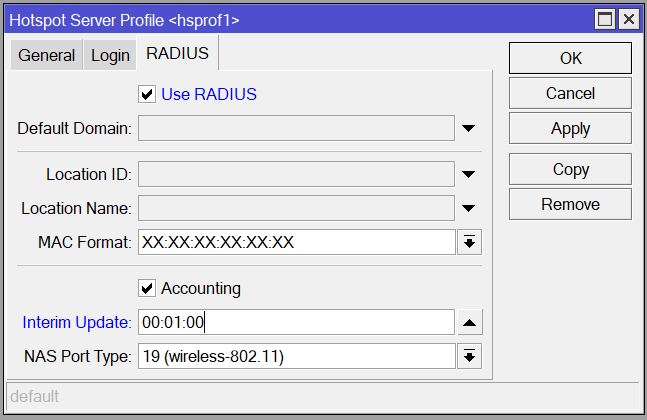
RADIUS tab:
| Field | Value |
|---|---|
| Use RADIUS | ✅ Checked |
| Accounting | ✅ Checked |
| Interim Update | 00:01:00 |
| NAS Port Type | 19 (wireless-802.11) |
Click Apply → OK.
Step 5 – Configure Hotspot Server Settings
Go to IP → Hotspot → Servers tab → double-click your hotspot server.
| Field | Value |
|---|---|
| Name | hotspot1 |
| Interface | ether5 (your Wi-Fi interface) |
| Address Pool | wifi-pool |
| Profile | freewifi |
| Idle Timeout | 00:05:00 |
| Keepalive Timeout | (leave empty) |
| Addresses Per MAC | 2 |
Click Apply → OK.

Step 6 – Configure User Profile
Go to IP → Hotspot → User Profiles tab → double-click default.
| Field | Value |
|---|---|
| Keepalive Timeout | (leave empty) |
| Status Autorefresh | 00:01:00 |
Click Apply → OK.

Step 7 – Configure Walled Garden
Walled Garden defines which websites users can access before logging in. Without this, users cannot reach the login portal page.
Go to IP → Hotspot → Walled Garden tab and add the following entries (Action = allow for each):
| # | Dst. Host |
|---|---|
| 0 | portal.wizone.io |
| 1 | static.cloudflareinsights.com |
| 2 | challenges.cloudflare.com |

Step 8 – Upload Login Page
- In WiZone Portal → NAS Configuration, click Download next to Hotspot setup files.
- Extract the downloaded archive. Key files:
| File | Purpose |
|---|---|
login.html | Main login page |
alogin.html | Auto-login redirect page after successful login |
- In WinBox, go to Files and open the
hotspotfolder (created by the wizard). - Drag all extracted files into the
hotspot/folder on MikroTik.

- Go to IP → Hotspot → Server Profiles tab → double-click hsprof1.
- In the General tab, set HTML Directory →
hotspot.
Click Apply → OK.

Verify

- Connect a phone to Wi-Fi.
- Open a browser → it should redirect to the WiZone login page.
- Log in with a test account from Portal → should authenticate and access the internet.

| Problem | Check |
|---|---|
| No redirect to login | Verify Hotspot server is on the correct interface; DHCP is working |
| Redirects but login fails | Verify WireGuard tunnel (Stage 2) and RADIUS secret (Step 1 above) |