Configure RADIUS Server for WiZone Authentication
Step 10 – Configure RADIUS Server for WiZone Authentication
This step connects your Mikrotik router to the WiZone RADIUS Server, allowing centralized authentication, accounting, and real-time control (CoA – Change of Authorization).
Once configured, WiZone will manage user sessions and data accounting directly through RADIUS communication.
10.1 Add RADIUS Server
- Go to RADIUS → Add (+)
- Configure the following settings:
| Field | Value |
|---|---|
| Service | hotspot (select additional services as needed) |
| Address | 10.1.10.7 |
| Protocol | udp |
| Secret | nAnAH3RZMw53 |
| Authentication Port | 1812 |
| Accounting Port | 1813 |
| Timeout | 300 ms |
| Require Message Auth | no |
✅ Make sure the hotspot option is checked to allow WiZone to authenticate users via the captive portal.

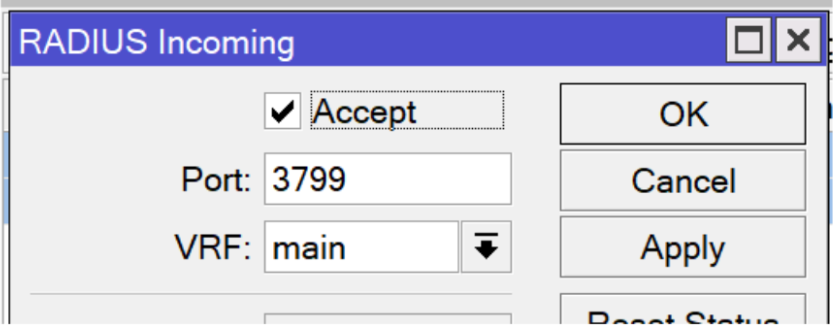
10.2 Enable RADIUS Incoming (CoA Support)
WiZone uses Change of Authorization (CoA) requests to manage active user sessions — for example, disconnecting, updating quota, or reauthenticating users.
- Go to RADIUS → Incoming
- Check Accept
- Set Port to
3799(default CoA port) - Click Apply → OK
10.3 Configure Firewall Rule for CoA Port
To allow RADIUS CoA packets to reach the router, add a firewall rule to accept UDP traffic on port 3799.
- Navigate to IP → Firewall → Filter Rules → Add (+)
- Set the following parameters:
| Field | Value |
|---|---|
| Chain | input |
| Protocol | udp |
| Dst. Port | 3799 |
| Action | accept |
- Click Apply → OK
- Move the rule to the top of the list to ensure priority handling.

Import SSL Certificate for WiZone Captive Portal
This section explains how to upload and import SSL/TLS certificates into Mikrotik for secure HTTPS captive portal access.
Configure Hotspot Profile for WiZone
This section explains how to create and configure a hotspot server profile linked to the WiZone captive portal, SSL certificate, and RADIUS authentication.