Configure Hotspot Profile for WiZone
Step 11 – Configure Hotspot Profile for WiZone
After setting up RADIUS, DNS, and certificates, the next step is to create a Hotspot Profile.
This profile defines how users connect to WiZone, including login methods, SSL certificate, and RADIUS accounting behavior.
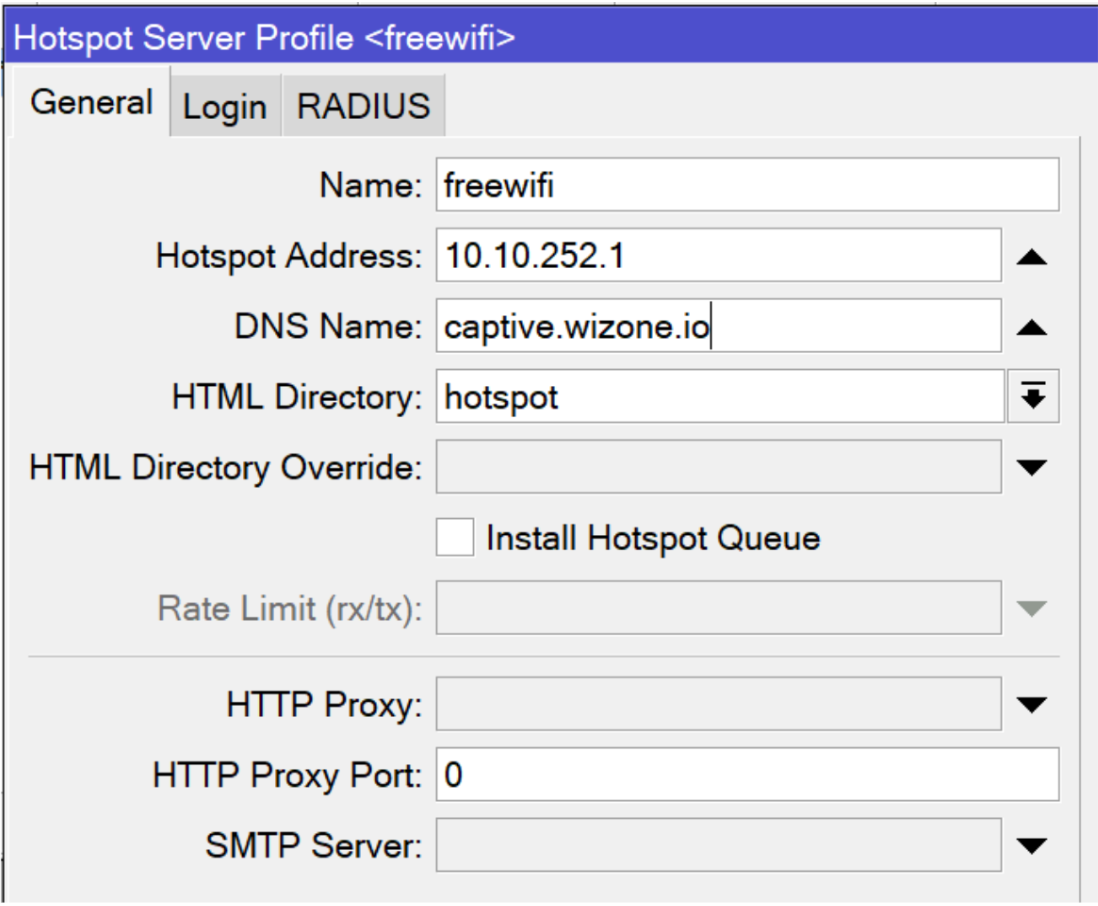
11.1 Create Hotspot Server Profile
- Go to IP → Hotspot → Server Profiles → Add (+)
- Configure the following fields under the General tab:
| Field | Value |
|---|---|
| Name | freewifi |
| Hotspot Address | 10.10.252.1 |
| DNS Name | captive.wizone.io |
| HTML Directory | hotspot |
| Rate Limit (rx/tx) | (optional) |
| HTTP Proxy Port | 0 |
| SMTP Server | (leave blank) |
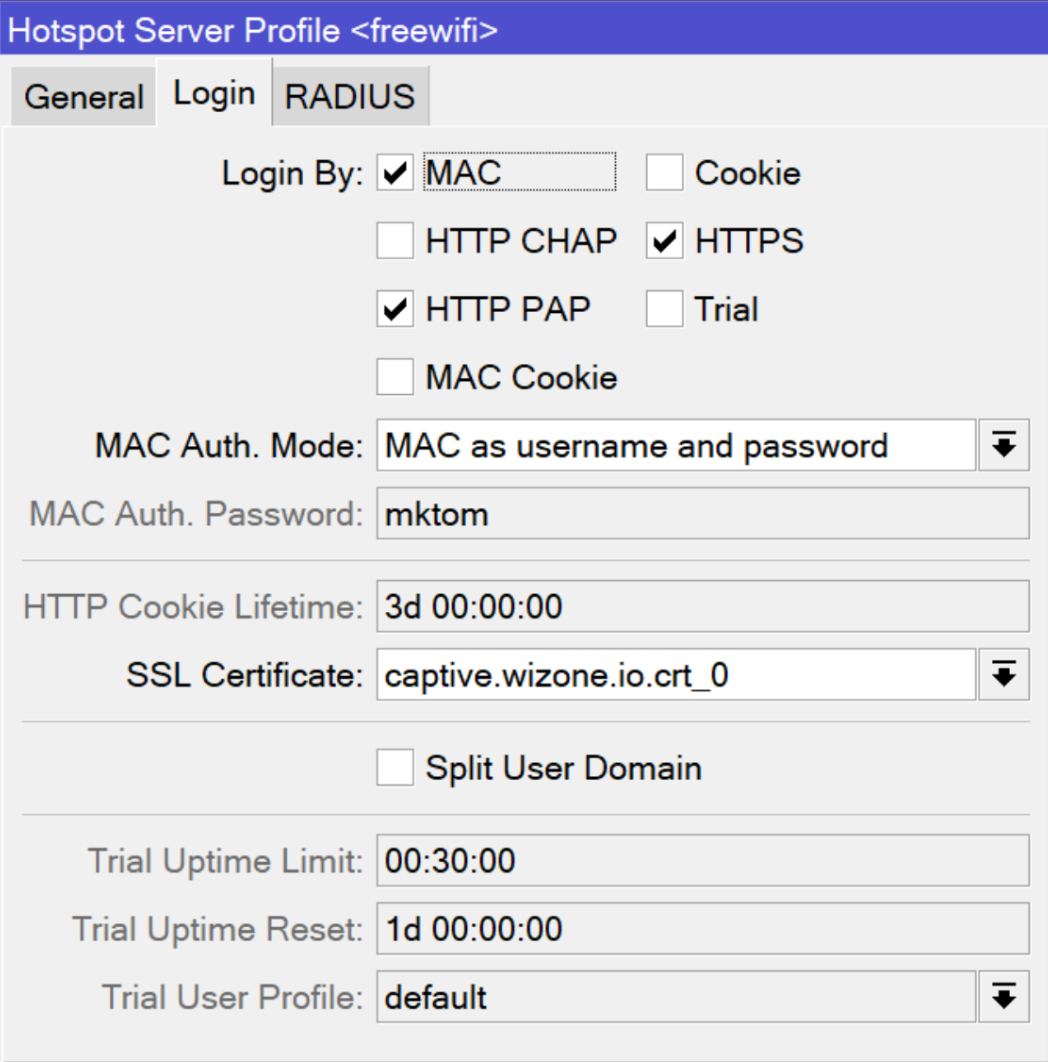
11.2 Configure Login Settings
- Open the Login tab
- Enable the following login methods:
✅ MAC
✅ HTTPS
Then set these options:
| Field | Value |
|---|---|
| MAC Auth. Mode | MAC as username and password |
| MAC Auth. Password | mktom |
| SSL Certificate | captive.wizone.io.crt_0 |
| HTTP Cookie Lifetime | 3d 00:00:00 |
You may also enable Trial Login for testing purposes and define usage limits.
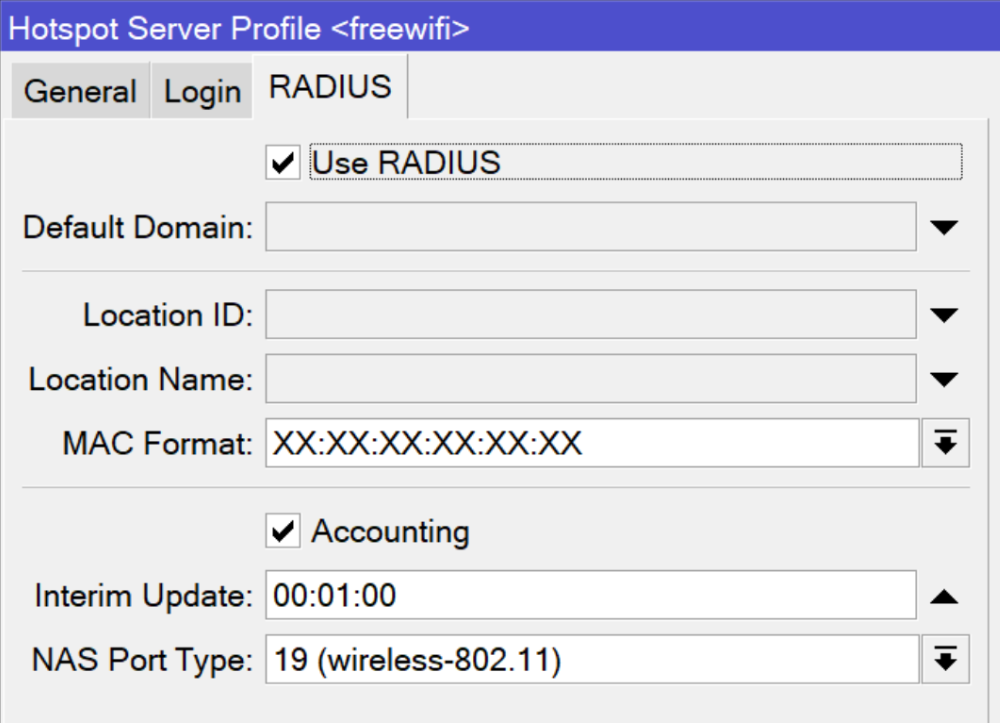
11.3 Configure RADIUS and Accounting
- Go to the RADIUS tab
- Enable both checkboxes:
✅ Use RADIUS
✅ Accounting
- Configure the following parameters:
| Field | Value |
|---|---|
| Interim Update | 00:01:00 (send accounting updates every 1 minute) |
| NAS Port Type | 19 (wireless-802.11) |
This ensures that all authentication and accounting data is processed through the WiZone RADIUS server and updated periodically for session tracking.
Configure RADIUS Server for WiZone Authentication
This section explains how to configure the RADIUS server, enable incoming CoA requests, and set the necessary firewall rules for WiZone integration.
Configure Hotspot Server for WiZone
This section explains how to create and configure a Mikrotik hotspot server, allow WiZone and Cloudflare services, and upload the custom WiZone login page.