Configure Hotspot Server for WiZone
Step 12 – Configure Hotspot Server for WiZone
After creating the hotspot profile and enabling RADIUS integration, set up the actual Hotspot Server that users will connect to via Wi-Fi.
This defines the active interface, IP pool, and portal behavior.
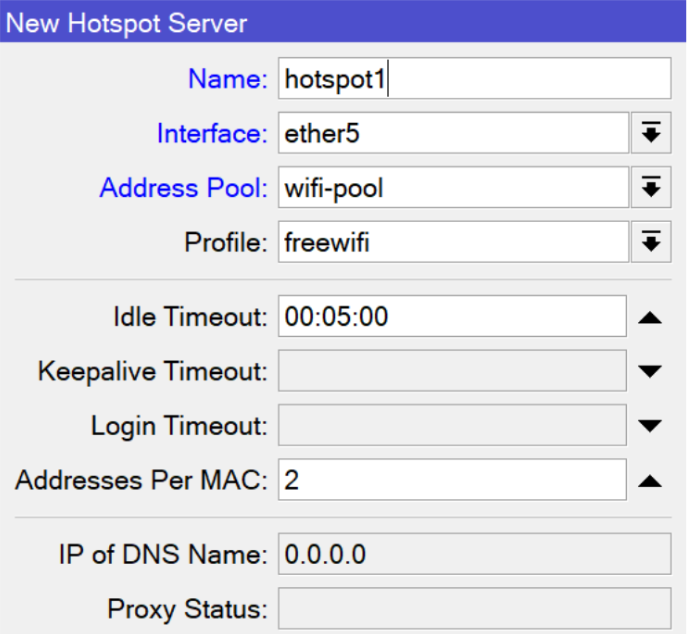
12.1 Create Hotspot Server
- Go to IP → Hotspot → Servers → Add (+)
- Configure as follows:
| Field | Value |
|---|---|
| Name | hotspot1 |
| Interface | ether5 (your Wi-Fi interface) |
| Address Pool | wifi-pool |
| Profile | freewifi |
| Idle Timeout | 00:05:00 |
| Keepalive Timeout | 00:05:00 |
| Login Timeout | (leave default) |
| Addresses Per MAC | 2 |
| IP of DNS Name | 0.0.0.0 (default) |
Click Apply → OK
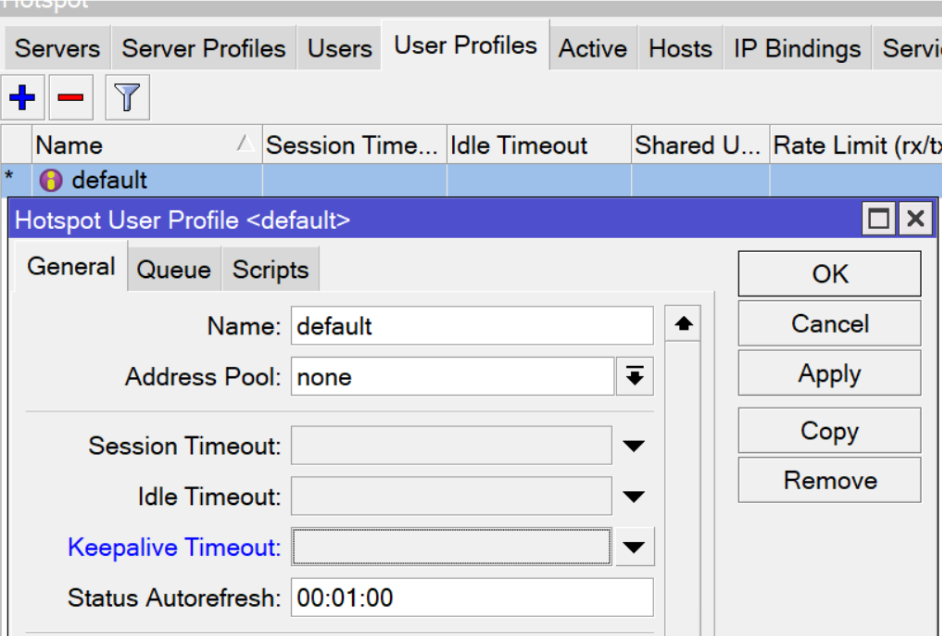
12.2 Configure User Profile Defaults
- Under Hotspot → User Profiles → default, set:
| Field | Value |
|---|---|
| Session Timeout | (optional) |
| Idle Timeout | (optional) |
| Keepalive Timeout | 00:05:00 |
| Status Autorefresh | 00:01:00 |
This ensures stable user sessions and consistent portal updates.
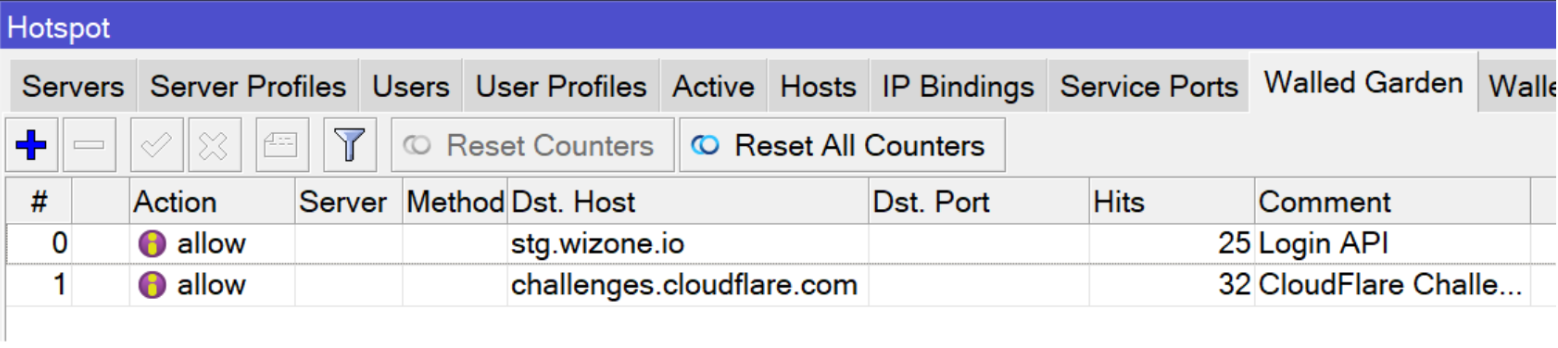
12.3 Add Walled Garden Entries
The Walled Garden allows specific domains to be accessed even before login.
Add the following entries to ensure WiZone authentication and Cloudflare challenges work properly.
- Navigate to Hotspot → Walled Garden → Add (+)
- Add the following hosts:
| Allow Hostname | Description |
|---|---|
stg.wizone.io | WiZone authentication service |
challenges.cloudflare.com | Cloudflare verification service |
Click Apply → OK after adding each.
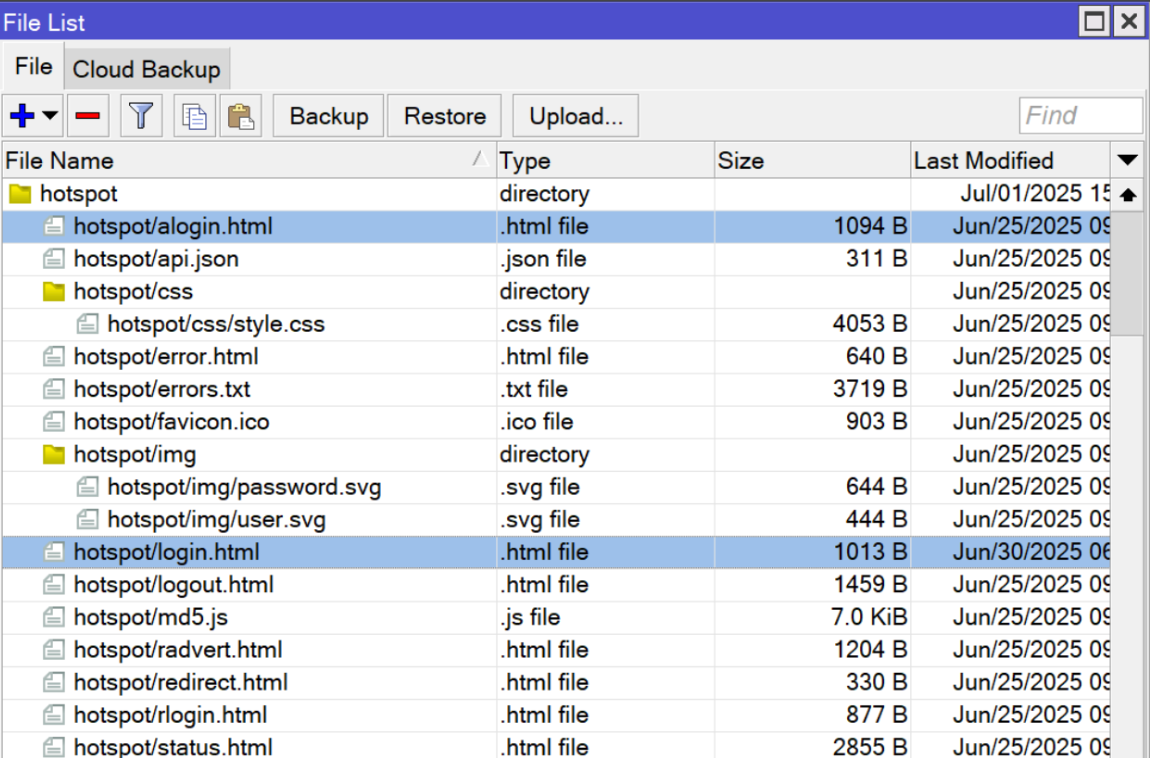
12.4 Upload Custom Login Page
Upload your WiZone login and error pages to the hotspot directory so that users see the correct branded portal.
- Go to Files → hotspot folder
- Upload the following files:
| File Name | Purpose |
|---|---|
alogin.html | Auto-login page |
login.html | Main WiZone login page |
error.html | Display for login or network errors |
Once uploaded, your hotspot directory should look similar to this:
Configure Hotspot Profile for WiZone
This section explains how to create and configure a hotspot server profile linked to the WiZone captive portal, SSL certificate, and RADIUS authentication.
Configure Remote Logging for WiZone
This section explains how to configure Mikrotik to send firewall and hotspot logs to the WiZone centralized log server using remote syslog.