pfSense Setup
Network Configuration
Configure routing, gateway, WiFi, and DHCP server for WiZone connection.
Note: The IP Addresses in this guide are examples only. You may use any IP Range that suits your network configuration.
Step 1 - Add Gateway
- Go to System → Routing → Gateways.
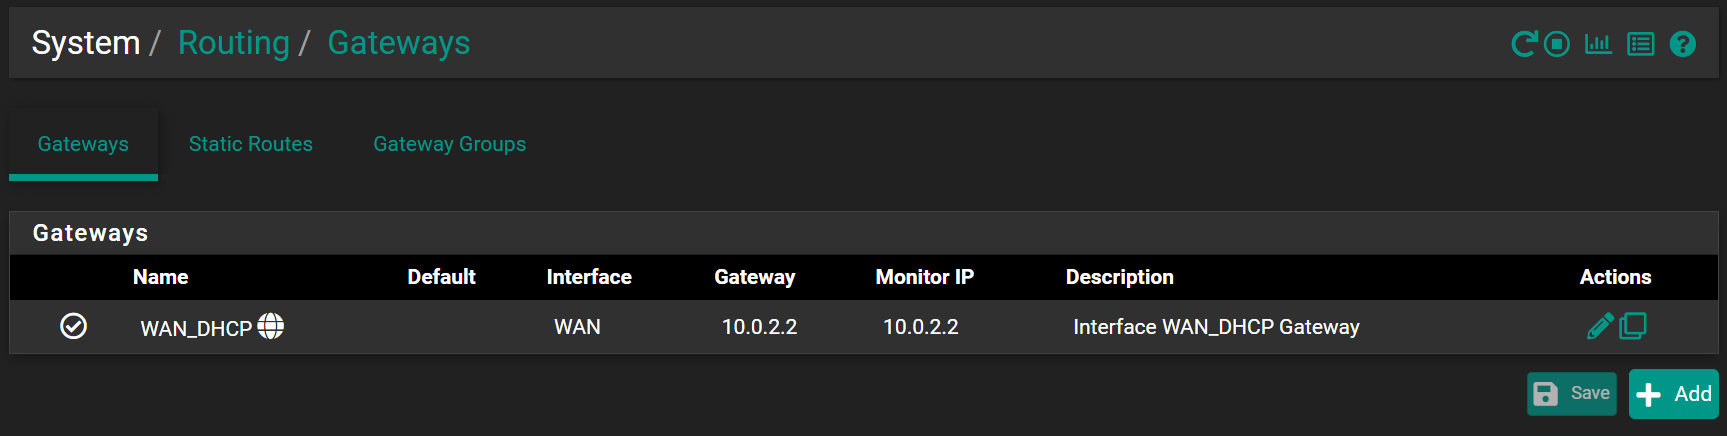
- Click + Add to create a new gateway.
- Fill in the following details:
| Field | Value | Description |
|---|---|---|
| Interface | WG_WiZone | Select the WireGuard interface you created earlier. |
| Address Family | IPv4 | Choose IPv4 protocol |
| Name | (choose any name) | A name to identify this WiZone gateway– e.g., WIZONE_GW |
| Gateway | 10.255.0.1 | Gateway IP address (typically .1 in the WG subnet) |
The gateway IP address is typically the first IP in your WireGuard interface subnet.
If your WG INTERFACE IP from the WiZone Portal is
If your WG INTERFACE IP from the WiZone Portal is
10.255.0.X/24, the gateway is usually 10.255.0.1.
- Click Save and Apply Changes.
Step 2 - Add Routing
- Go to System → Routing → Static Routes.
- Click + Add to create a new route.
- Configure the route using the following settings:
| Field | Example Value | Description |
|---|---|---|
| Destination Network | 10.1.10.0/24 | Route traffic to the WiZone server |
| Gateway | WIZONE_GW - 10.255.0.1 | Gateway created in Step 1 |
| Description | WiZone System | For administrative reference |

Optional : If you need allow wizone support team remote access to your NAS, add another static route
Destination Network: 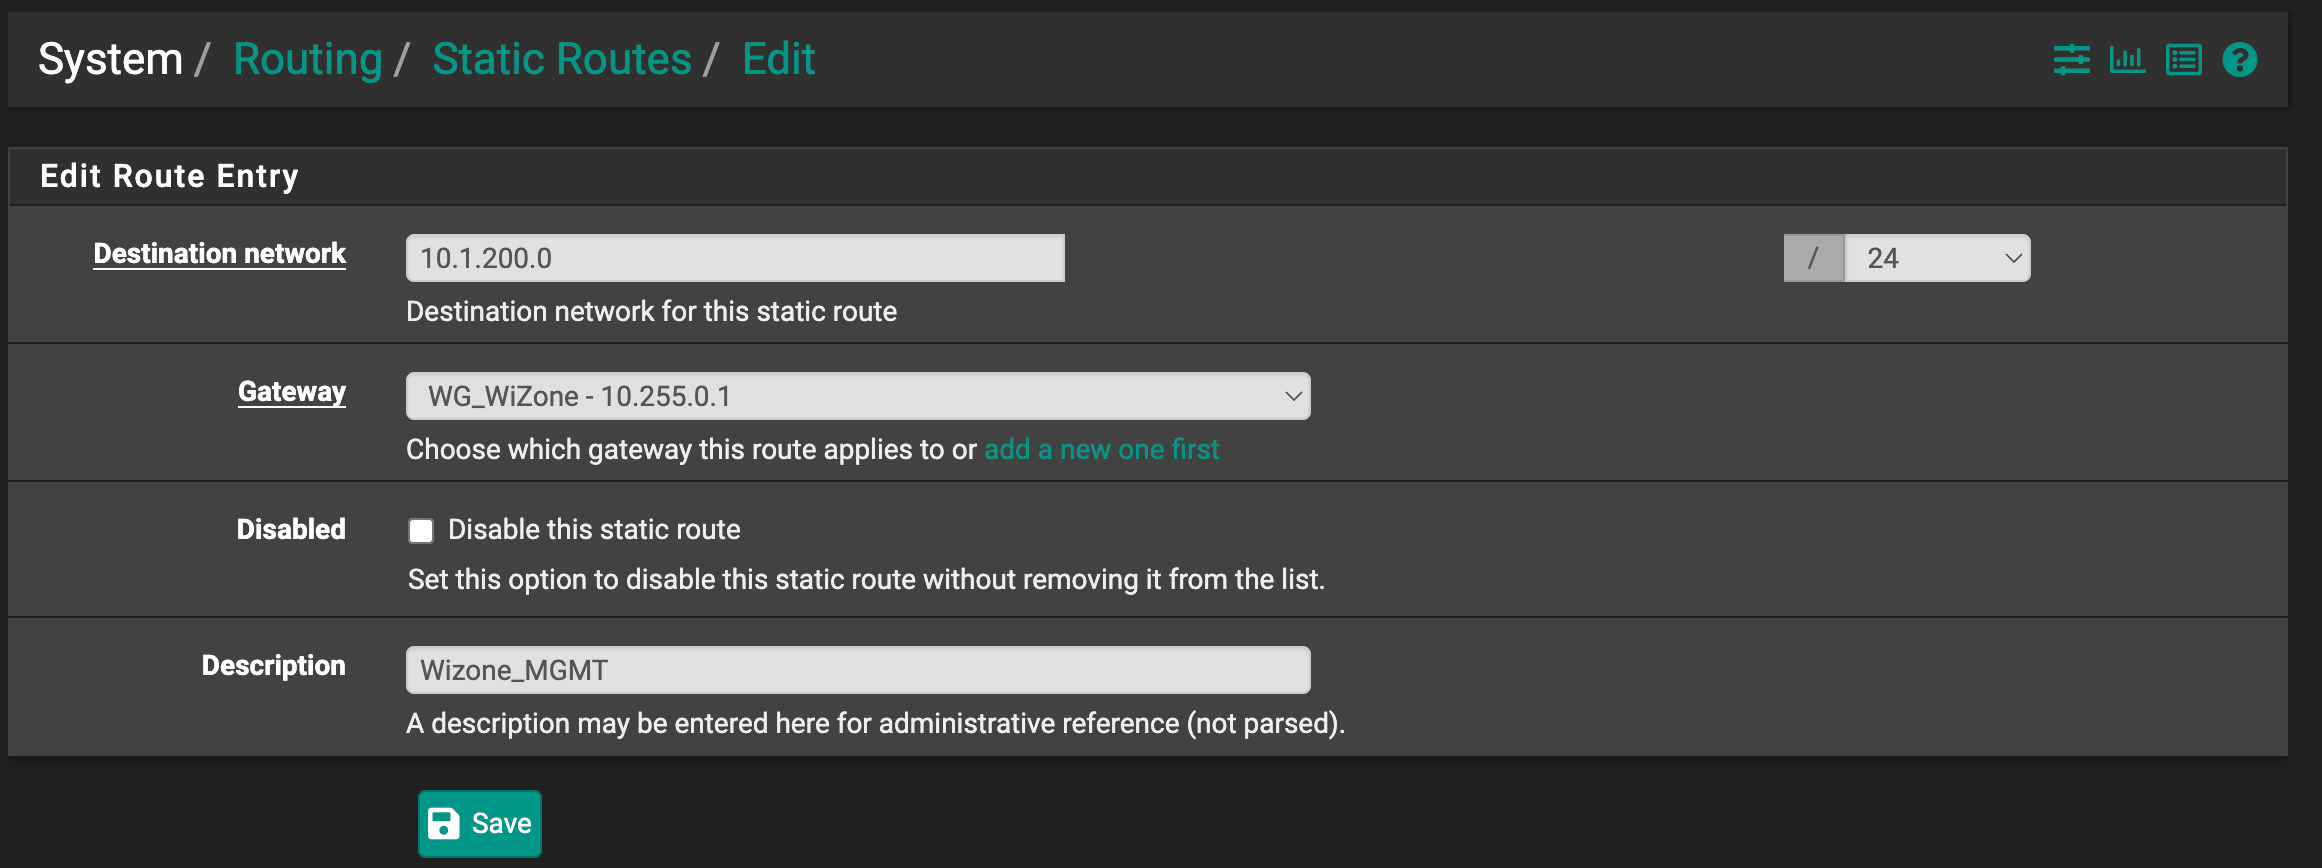
Destination Network:
10.1.200.0/24 Step 3 - Configure WiFi Interface
- Go to Interfaces → Assignments → WIFI (em2).
- Enable the interface and configure the following:
| Field | Example Value | Description |
|---|---|---|
| Enable | (check the box) | Turn on the WiFi interface |
| Description | WIFI | Interface name |
| IPv4 Configuration Type | Static IPv4 | Assign a static IP |
| IPv4 Address | 10.10.252.1/24 | Local WiFi network address (use your system's IP) |
Use your own IP Range: The example uses
10.10.252.1/24, but you can use other ranges such as 192.168.10.1/24 or 172.16.1.1/24 as appropriate for your network.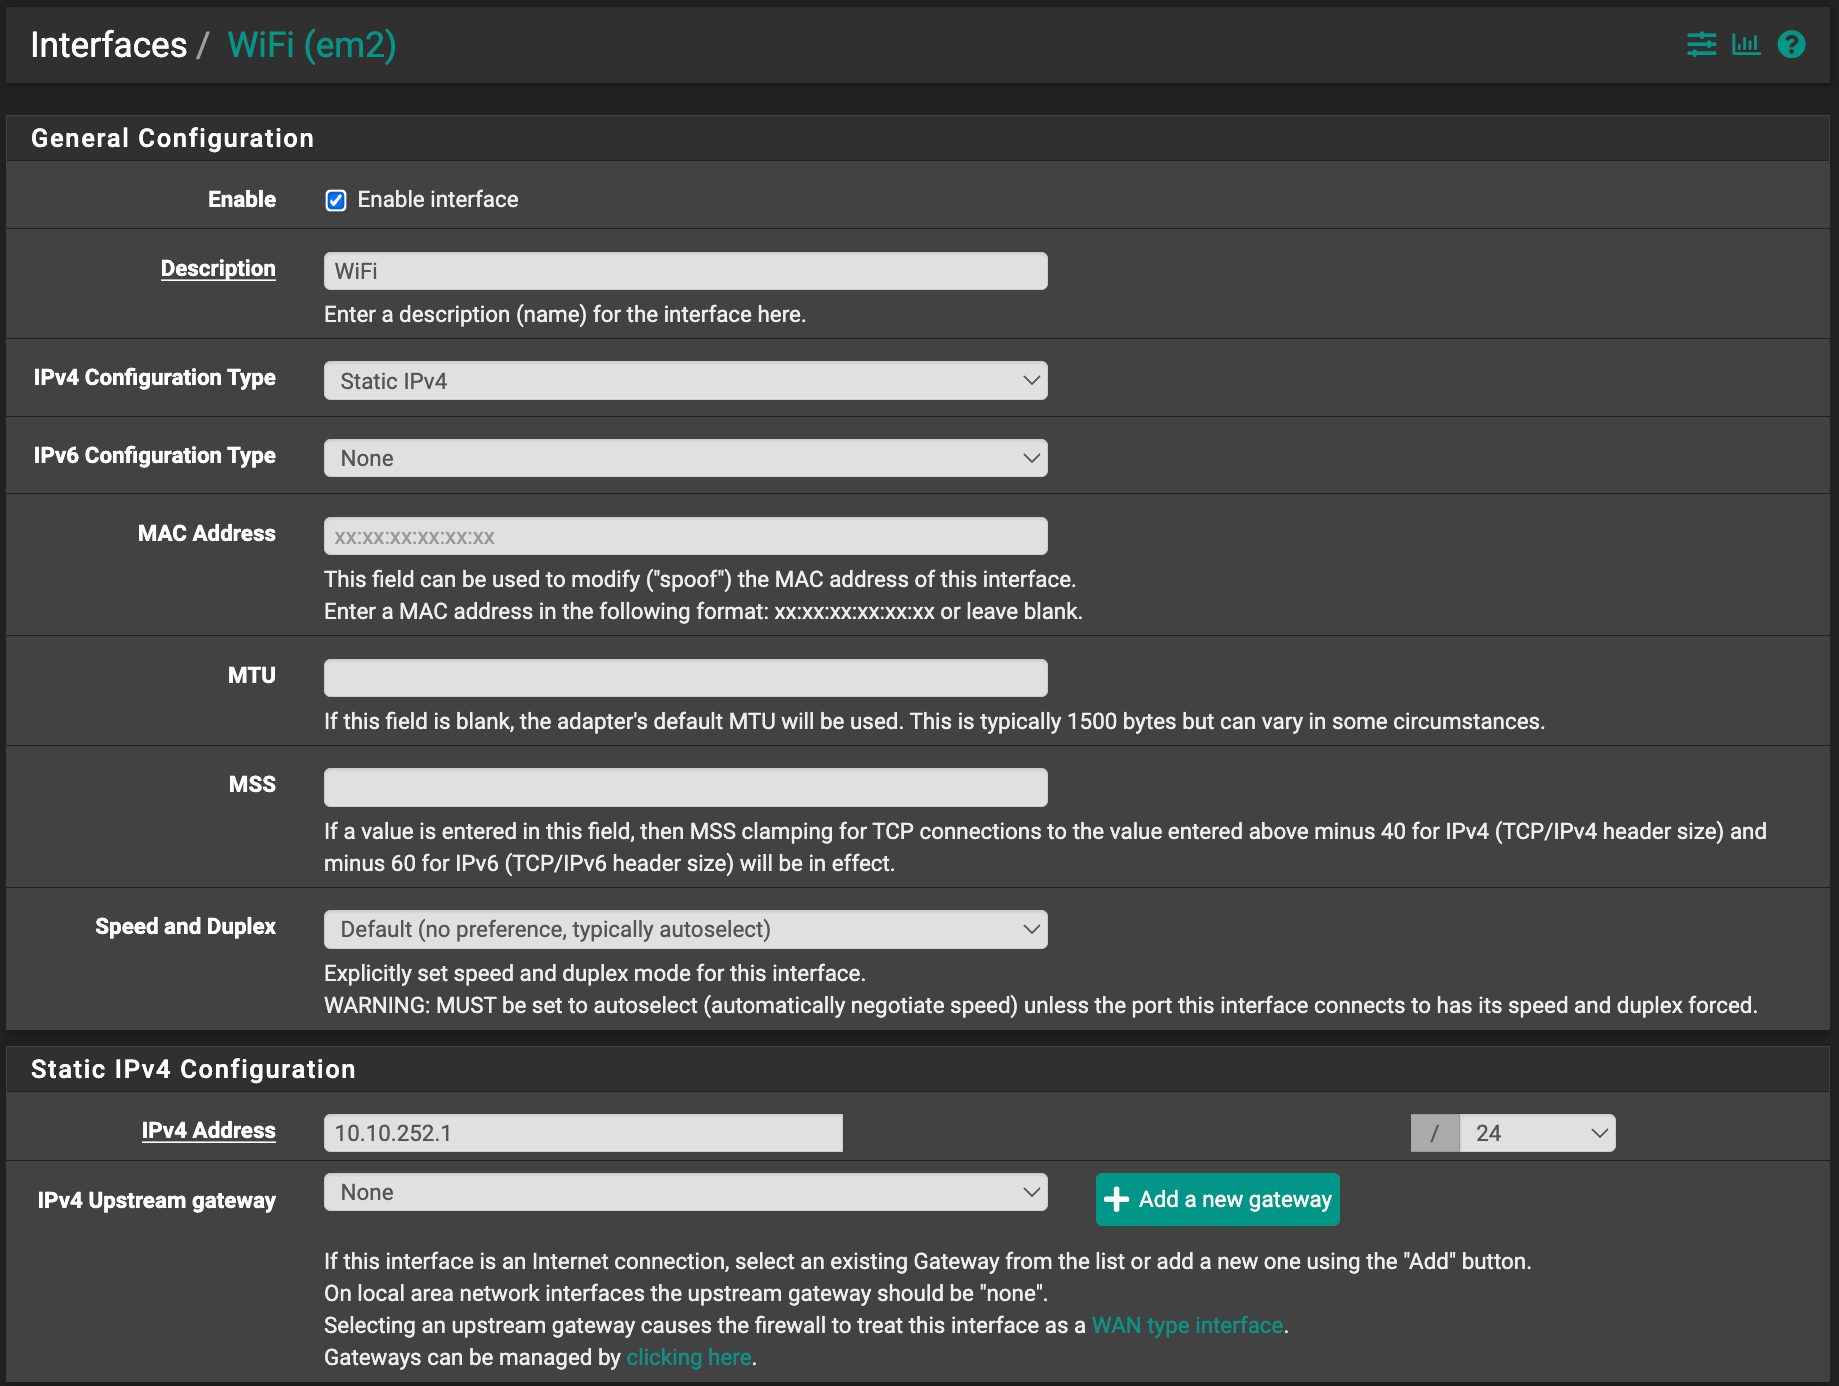
Step 4 - Add Firewall Rules for WiFi
To allow WiFi clients to access the internet and the WiZone tunnel, you must add a firewall rule on the WIFI interface.
- Go to Firewall → Rules → WIFI.
- Click + Add to create a new rule.
Fill in the following fields:
| Field | Value | Description |
|---|---|---|
| Action | Pass | Allow all traffic |
| Interface | WIFI | Select your WiFi interface |
| Address Family | IPv4 | WiFi network uses IPv4 |
| Protocol | Any | Allow all protocols |
| Source | Any | Any device from WiFi network |
| Destination | Any | Allow outbound traffic |
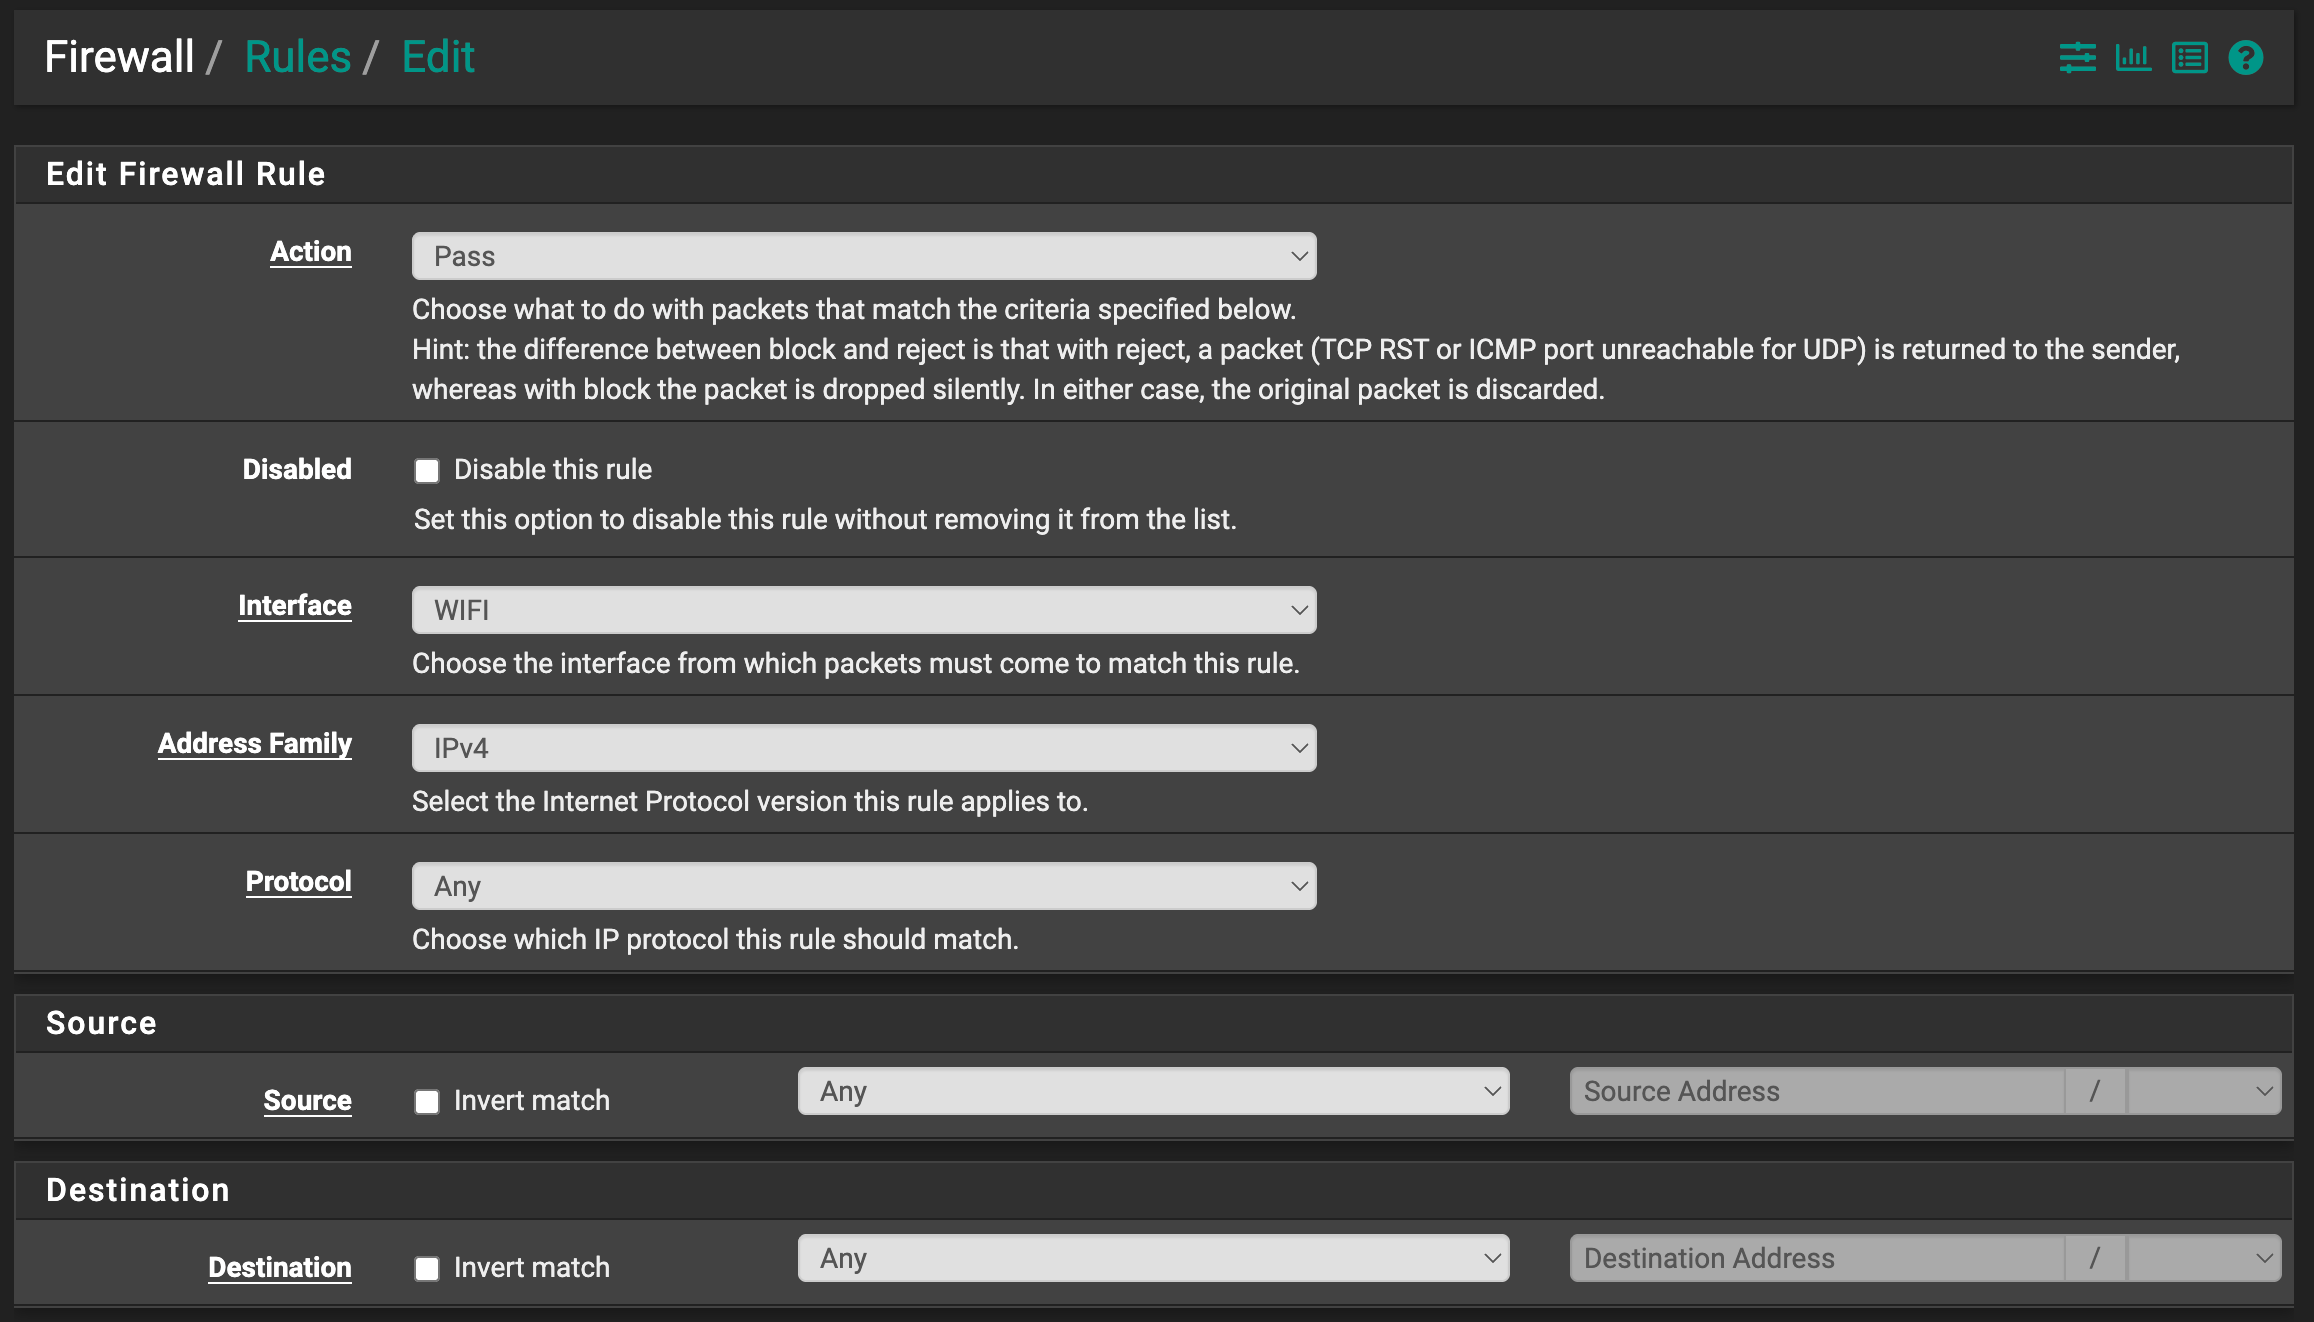
After saving, you should see a rule similar to this:
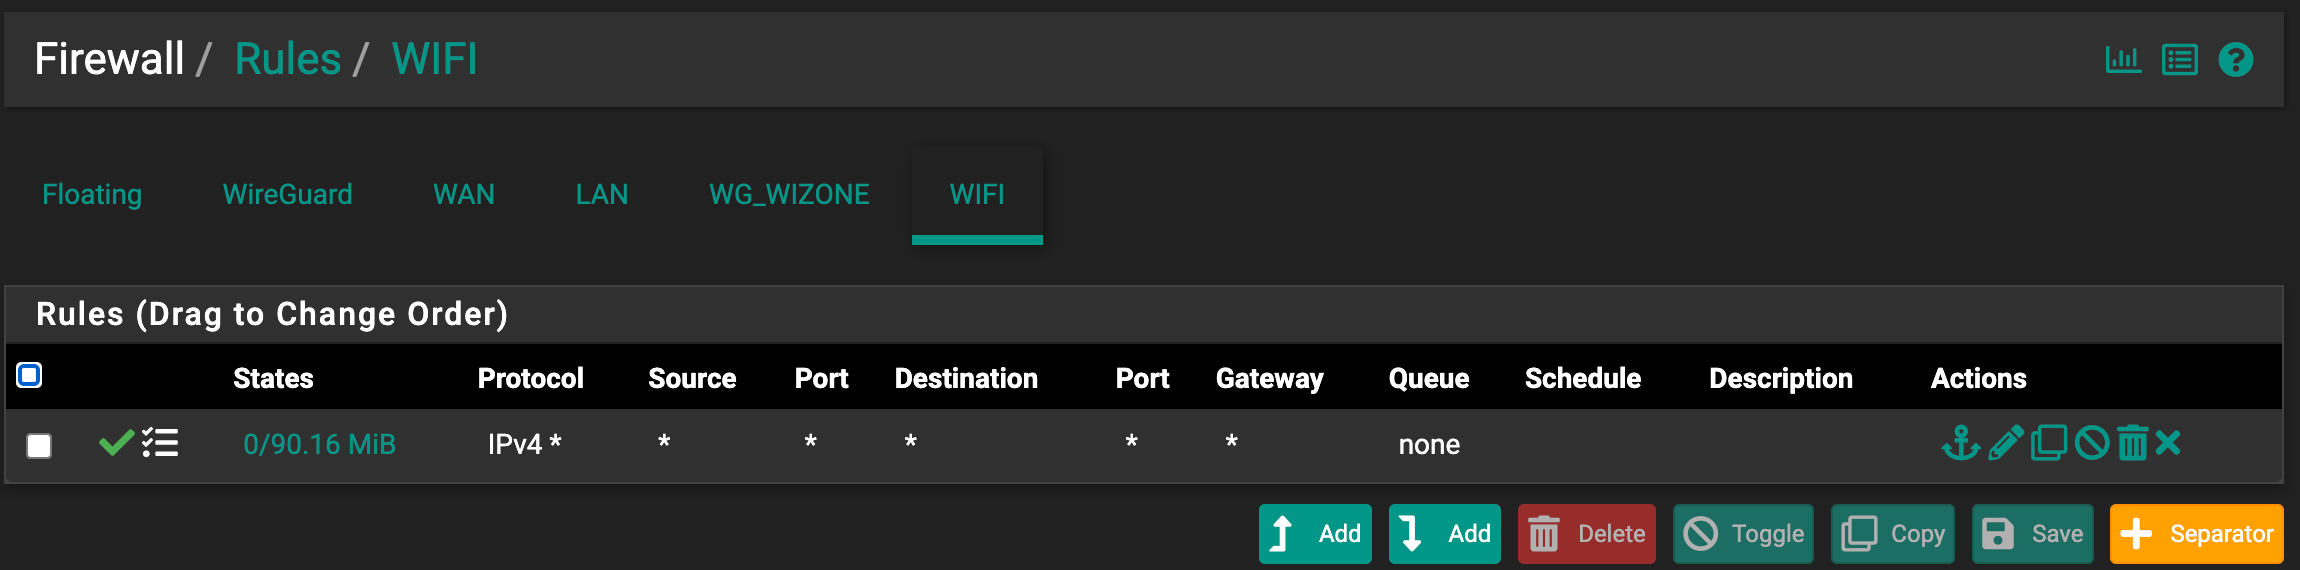
- Click Save and Apply Changes.
Step 5 - Configure DHCP Server
- Go to Services → DHCP Server → WIFI.
- Enable the DHCP server for the WiFi interface.
- Under Primary Address Pool, configure:
| Field | Example Value | Description |
|---|---|---|
| Address Pool Range | 10.10.252.10 to 10.10.252.30 | Range for DHCP clients (adjust according to your IP Range) |
DHCP Pool must be in the same Subnet as the WiFi Interface: For example, if your WiFi Interface is
192.168.10.1/24, set the Pool to 192.168.10.10 - 192.168.10.254.
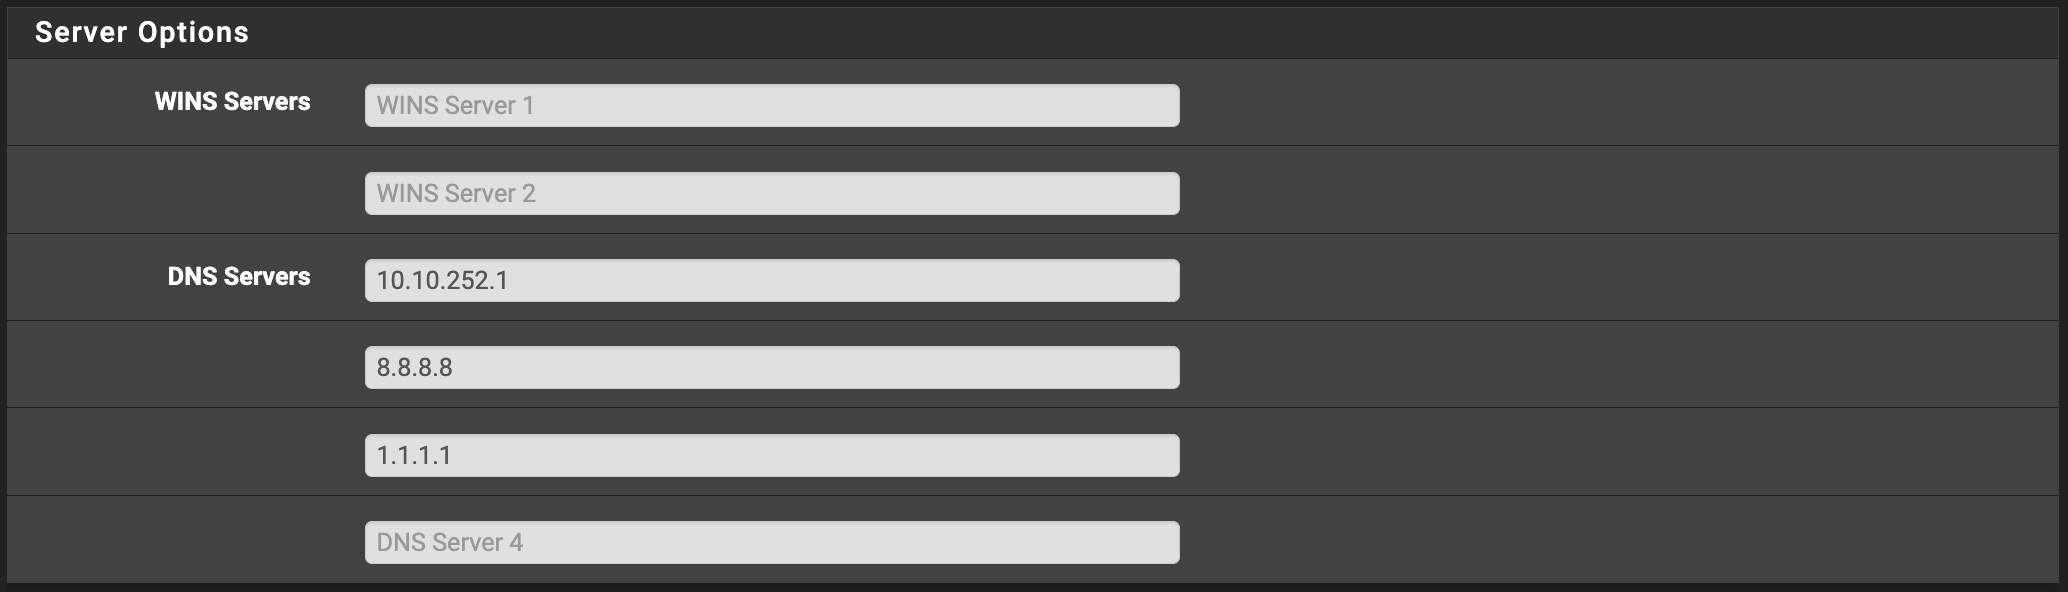
- Under Server Options, set DNS servers:
| DNS Server | Example Value |
|---|---|
| DNS 1 | 10.10.252.1 (use WiFi Interface IP) |
| DNS 2 | 8.8.8.8 |
| DNS 3 | 1.1.1.1 |
- Under Other DHCP Options, configure:
| Field | Value | Description |
|---|---|---|
| Gateway | 10.10.252.1 | (use WiFi Interface IP) |
| Domain Name | wizone.io | Domain name for local network |
| Default Lease Time | 86400 | 24 hours |
| Maximum Lease Time | 86400 | 24 hours |
- Click Save to apply the configuration.

WireGuard Connection
This section shows you how to enable the WireGuard service, apply the required firewall rules, and confirm that your device is successfully connected to WiZone.
Configure WiZone RADIUS
This section explains how to configure RADIUS authentication, certificates, DNS resolver, and captive portal for WiZone.