pfSense Setup
Configure WiZone RADIUS
This section explains how to configure RADIUS authentication, certificates, DNS resolver, and captive portal for WiZone.
Step 1 - Add RADIUS Server
Get your RADIUS configuration values from the WiZone Portal
- Log in to the WiZone Portal
- Go to the Devices page
- Select your device
- Copy the RADIUS SERVER IP and SHARED SECRET values
- Go to System → User Manager → Authentication Servers → Add.
- Configure using values from your WiZone Portal device configuration:
| Field | Where to Find Value | Description |
|---|---|---|
| Descriptive Name | (choose any name) | A name for this RADIUS configuration (e.g., rad_wizone). |
| Type | RADIUS | Select RADIUS as the authentication type. |
| Protocol | PAP | Authentication protocol used by WiZone. |
| Hostname / IP Address | RADIUS SERVER | (Copy from WiZone Portal Device Configuration) |
| Shared Secret | SHARED SECRET | (Copy from WiZone Portal Device Configuration) |
| Services Offered | Authentication and Accounting | Enables both user authentication and usage accounting. |
| Authentication Port | 1812 | Standard RADIUS authentication port. |
| Accounting Port | 1813 | Standard RADIUS accounting port. |
| RADIUS NAS IP Attribute | (use your WG interface IP) | Select the WireGuard interface created earlier (e.g., WG_WiZone - 10.255.0.3). |
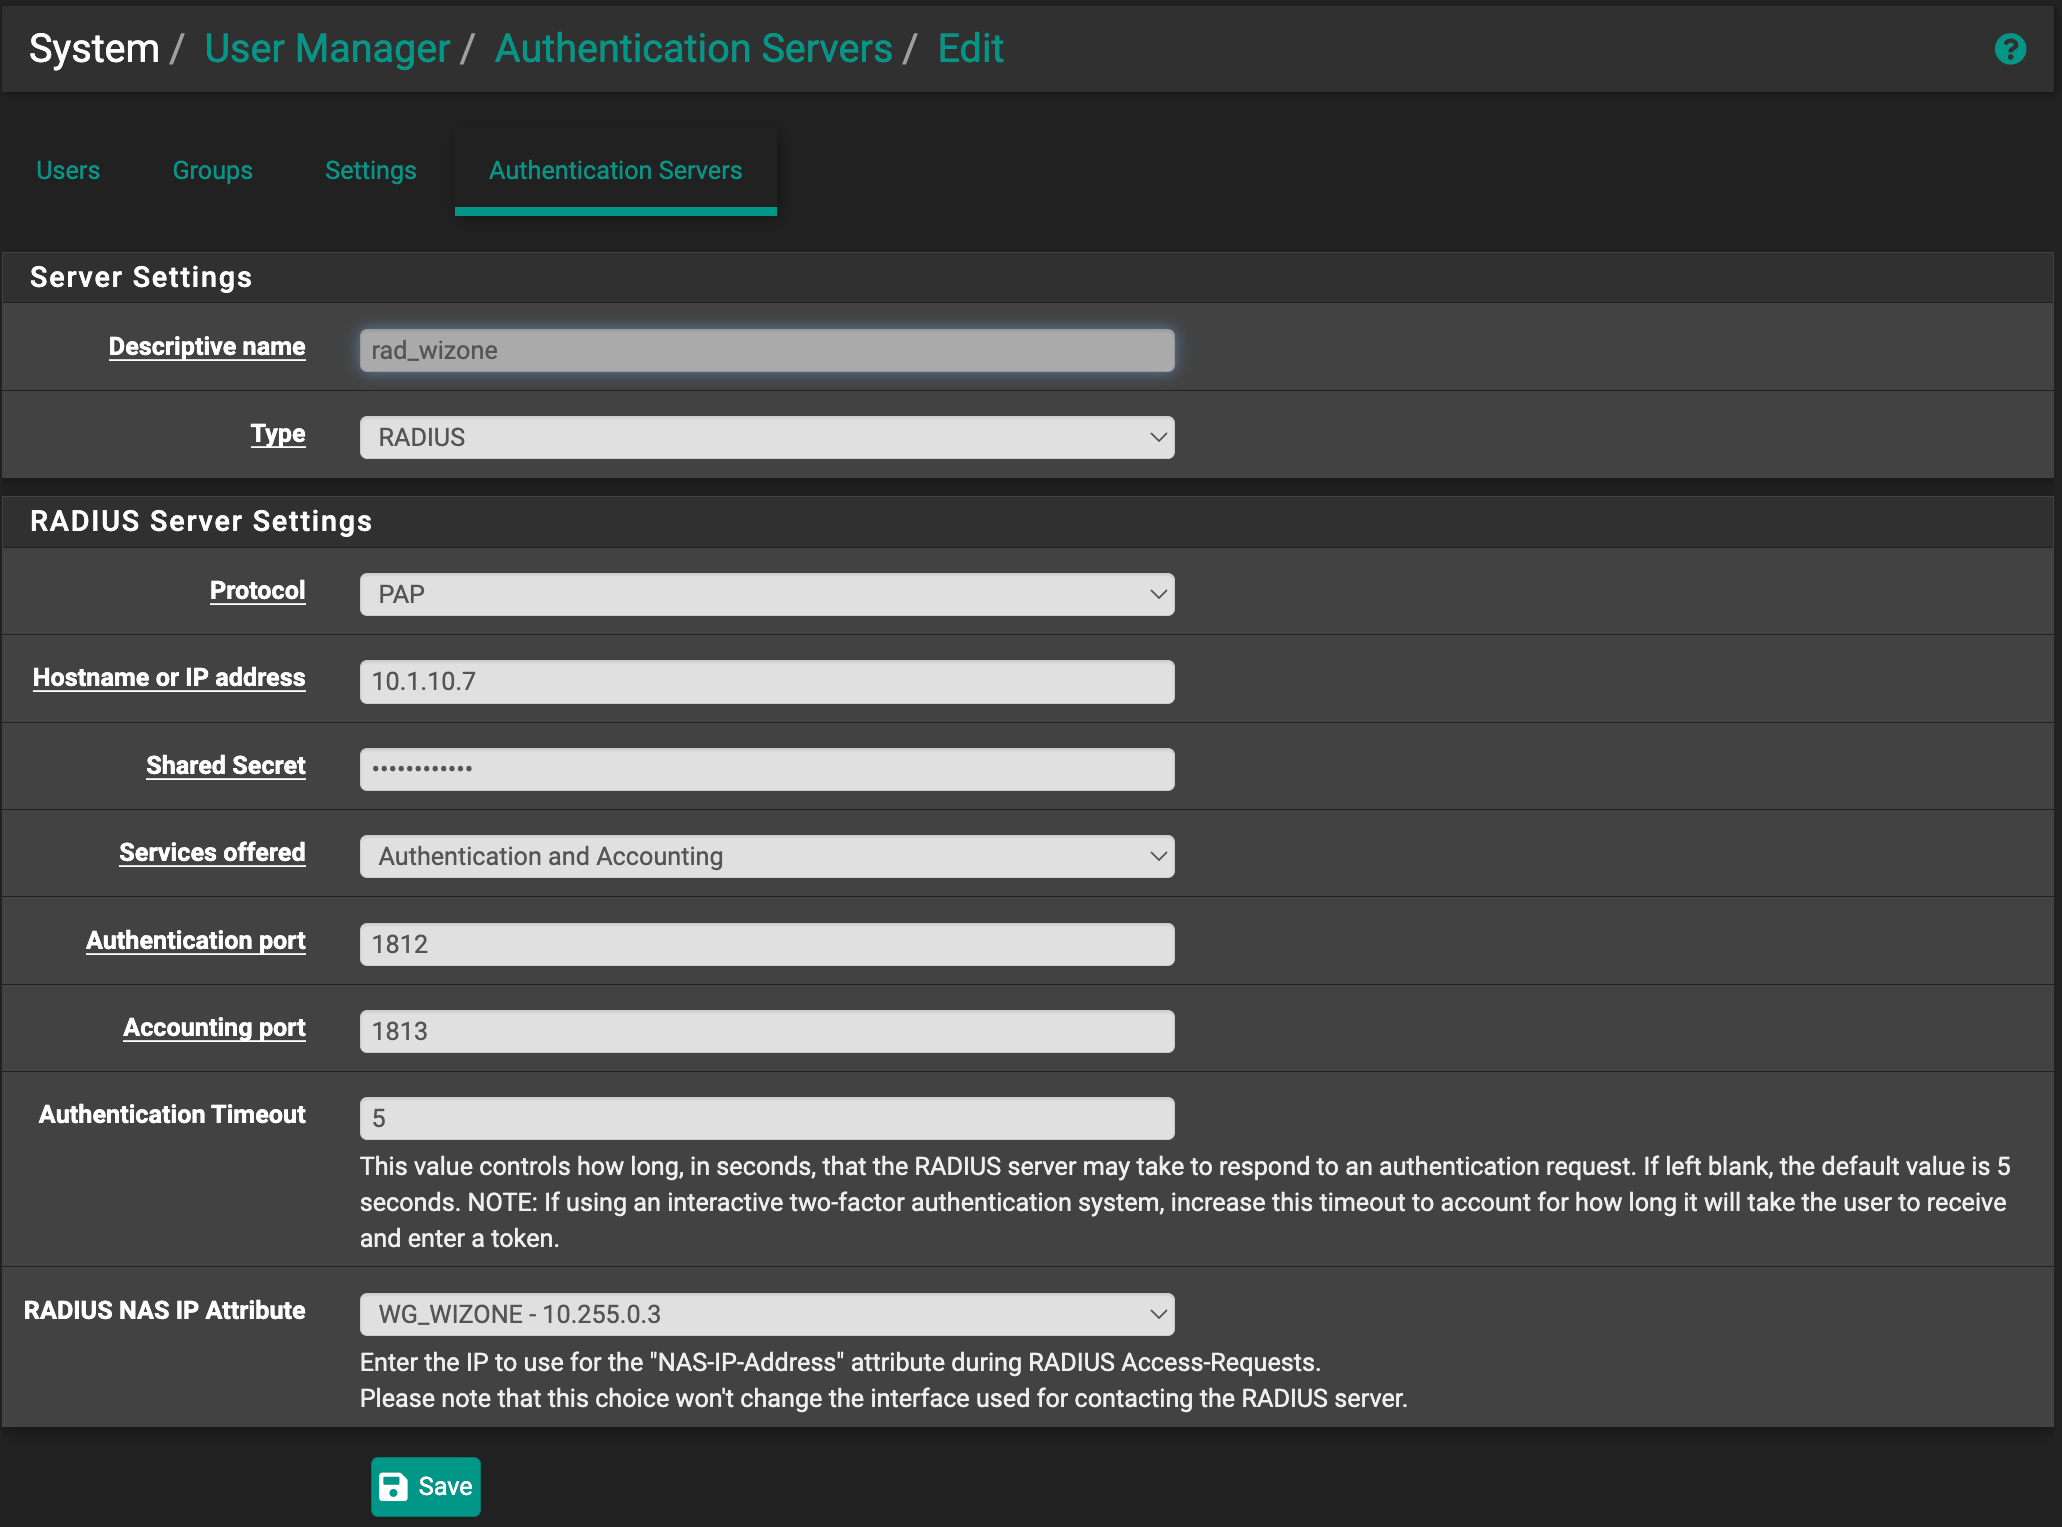
- Click Save, then test your configuration.
(Optional) Test Authentication
- Go to Diagnostics → Authentication.
- Select the newly added server
rad_wizone. - Enter the following test credentials:
| Username | Password |
|---|---|
radtest | radtest123 |
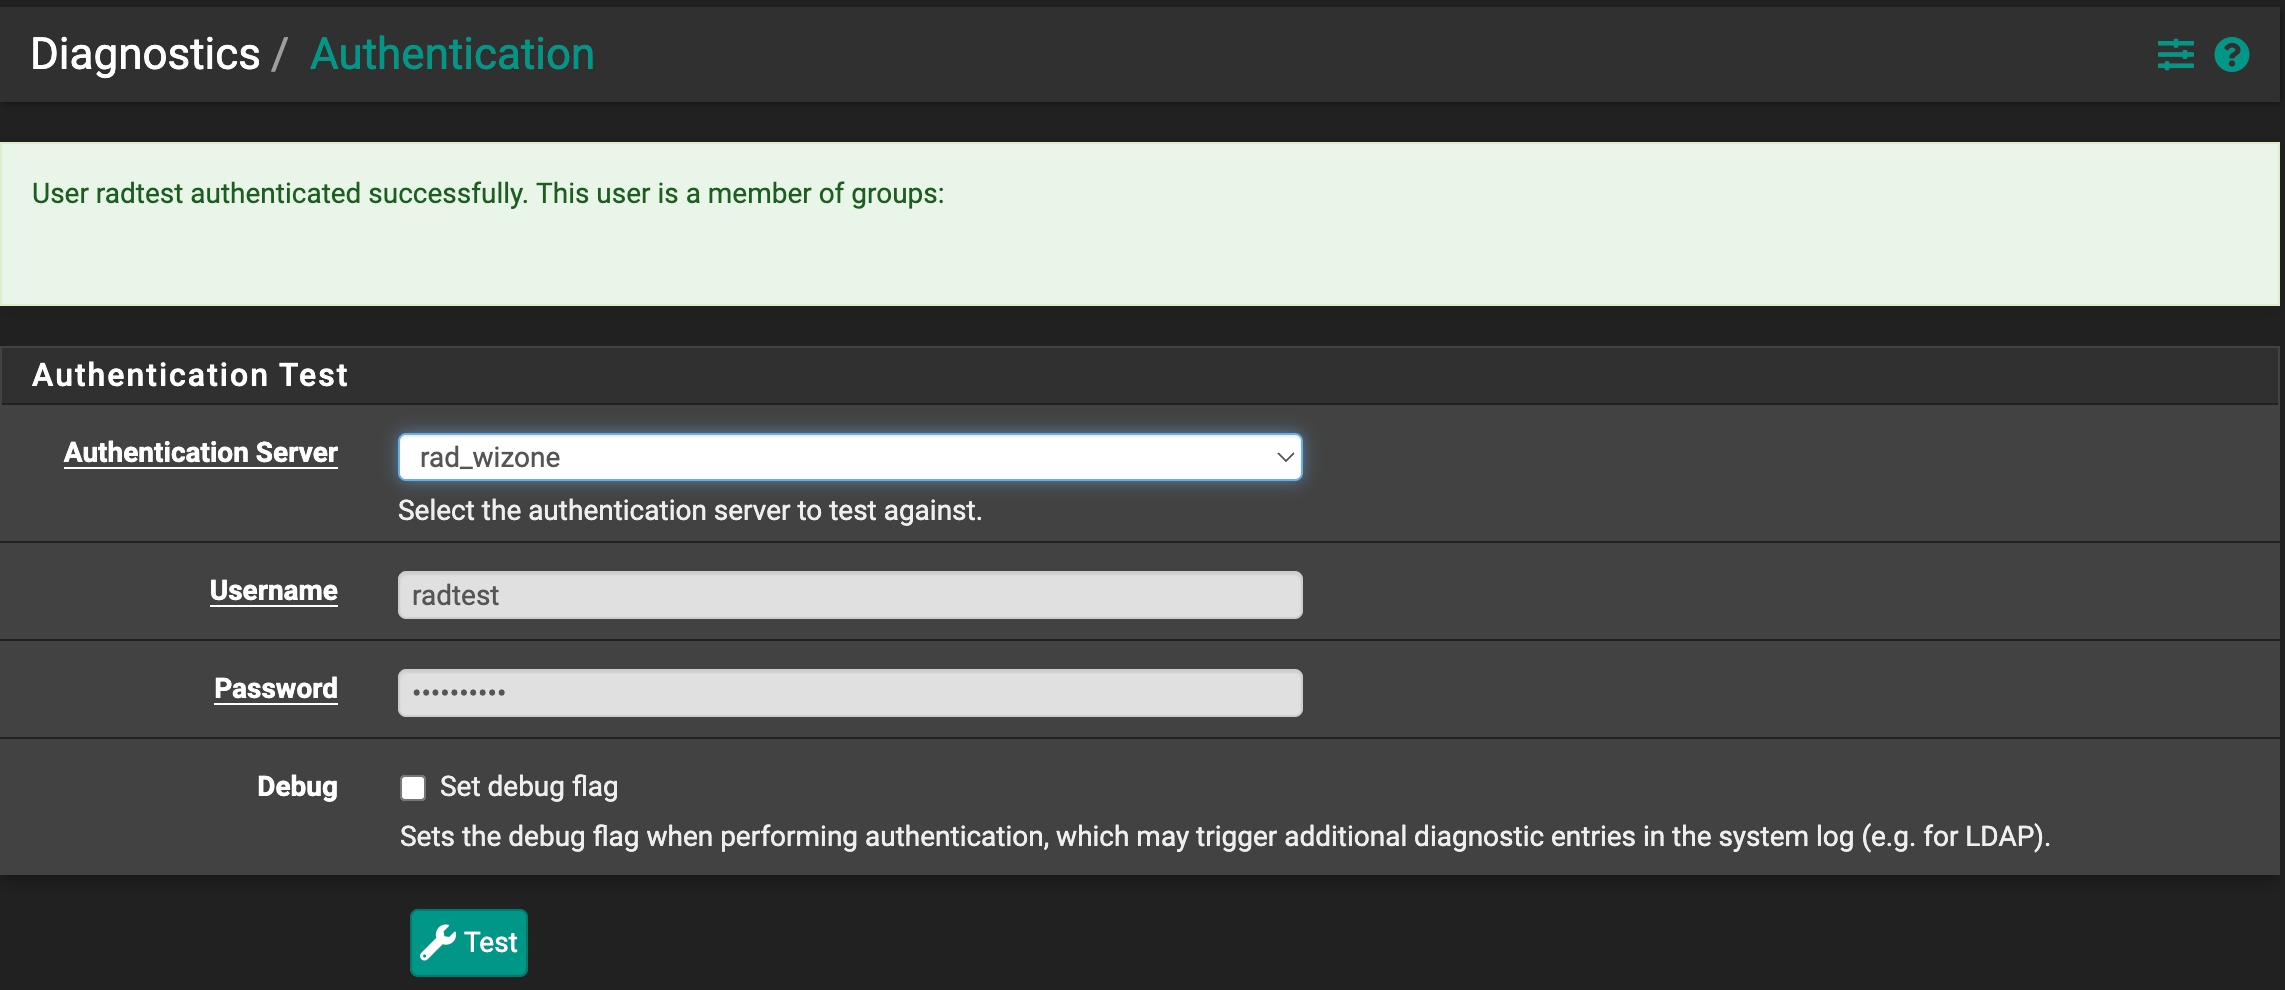
A successful test should display the message: (User radtest authenticated successfully.)
Step 2 – Setup ACME for Captive Portal
Prerequisite: You need to setup WireGuard (WG) and ensure your NAS is online to complete this step.
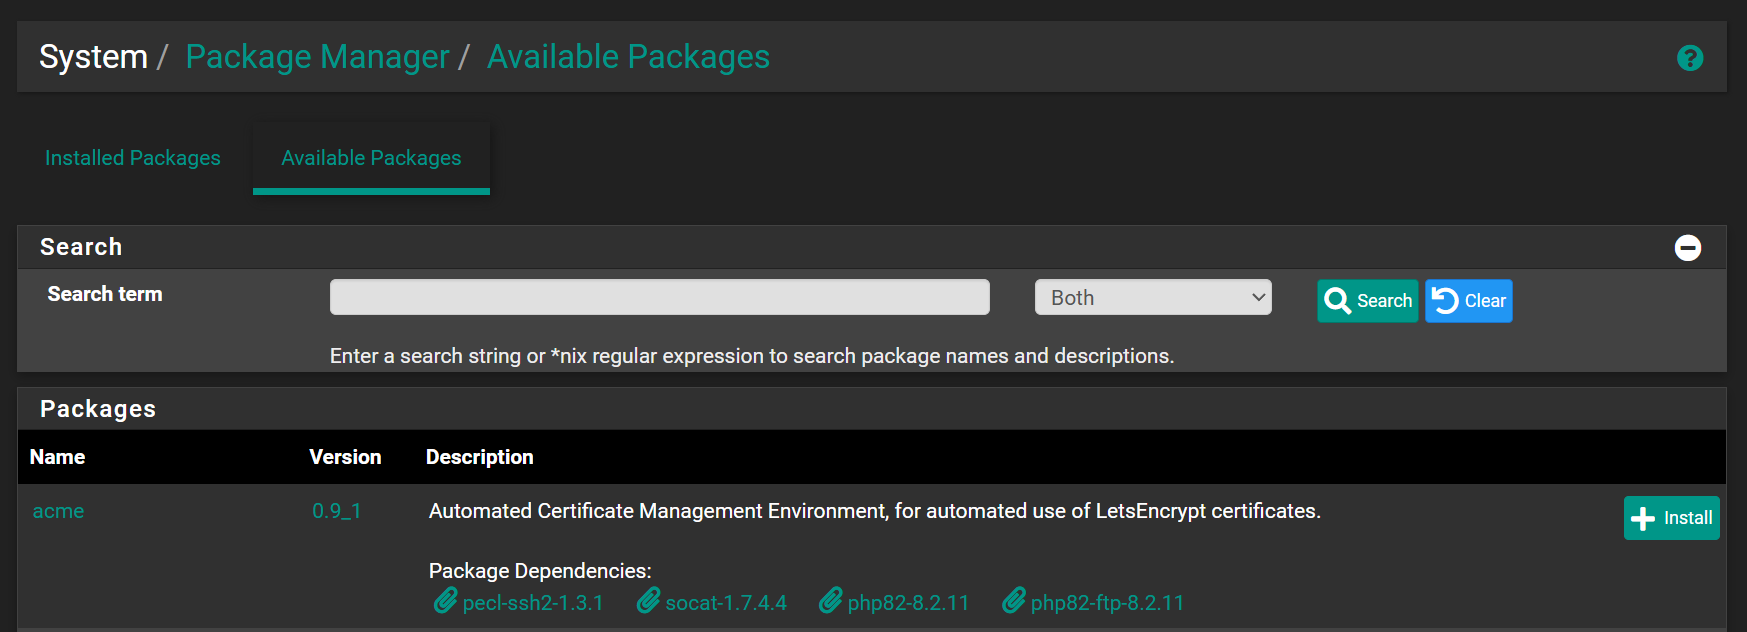
install ACME package
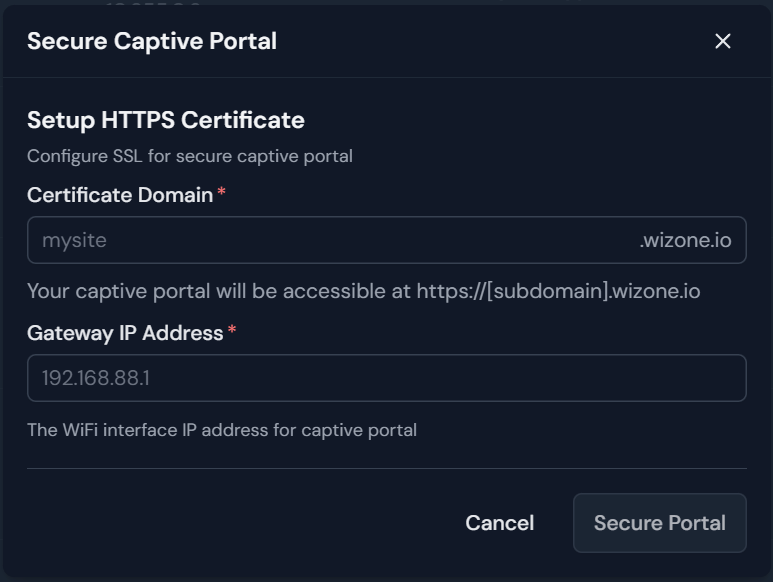
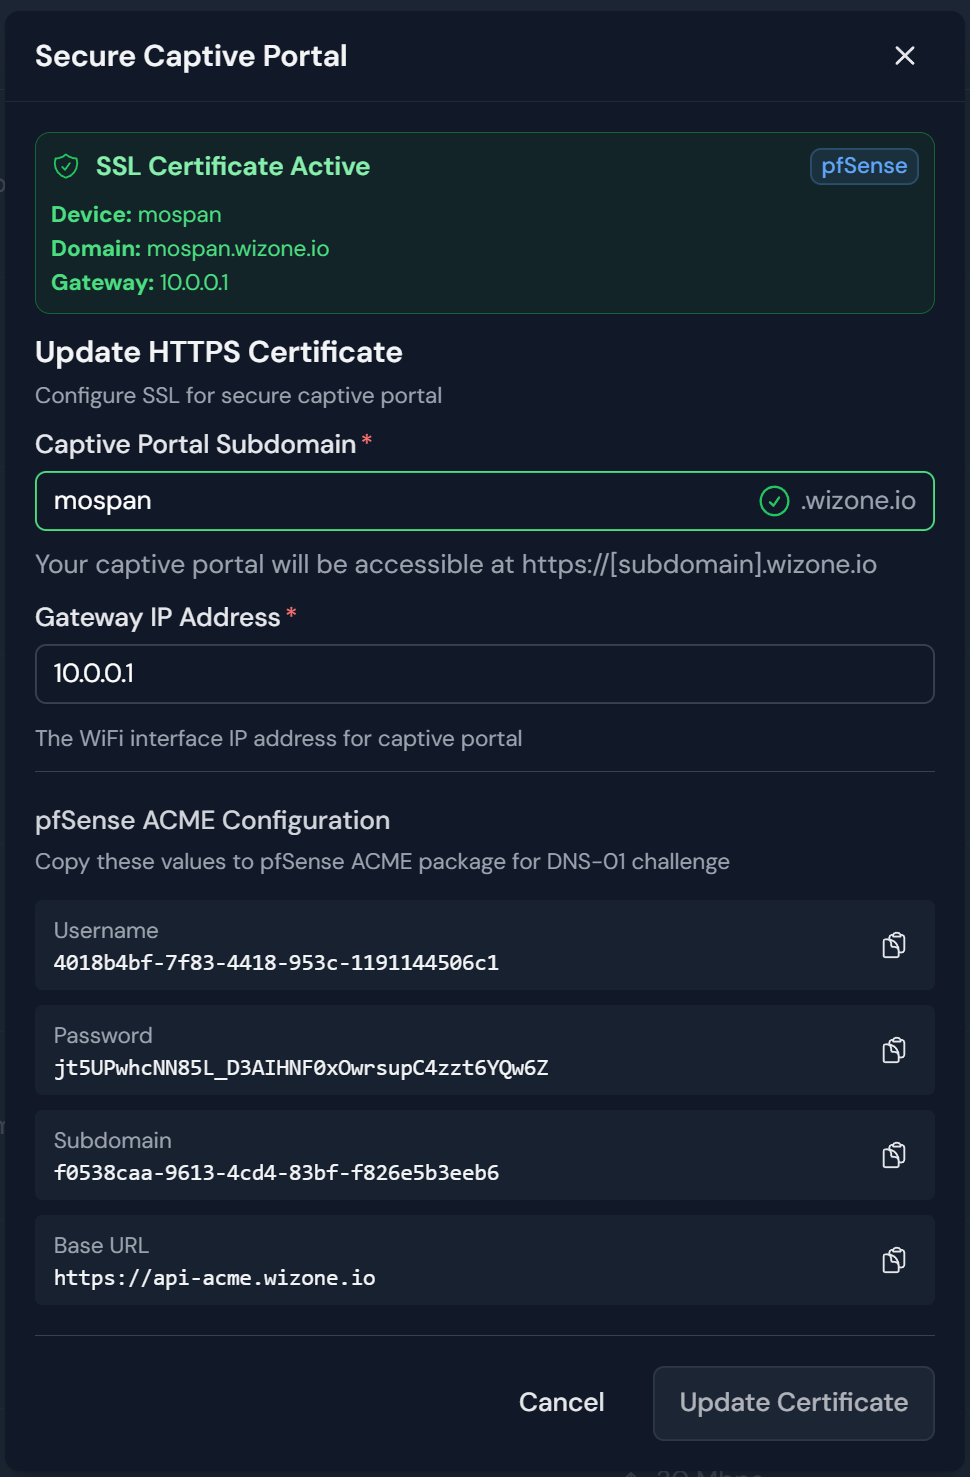
Create your SSL certificate from the WiZone Portal:
- Open WiZone Portal and login. Go to Devices page, select your device and click on Captive Portal ssl configuration
 .
. - Enter Certificate Domain (e.g.
mysite) and WIFI Gateway IP Address. - Click Secure Portal to generate the certificate.
- wait for the certificate to be generated.
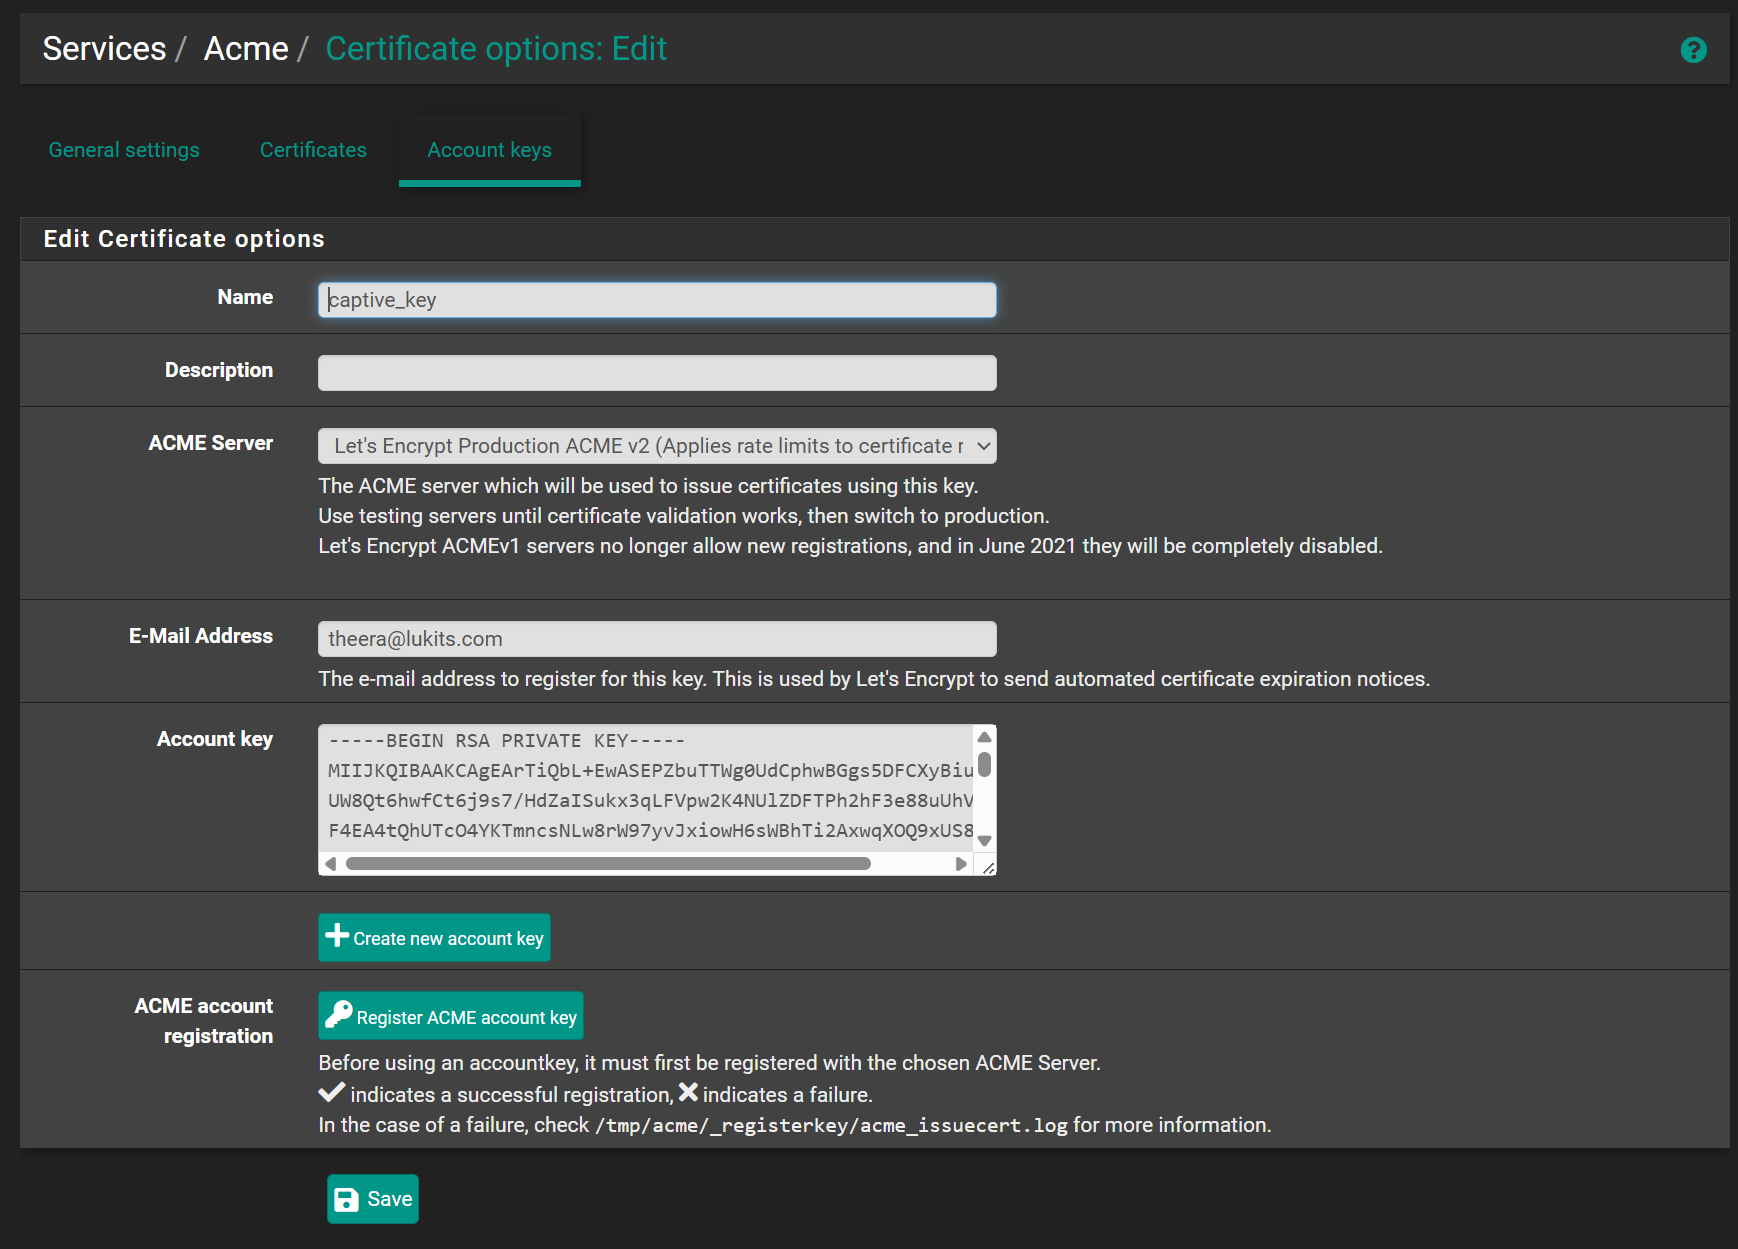
- Go to Services → ACME → Account Keys and click + Add.
- Select Let's Encrypt Production.
- Click Create new account key, then click Register ACME account key.
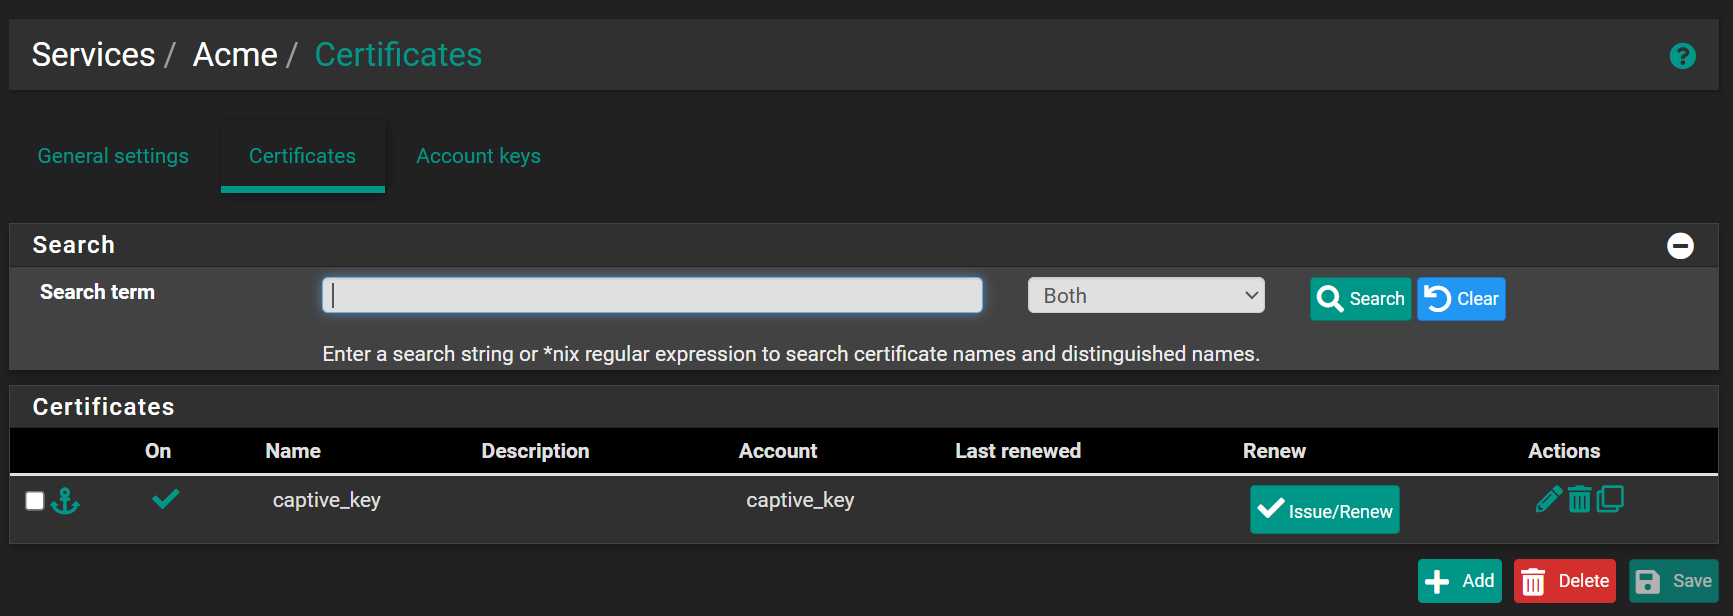
- Go to Services → ACME → Certificates and click + Add.
- Configure the certificate with the following settings:
- Name:
captive - Domain SAN list: enter your Full Domain Name (FQDN) e.g.
testaudi.wizone.io - Method:
DNS-ACME-DNS
- Name:
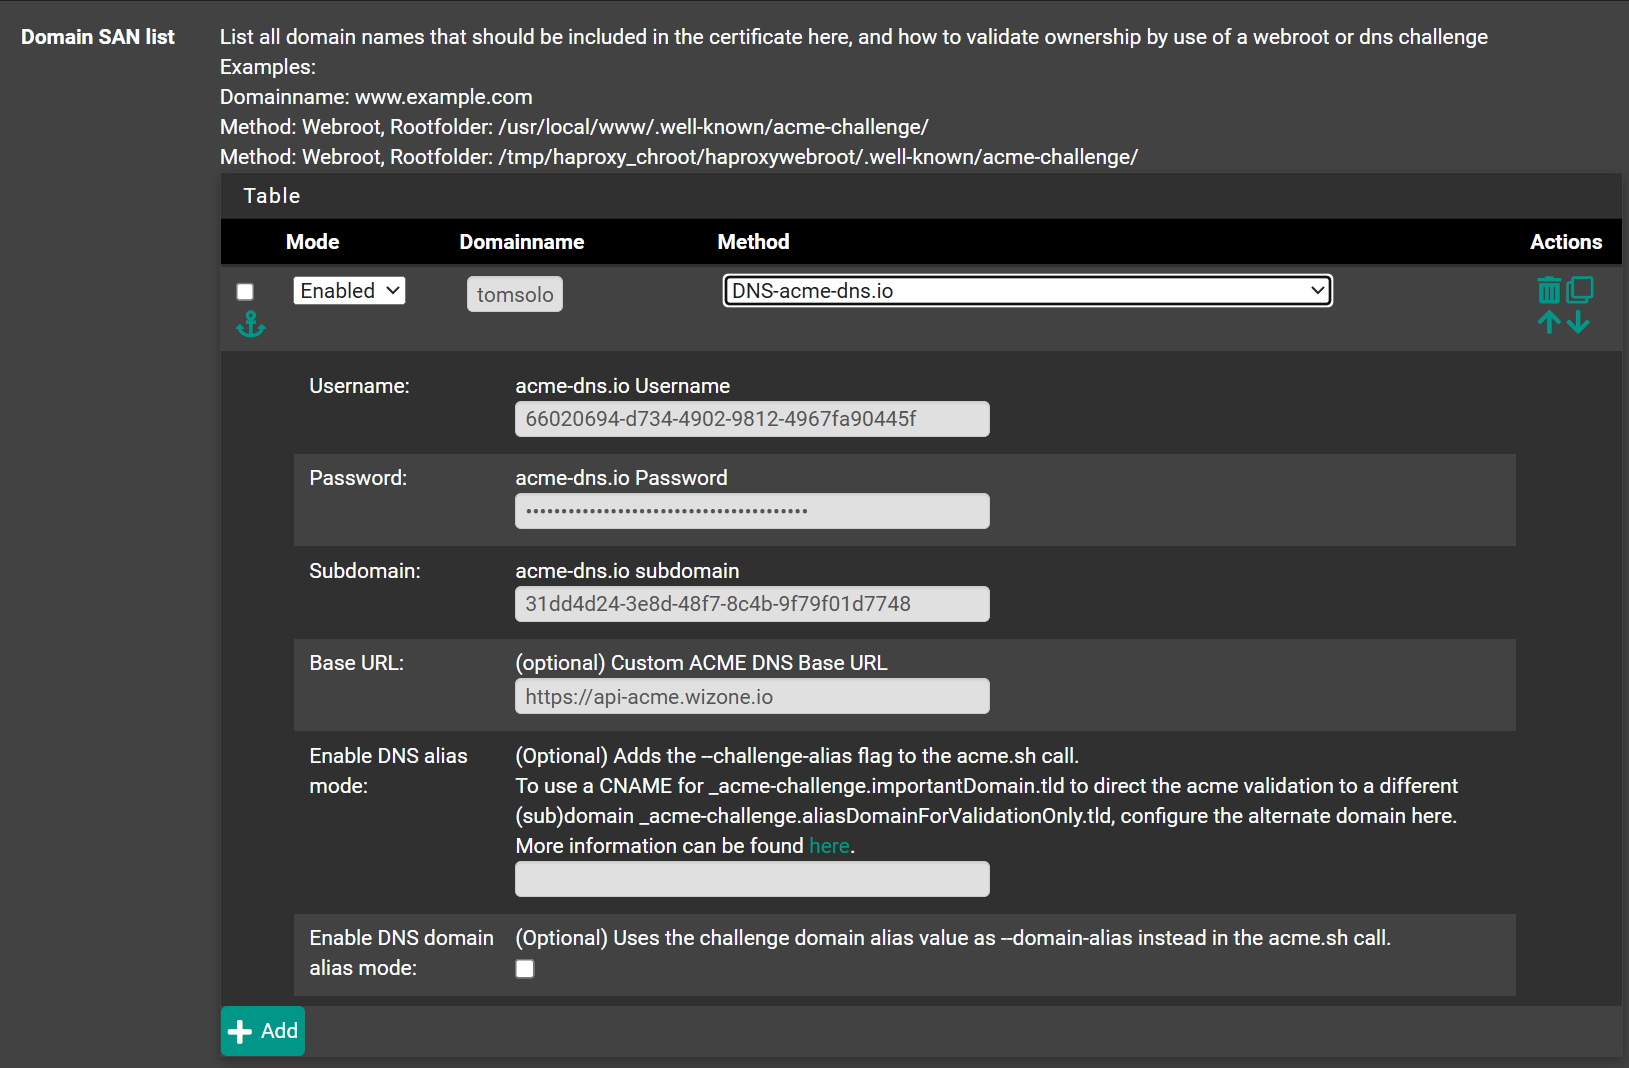
- Click Issue Certificate and wait for the certificate to be issued about 3 minutes.
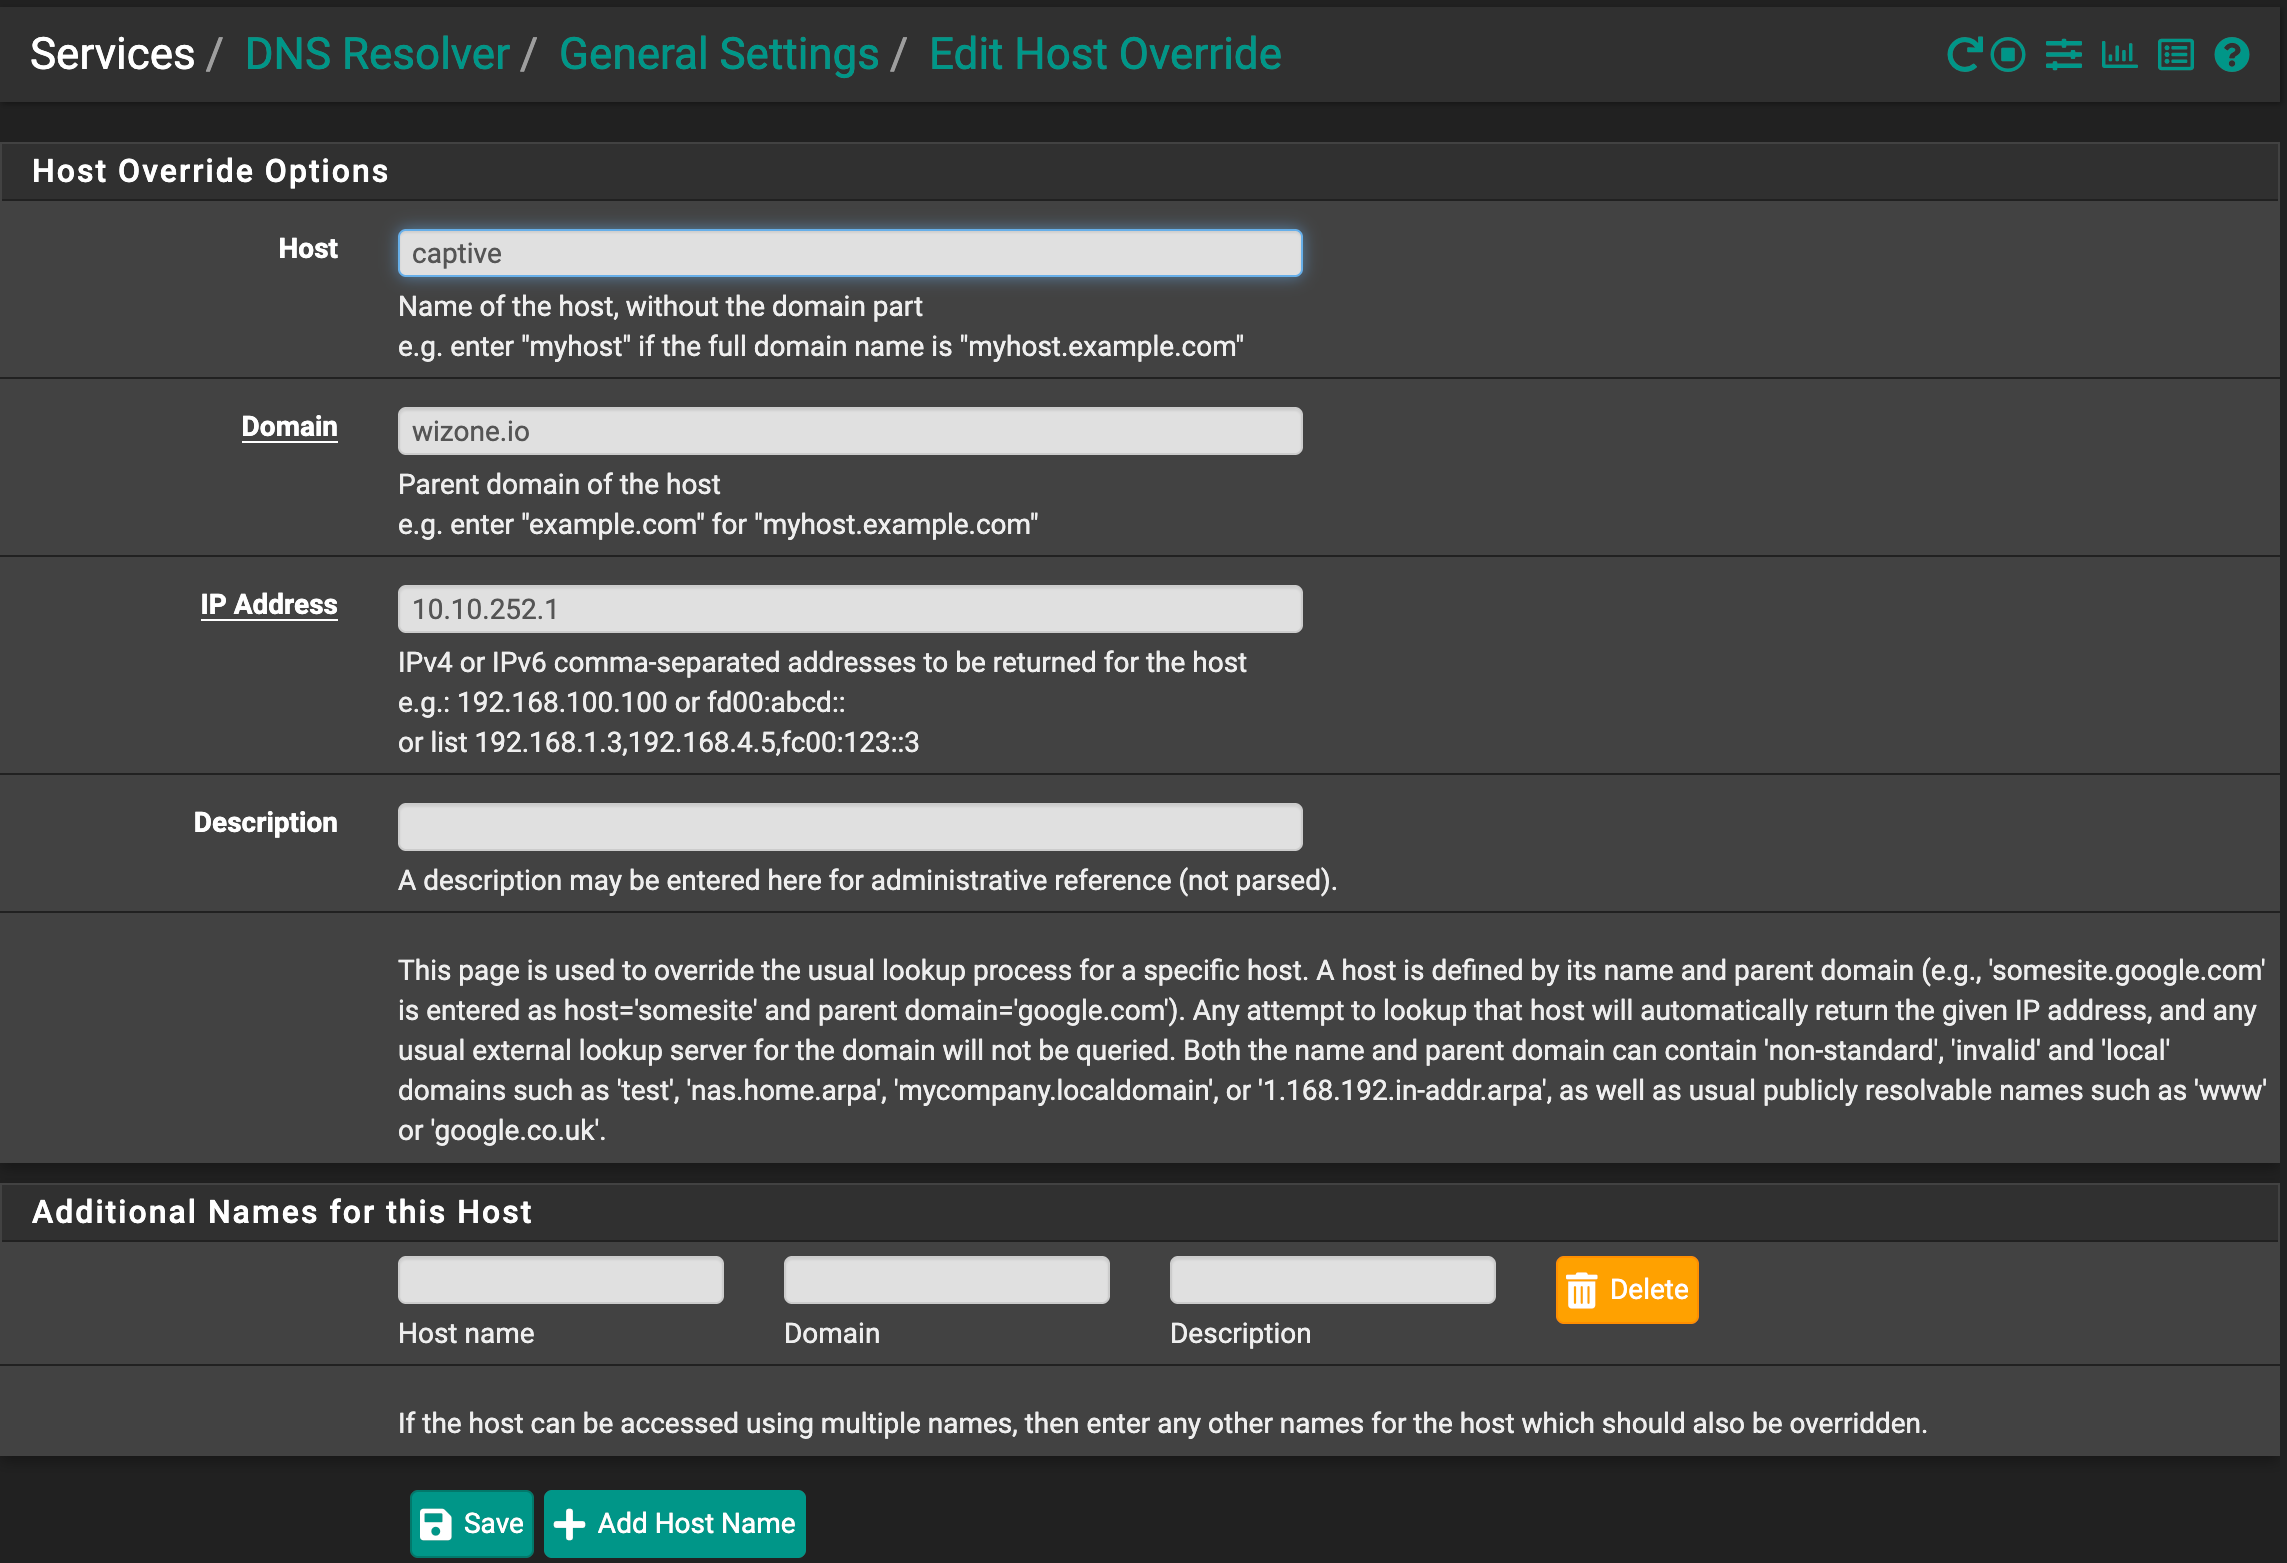
Step 3 – Add DNS Resolver Entry
- Go to Services → DNS Resolver → General Settings → Host Overrides → Add.

- Add a host record to map captive portal name to local IP:
| Field | Value |
|---|---|
| Host | your Captive Portal Subdomain from Secure Captive Portal |
| Domain | wizone.io |
| IP Address | 10.10.252.1 |