Import SSL Certificate for WiZone Captive Portal
Step 9 – Import SSL Certificate for Captive Portal
To enable secure HTTPS access for the WiZone captive portal, upload and import the SSL certificate files into your Mikrotik router.
This certificate allows browsers to recognize captive.wizone.io as a trusted domain, ensuring encrypted communication between users and the hotspot portal.
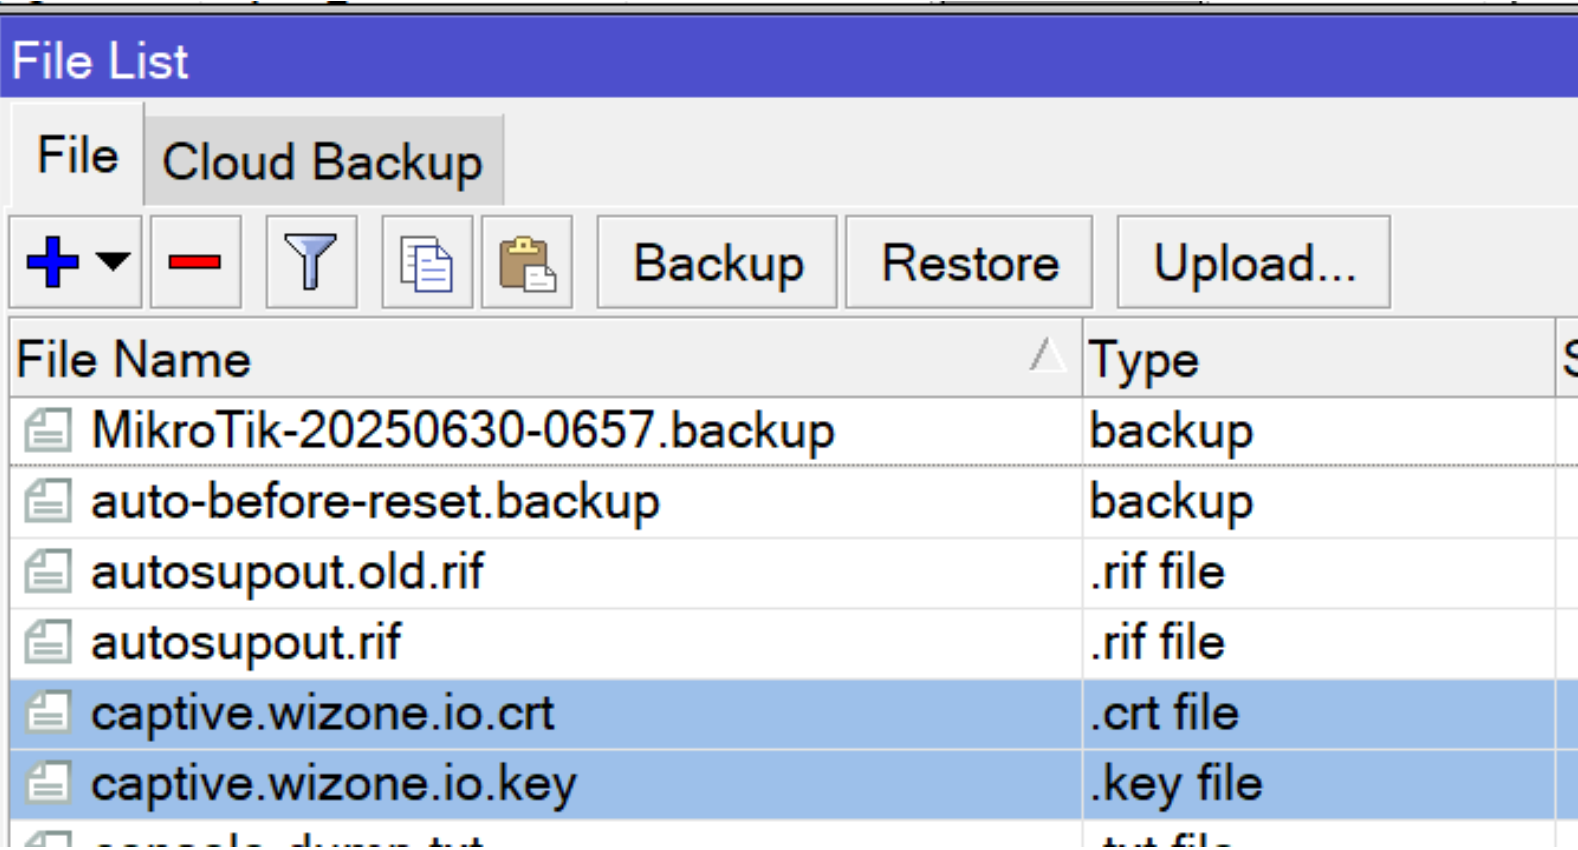
9.1 Upload Certificate Files
- Go to Files in the Mikrotik menu.
- Click Upload, then select and upload both files from your local computer:
| File | Description |
|---|---|
captive.wizone.io.crt | Certificate file |
captive.wizone.io.key | Private key file |
Once uploaded, both files will appear in the File List window.
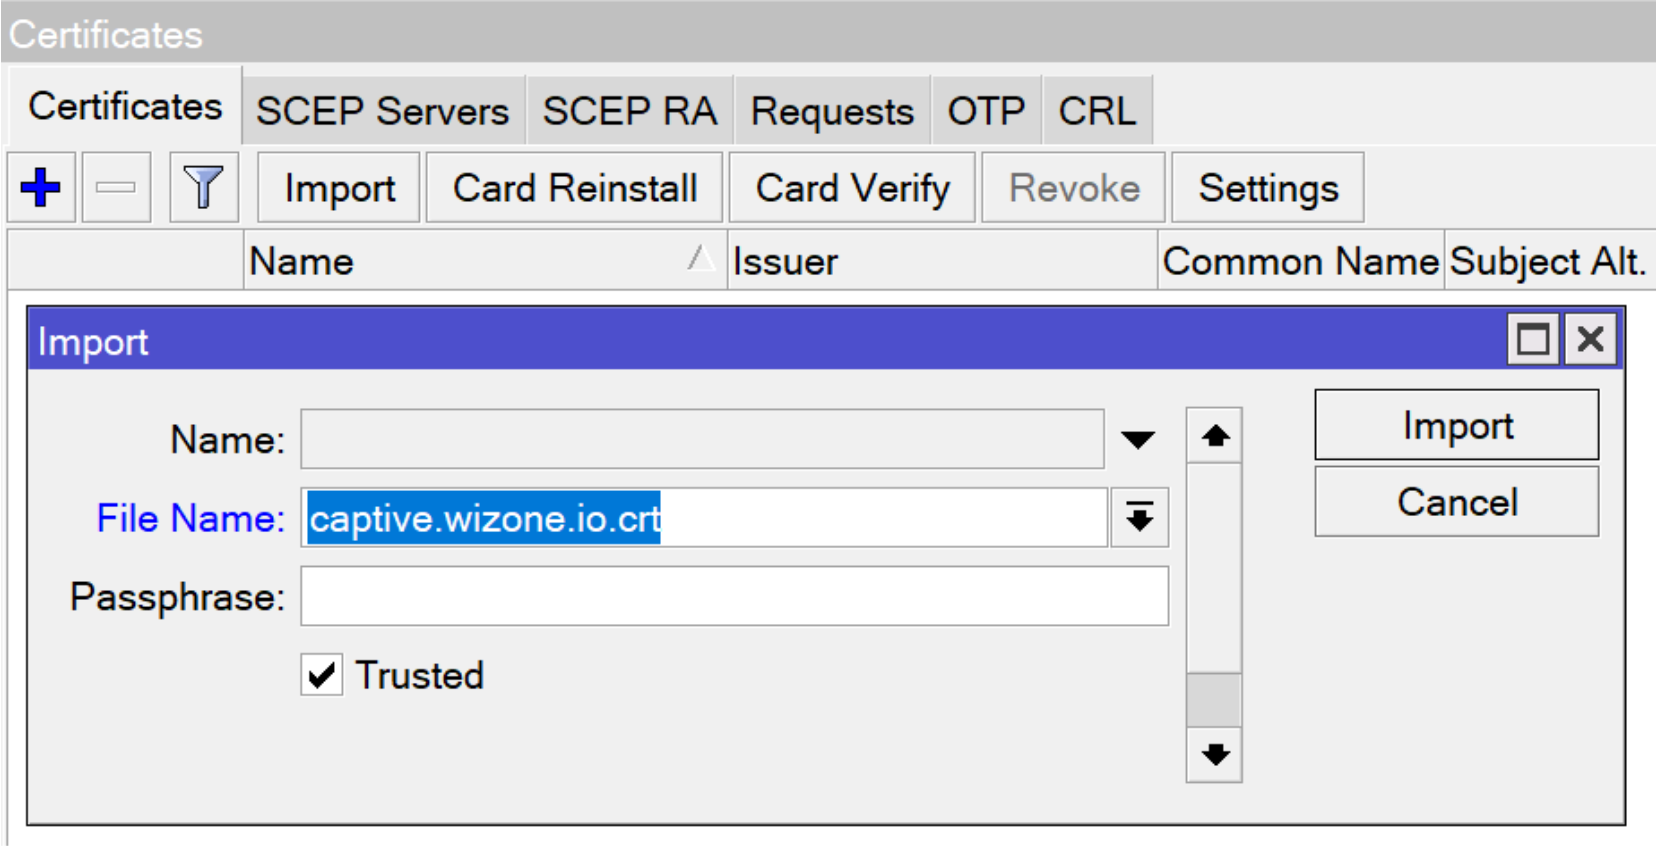
9.2 Import Certificate (.crt)
- Navigate to System → Certificates → Import
- In the File Name dropdown, select
captive.wizone.io.crt - Leave Passphrase blank (unless provided)
- Enable Trusted
- Click Import
This imports the public certificate into the Mikrotik system.
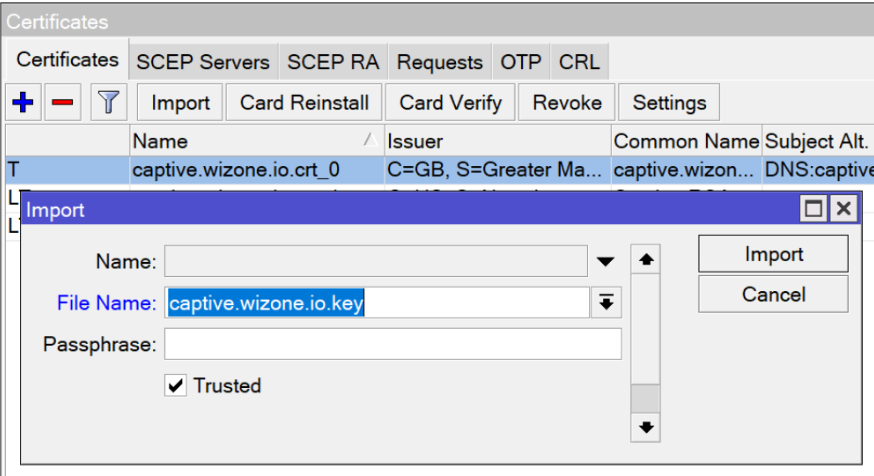
9.3 Import Private Key (.key)
- Repeat the same process, but select the second file:
captive.wizone.io.key - Ensure Trusted is checked
- Click Import
Once completed, both the certificate and key will be paired automatically under the same name.
9.4 Verify Imported Certificates
After importing both files successfully, the Mikrotik router will display the certificates under System → Certificates.
You should see an entry similar to:
| Name | Common Name | Trusted |
|---|---|---|
KT | captive.wizone.io | ✅ Yes |
This certificate will later be used in your HTTPS Captive Portal Configuration to enable encrypted logins and secure data exchange.

Configure DNS and Static Entry
This section explains how to set up DNS servers and create a static DNS entry for the WiZone captive portal.
Configure RADIUS Server for WiZone Authentication
This section explains how to configure the RADIUS server, enable incoming CoA requests, and set the necessary firewall rules for WiZone integration.